I am always looking for creative ways to decorate my house. If you have been hanging out with me for a while you know that I tend to tackle huge DIY projects that are functional and beautiful, but I also enjoy creating projects on a smaller scale as well. Shelves are a perfect smaller project that is pretty on their own, but also give you spots throughout your house to purposefully add in additional decor. Shelves are a great DIY project for anyone, even if you haven’t DIYed before! Check out my all-time top 3 favorite DIY shelves for inspiration to update your home.
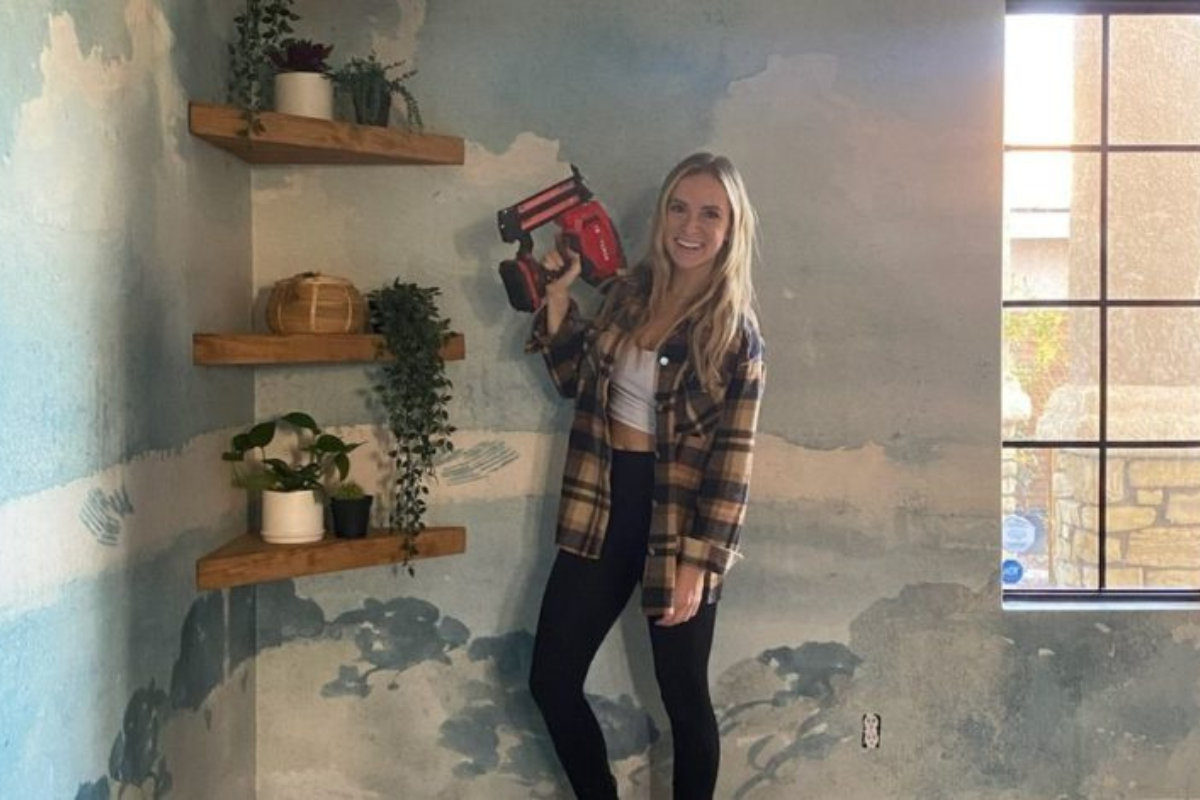
#1 DIY Favorite DIY Shelf: DIY Corner Shelves
Corner shelves are a great way to add a little sparkle into a spot in your home that may be forgotten. I loved building corner shelves for my son’s cloud-inspired room. They brought together the whole space.
To build corner shelves, think about building a triangle-shaped box. You start by building a frame that will keep everything attached to the wall. First, grab a stud finder and mark all of the studs you want to drill into. Make sure you don’t skip this step! You can also use small pieces of blue painter’s tape to mark the studs too.
After marking the studs, it’s time to cut two thin pieces of wood to the length you want the sides of the shelves to be. Once the pieces of wood are cut to length, drill them into the wall where you previously marked the studs. Don’t forget to use a level for this part!
Triangle Time
When making corner shelves you’ll need a top and bottom triangle piece as well as a front edge piece. For the triangle pieces, grab some precut 2×4 sheets of plywood from the hardware store. Use some scrap wood blocks to prop up the plywood sheet off the floor before cutting the triangle pieces. Then draw a line where you want to cut. I like clamping my level near the line to help me guide my saw. Once you do that, you are ready to make the cut on your miter saw.
Cutting the front edge pieces is a little trickier because the ends of the board needed to be cut at an angle. I used my miter saw to make the angled cuts and then tested it out on the framed shelves inside to make sure it matched up.
Now that you have all of your pieces ready, you’ll want to paint or stain them. I really like using Early American by Minwax. It is a gorgeous rich color that adds a cozy feel without being too warm.
Once your wood is prepped and ready, it’s time to assemble. A nail gun is great for this! You will want to attach your pieces in this order: top triangle, bottom triangle, and then front edge. Shoot nails both into the frame and the connecting pieces of the shelf. Then, you’re done! Can you believe how easy that was? Check out my full tutorial here.
FUN IDEA:
Before closing off one of the shelves in my son’s room, I had my kids put a little note or treasure inside. It was a fun way to add some extra DIY magic!
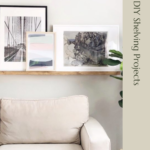
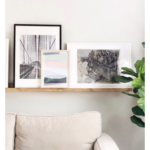
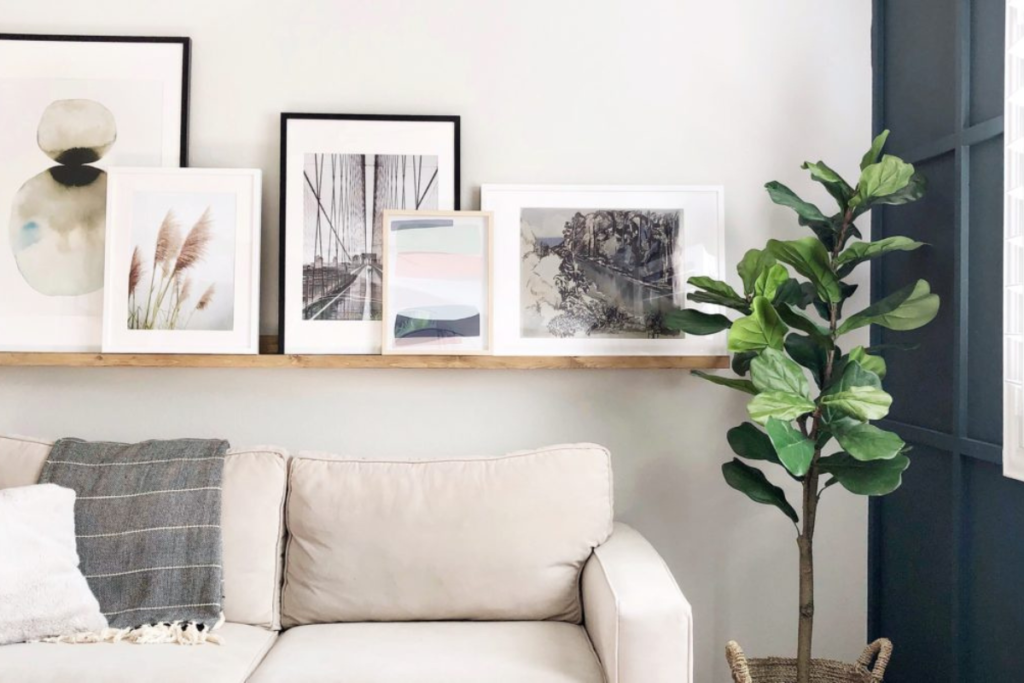
#2 DIY Favorite DIY Shelf: DIY Long Art Ledge
When I first saw the art ledge from Chris Loves Julia, I instantly fell in love. It seemed like such a great way to display art, whether you want to layer large scale art pieces or are looking for a great way to include multiple styles of prints. I loved the art ledge idea so much that I put my own spin on it for my master bedroom.

The best part of DIYing an art ledge is that you only need 3 boards. Yep, I said only 3 boards! Hard to believe, right? Let me show you how this will work. You will need a 1×4 for the base, a 1×4 for the back (which will be the part that screws into the wall), and the 1×2 for the front trim piece. That’s it!
The Build
You can sand your boards now, or wait until you are ready to condition and stain your wood. To begin building the ledge, grab your wood glue and glue the pieces together and then CLAMP them together in 4 places. Make sure to have your boards lined up flush because once it’s glued…it’s not moving. You can choose to put some finish nails in the front 1×2 trim piece, but I just left it with the glue only.
Once your glue is dried, predrill some pilot holes along the backside every 8 or so inches going into the back board and base. Screw your 1 1/2 inch screws into your predrilled holes. This will make sure your base and back are secure and strong!
If you haven’t already sand your boards, you will want to do that now. Then, wood condition and stain/paint your boards. I always use wood conditioner before staining to get a more even coverage. Keep in mind that the inside and back will not really be seen since your pictures will be blocking most of it. So I say, focus your attention on the front piece. I used Early American and Weathered Oak to achieve my stain color.
There you go! Your ledge is built. All that is left to do is hang it on the wall and dress it up with your favorite frames! Check out my detailed blog post which has a step-by-step guide with pictures.
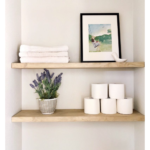
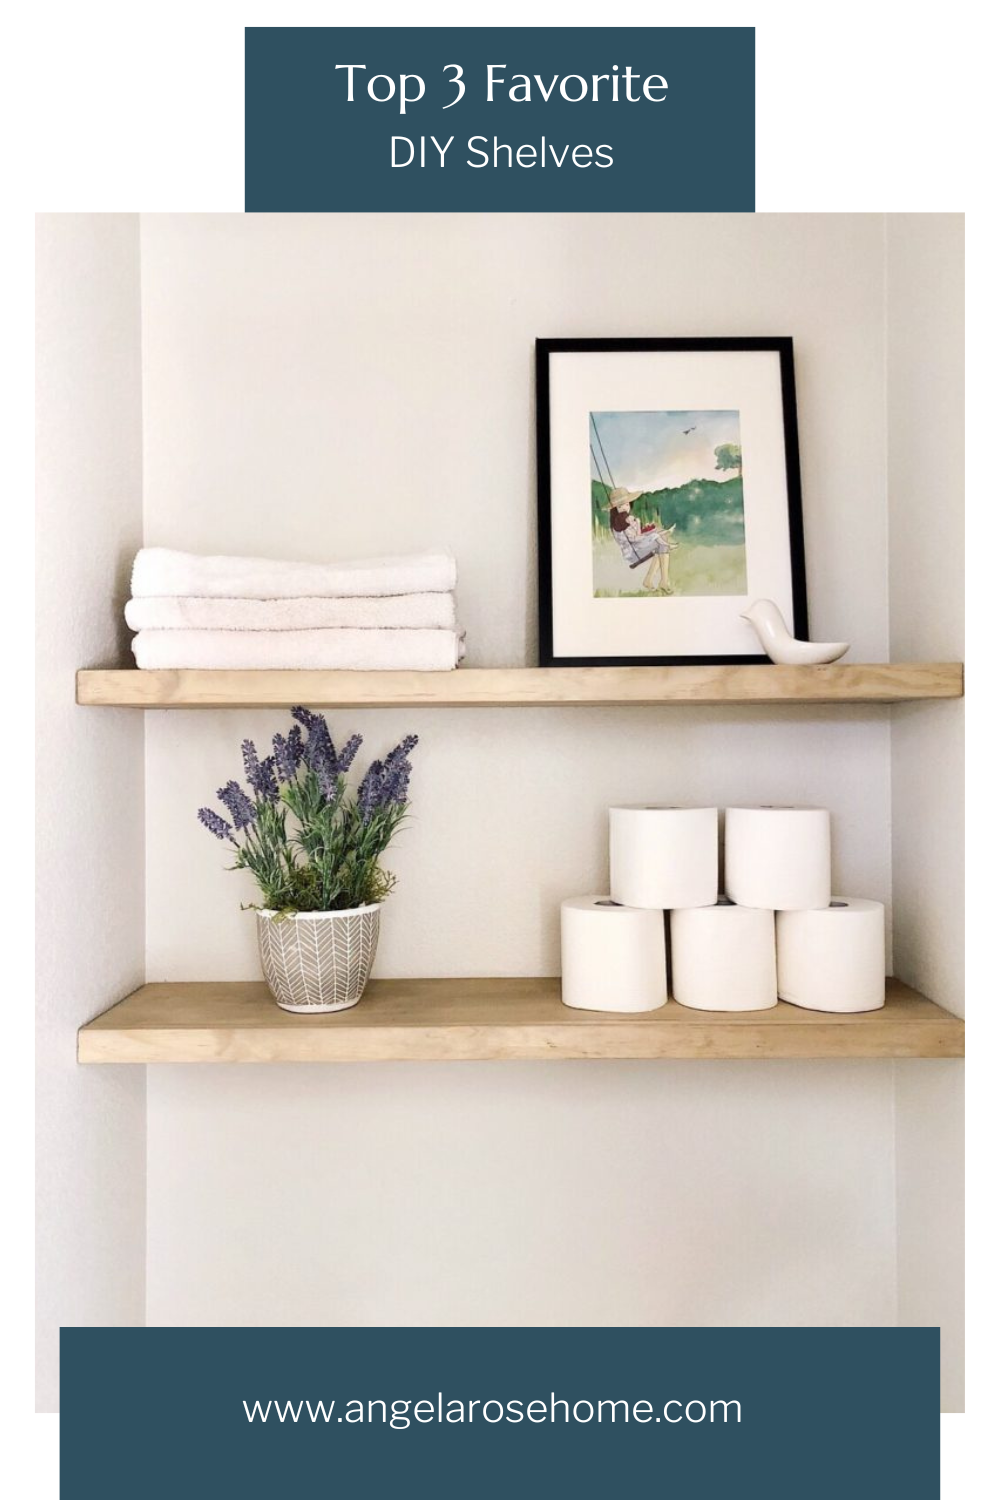
#3 DIY Favorite DIY Shelf: DIY Floating Built-in Shelves
I love the look of floating built-in shelves! Like, LOVE them! The problem is that most floating shelf tutorials have shelves that look very bulky and are at least 3 inches thick. After looking and looking for the perfect way to make a THIN 1.5-inch floating shelf, I found Young House Love’s tutorial. I loved what they did, but naturally, I had to put my own Angela spin on it. Imagine thin floating built-in shelves. That’s what I came up with for my bathroom. I still can’t get over how they turned out!
Here’s How to Make It
To make your own thin floating built-in shelves, start by visualizing where you’d like your shelves to go. I always use blue painter’s tape to help me get a good visual of the space I want to add shelves. Once you know where you want your shelves to go and what size you want them to be, attach your 1 x 2 pine support board along the back wall and into the studs. Make sure it’s level!
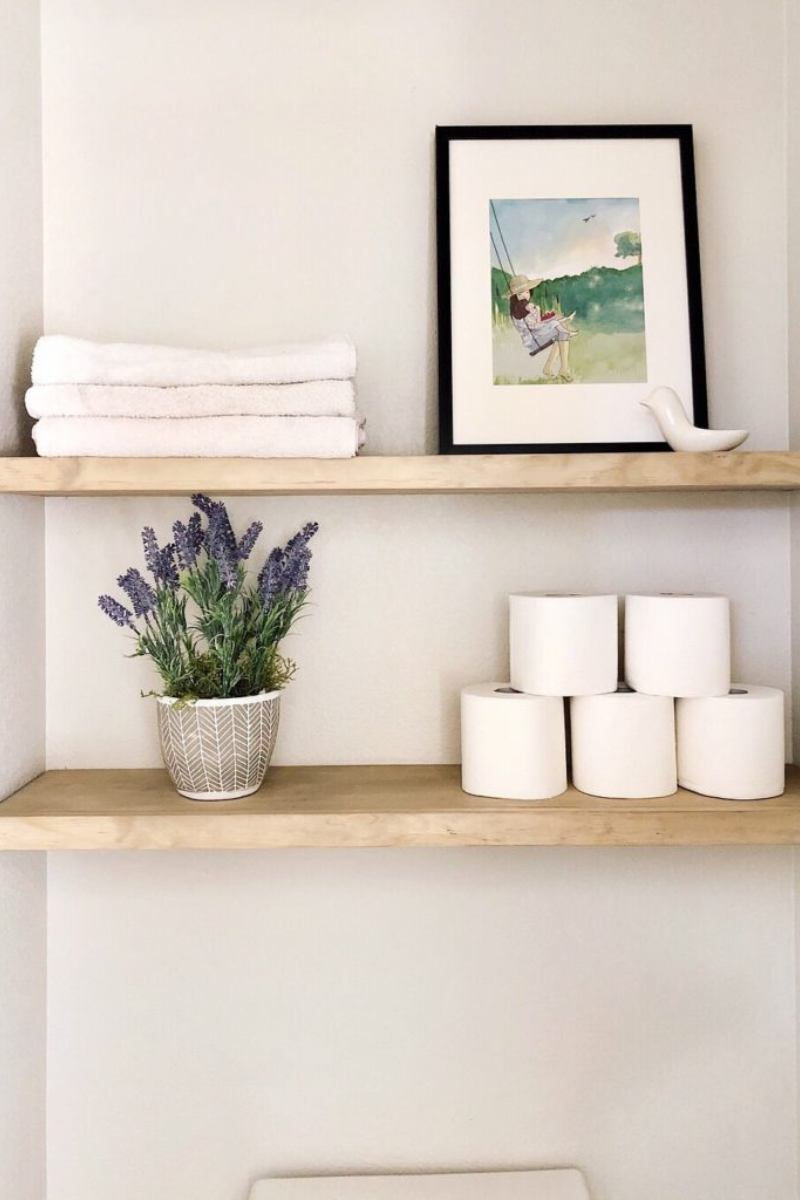
Once your 1×2 pine board is anchored into the studs, attach your 1 x 2 side supports. Make sure to check that these are level too. Clamps are super helpful while doing this. Consider them your friend that is hanging out with you. Next, you’ll attach the cleats. To keep these totally even with my other boards, I used a clamp again. For the top of the shelf, I used a 1/2 inch plywood (depth should be 1.5 in of the back support board + the cleat).
PRO-TIP:
Home Depot and Lowe’s will cut plywood and other boards for you in the store so that your pieces are the right size when you get home. Just make sure to have all of your measurements ready. It’s so much easier when you do! Pretty sure everyone at my local store knows me by name.
To attach the top, use 1-inch screws and screw them from underneath so they’ll be hidden. For the bottom of the shelf, use a 5 mm plywood and attach it with wood glue and finishing nails (and clamps to hold it in place). Then all you have left is the last final piece! Take a piece of select 1 x 2 pine and cut it to fit that front opening exactly. I like to wait to cut this until the end to get an exact fit. To attach the piece, use wood glue and some finishing nails. Check out my blog post with step-by-step instructions here.
Top 3 Favorite DIY Shelves
What is the first thing you are going to put on your shelves? I’ve got to know! I love adding the decor to any of my top 3 favorite DIY shelves because it makes all your DIY effort worth it. I tend to add faux plants because there are so many great options out there right now. Tag me in @angelarosehome in your reveal posts. I want to see what you created! If you are looking for other DIY ideas, make sure to hang out with me @angelarosehome on Instagram and TikTok. And remember…stop pinning. Start doing.
Disclosure: I only recommend products I would use myself and all opinions expressed here are our own. This post may contain affiliate links that at no additional cost to you, I may earn a small commission. Read the full privacy policy here.