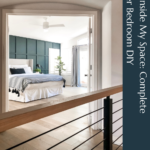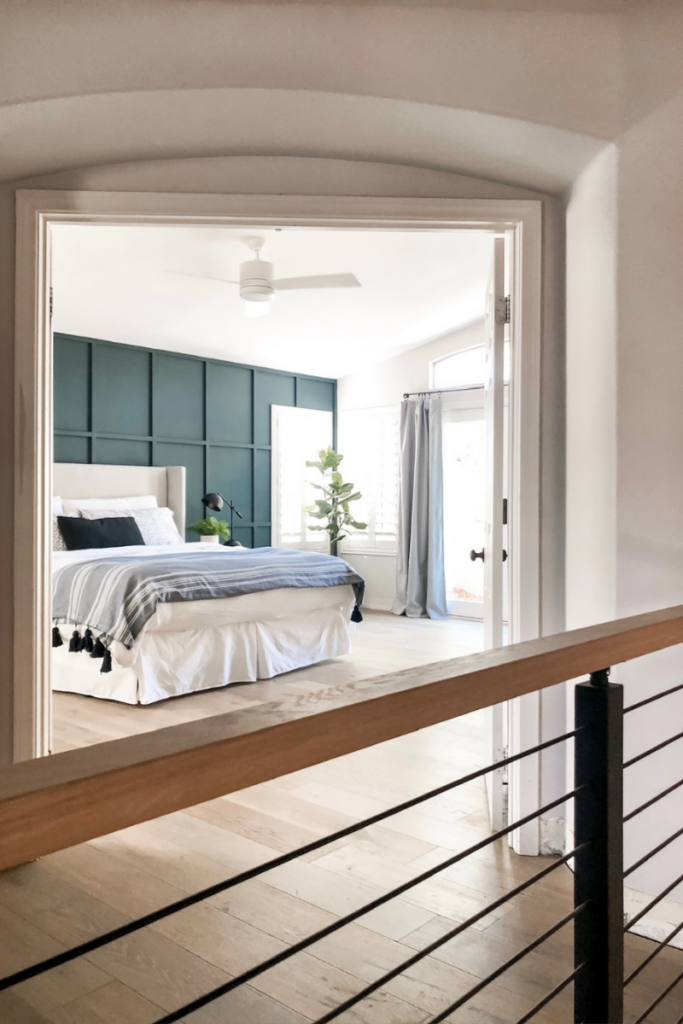
If you have been here a while, you’ve been on my master bedroom DIY journey with me. I have tackled DIY projects in this room one at a time and it has transformed my master bedroom into something magical. I have been documenting the process along the way, but I wanted to share the secrets to my complete master bedroom DIY.
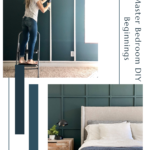
My Master Bedroom DIY Beginnings: Accent Wall
The first project I tackled in my DIY master bedroom was a gorgeously green accent wall. To get a smooth wall before starting my board and batten accents, I added a flat backer board to my walls. I could have skim coated the whole wall, but that just wasn’t going to happen. For me, it was easier to apply the backer boards to the wall with liquid nails and add finishing nails around the edges.
PRO-TIP: While prepping the smooth wall for details, remember to cut out holes for your outlets before putting your backer board on the wall. It also helps to paint the backer board once it’s installed before adding your detail boards.
For this wall, I wanted a thinner look for my batten so I chose 1×2 finger-joint pine. If you are looking to do board and batten you have different types of wood to choose from. You could use normal or select pine boards, finger-joint pine, or MDF. Just make sure you check to make sure your boards are straight before you purchase them. To do that, hold the boards to your eye. Look down the length of them to make sure they are not bowed.
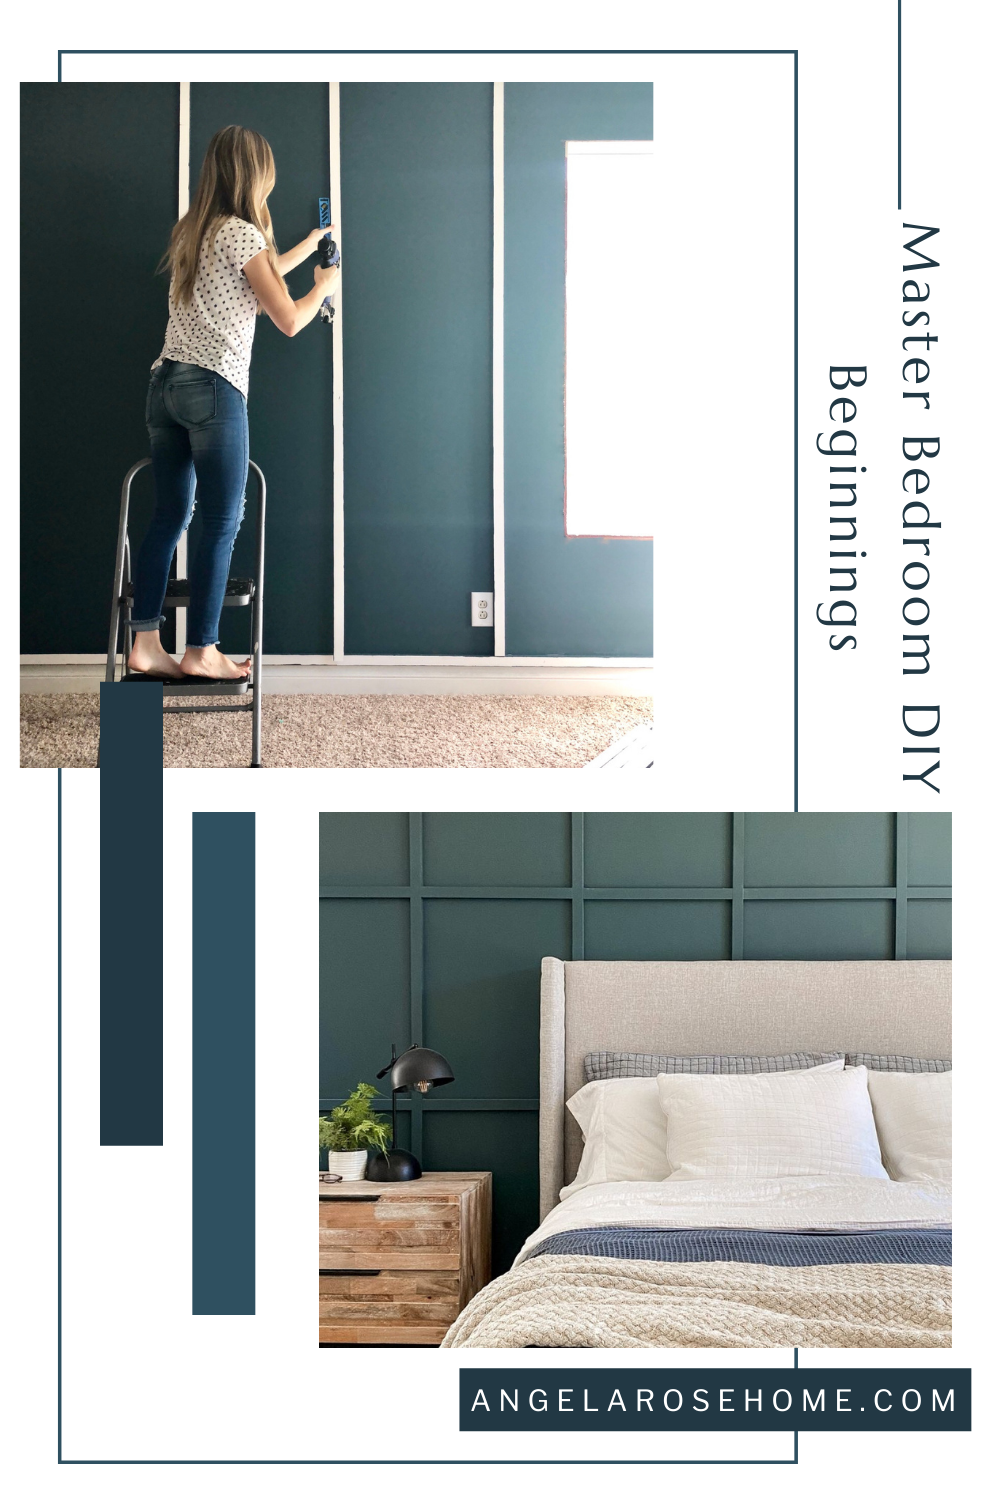
To finish my first master bedroom DIY project, I had to have the perfect color of paint. I decided to go with Newburg Green by Benjamin Moore and I couldn’t love it more! I learned a whole lot about what to do and what not to do while creating this accent wall and I shared all about it here.
Add Privacy in Your Master Bedroom with a DIY Barn Door
In our master bedroom, we needed separation between the bathroom and where we sleep. I knew I wanted a barn door, but I looked all over and all I could find were rustic barn doors. Rustic just didn’t sit right with me. I kept being pulled to a more modern feel. So, I turned to DIY after being inspired by a picture of Fixer Upper’s Joanna Gaines barn door.
If you can’t find what you like, build your own, right? I started creating the barn door with ¾ inch MDF sheet and then topped it with diagonal MDF lines so that everything would be perfectly smooth without warping over time. Once the diagonal lines were set, I framed out the door by securing 1x2x8 pine boards with glue and finishing nails. There was nail filling. Painting. And in the end, I had a unique barn door that completely changed my space. If you want even more details about the process you can check out my full tutorial here.

Hanging the barn door in our master bedroom was a bit of a challenge. To make sure your barn door doesn’t fall, the hardware has to be mounted to your studs. My hardware didn’t line up right so I had to get creative. I decided to drill new holes into the metal rail so it would be in line with my studs and it worked! The studs were hit just right. Now my 180 lb door won’t be going anywhere. I also added an oak backer board behind the metal hardware rail so the door would sit further off the wall to accommodate for the baseboards.
Find a Purpose with DIY in Your Master Bedroom
Once I had the accent wall and barn door completed, it was time to turn my attention to the forgotten corners of my master bedroom. I had a sad, neglected corner in my room that didn’t have a purpose. I couldn’t just leave it that way, so I got planning and came up with a few DIY projects to transform the space.
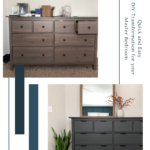
Quick 2-day DIY Transformation Anyone Can DIY
Is there anything better than a quick transformation? I honestly can’t think of anything I love more! Quick projects are the best. You feel a sense of accomplishment without getting overwhelmed. I challenged myself to do a quick 2-day transformation of an IKEA dresser to give it a modern twist and to help cheer up this sad corner of my room.
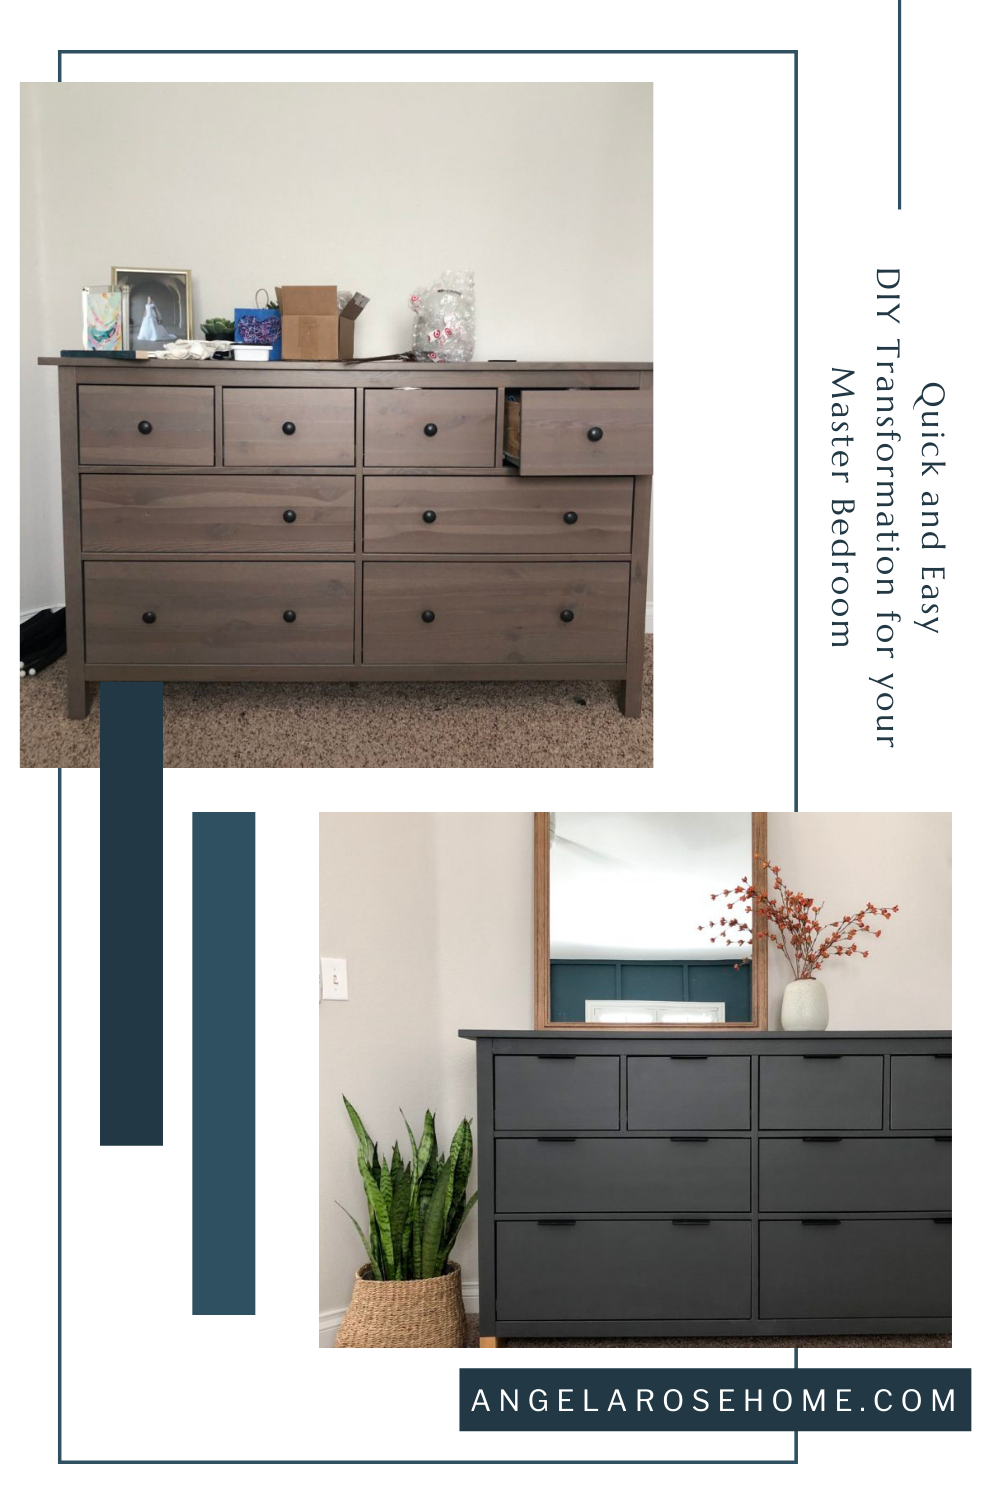
I started by taking off the hardware and filling the holes. With DIY projects like this, I like filling holes with Plastic Wood. It is great to work with! All you have to do is push the Plastic Wood into the holes without it becoming dimpled down. I usually overfill the holes and sand off the extra so that it is flush.
PRO-TIP: When you are sanding wood, sand in direction of the wood grain.
I wanted to change the initial color of the dresser, so I grabbed some Rustoleum chalked paint in charcoal. In my opinion, chalked paint is the easiest for painting furniture and is one of my go-to’s. It goes on easily and has a velvety matte finish. Plus, if it is an unfinished wood you don’t have to sand or prime your surface before painting with Rustoleum’s chalked paint!
To paint the dresser, I started by using a brush to paint the cracks and slightly feathered out the paint to avoid a harsh line. Then I rolled over the rest of the surface with a ¼ nap roller and added new hardware. The hardware I picked came in 6 different finishes (and 8 different sizes), but I fell in love with the brushed black. I measured 4.5 inches from both the far left and far right sides of the drawer before installing the hardware because they were easy to attach through the back with small screws. I’ve got a whole tutorial on how to give your furniture a modern twist if you are looking for a quick easy project that packs a punch.
Refresh Your Master Bedroom with a DIY Art Ledge
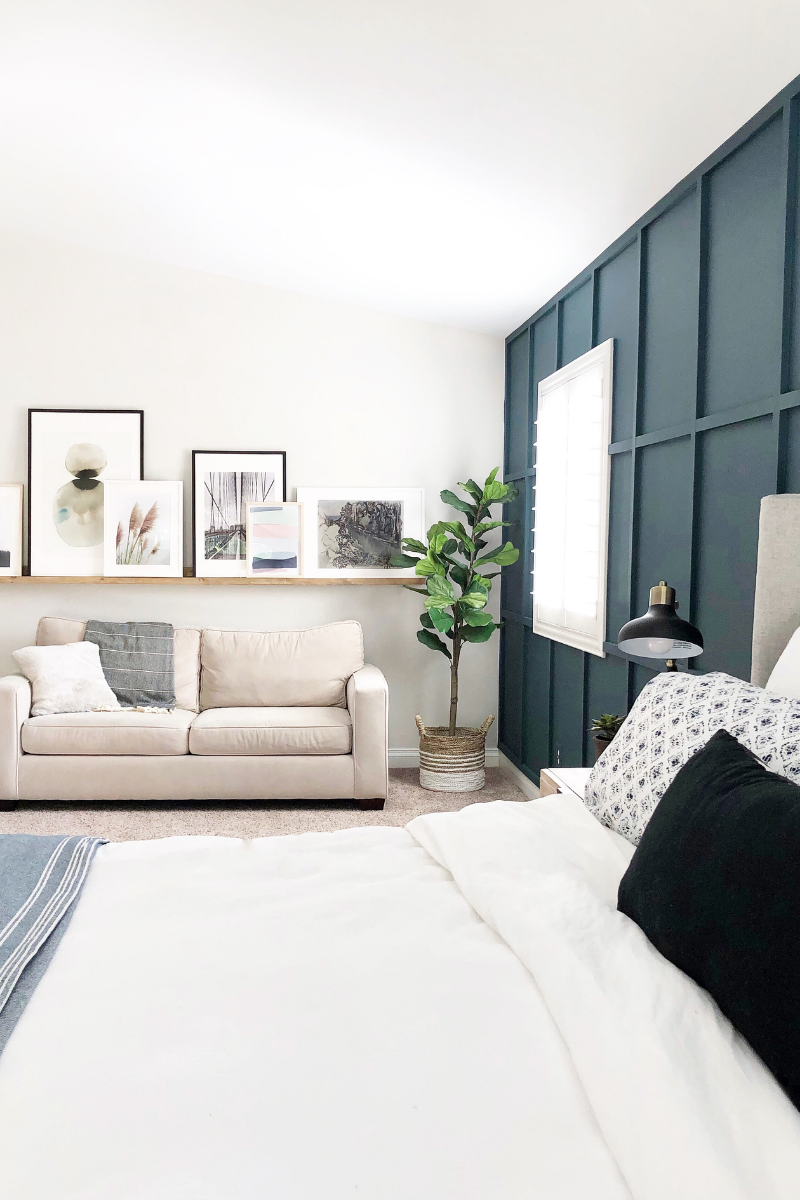
The other project I created, to give that sad corner some life, was an art ledge. It is the perfect beginner project for anyone looking to try DIY. Art ledges are also great for non-committal people like me because you can switch the art whenever you feel like it. You could totally change things up seasonally or when a new picture or print catches your eye. Check out my full tutorial here.
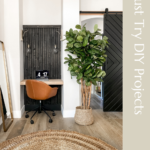
Last But Not Least: Master Bedroom Desk Area
The last project I completed to finish off my master bedroom DIY was a desk area.
Here in Las Vegas homes have awkward nooks and niches. Do the small, seemingly unuseful spaces in your home bother you as much as they bother me? Over the past few years, I have made it my mission to find a purpose for those small spaces. The nook in my master bedroom was the last awkward space I needed to tackle in my house. It came out so good! I transformed the nook into a built-in desk after being inspired by a few BIG TRENDS: charred wood and contrasting baseboard.
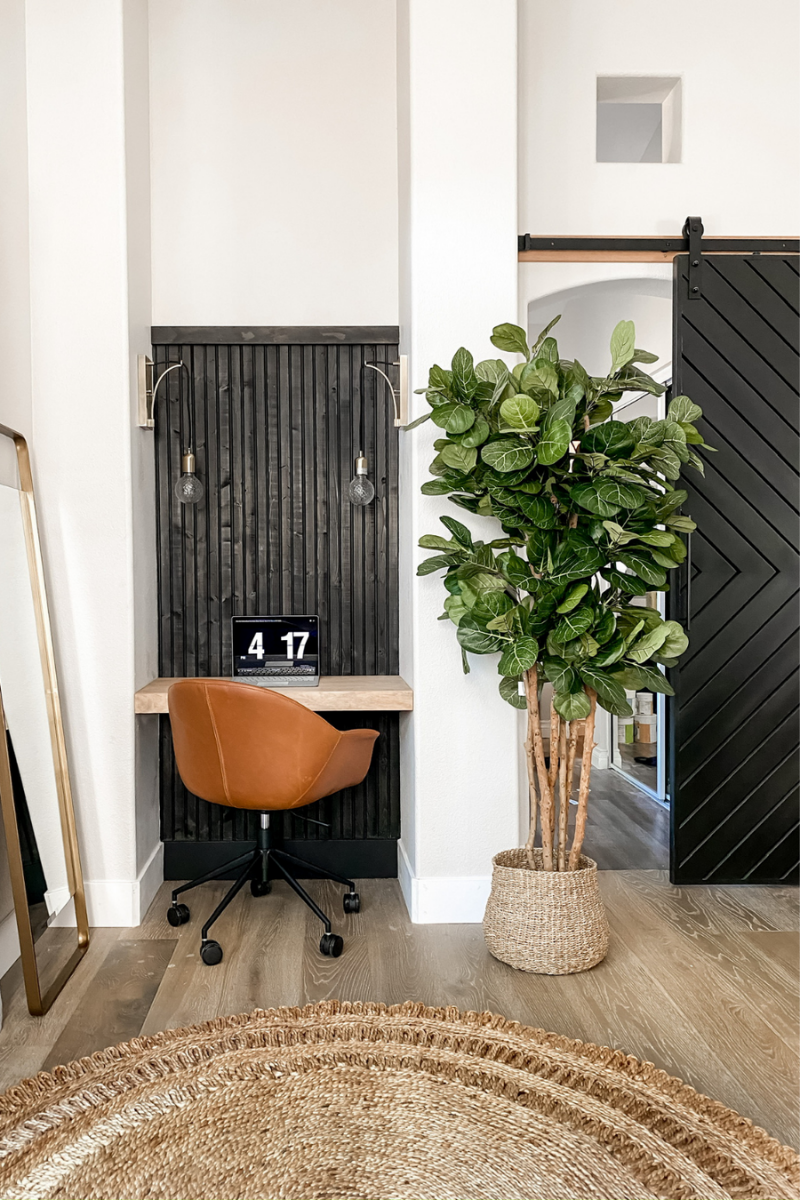
You guys, the space is so dreamy. It might be one of my favorite DIY projects in the master bedroom. I created a focal point with a “charred wood” beadboard. Then, the black baseboard ties everything together. It is a pocket full of personality that helps fuel my creativity for future projects.
The Secrets to My Complete Master Bedroom DIY
Sharing my complete master bedroom DIY has been so rewarding for me. I get to enjoy the hard work I put into this space every day. What is the first project you are going to do in your master bedroom DIY? It’s time to stop pinning and start doing so you can have a space that you can enjoy every day. There are definitely ups and downs in DIY, so make sure you hang out with me on Instagram and TikTok so that we can do projects together.