This post is sponsored by Rust-Oleum.
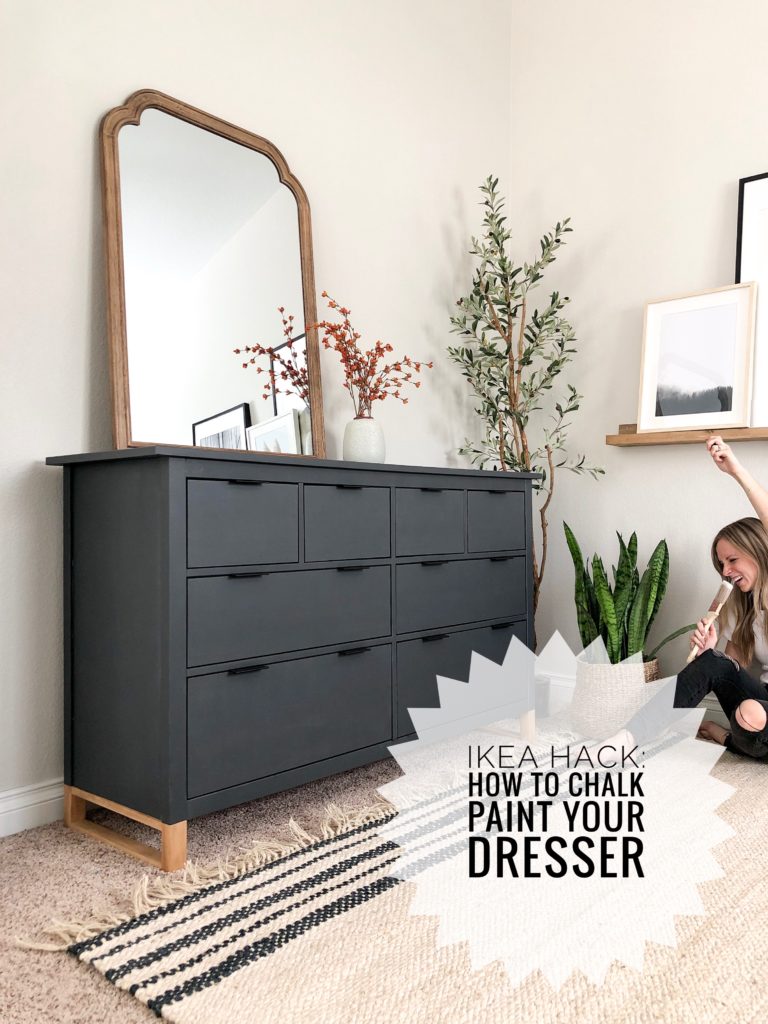
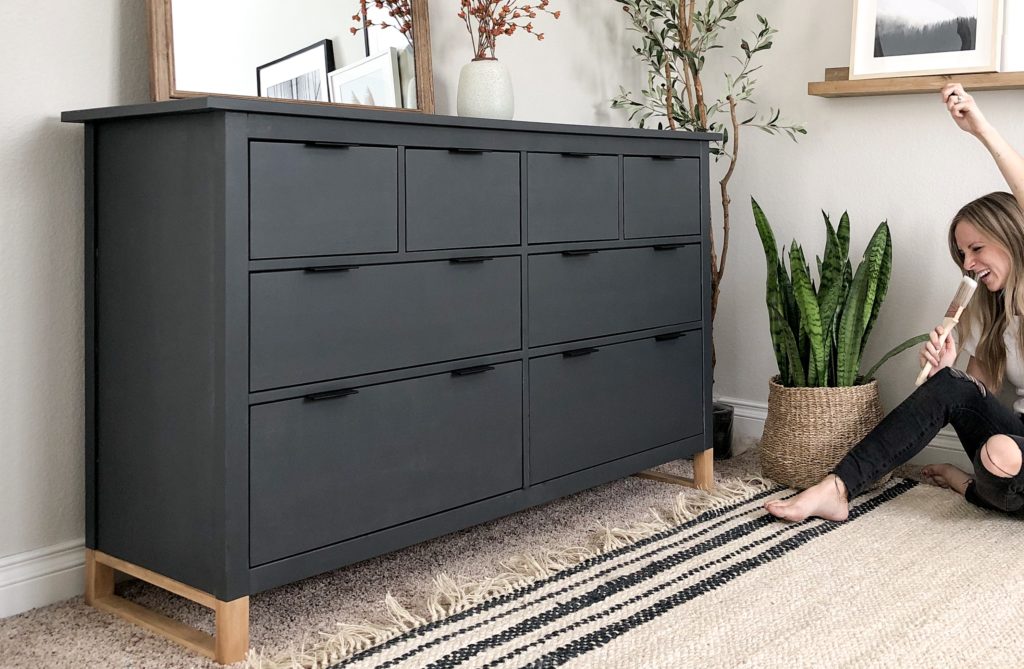
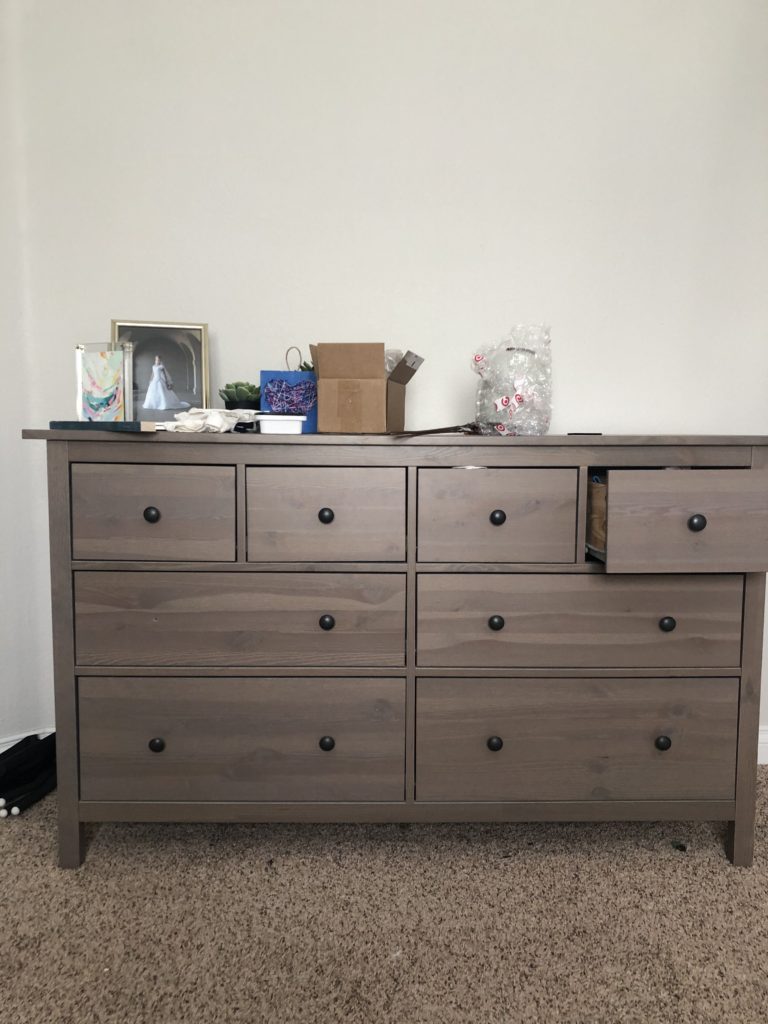
I hope you had fun following along with my 2 Day $200 transformation with Cynthia Harper. I decided to tackle a sad forgotten corner of my master bedroom, focusing on my IKEA Hemnes dresser. Are you ready to see this transformation and learn how you can modernize your furniture as well? (the answer is yes!)
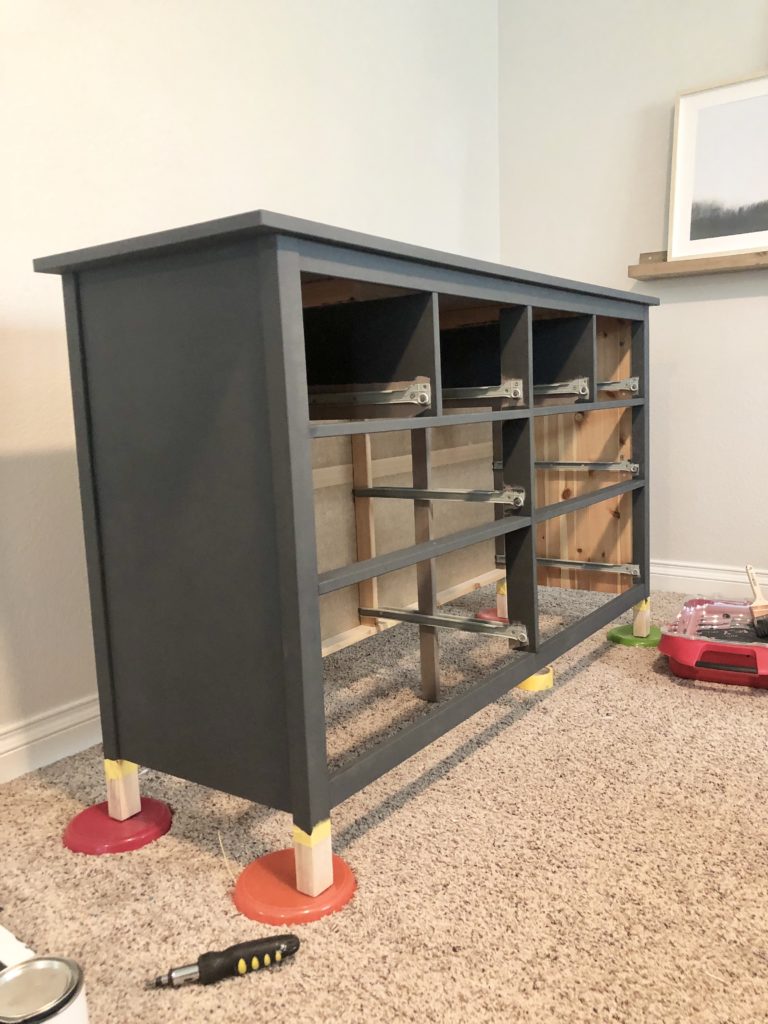
BEFORE
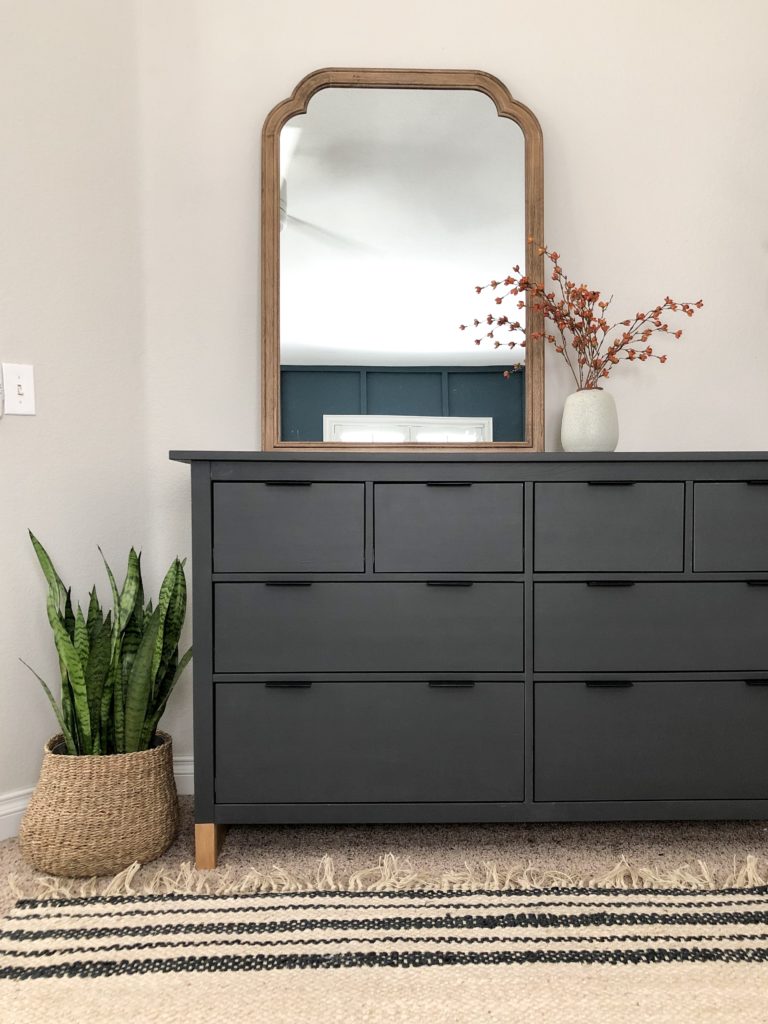
AFTER
One more???
BEFORE

AFTER
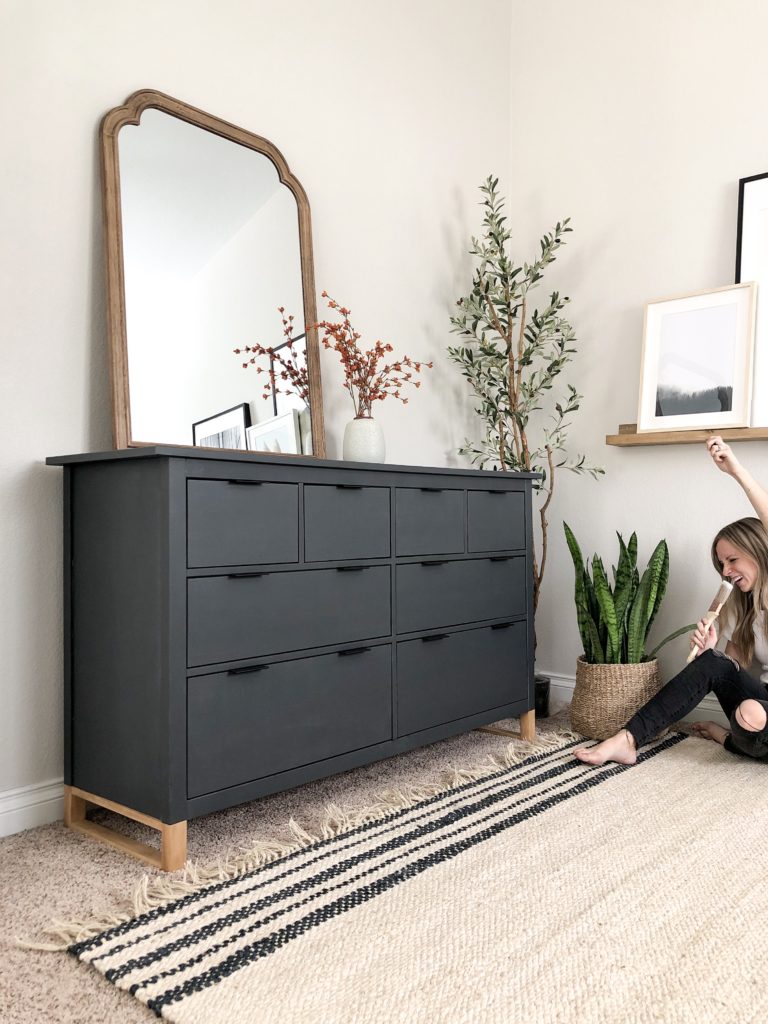

Do you see that leg detail? And the new hardware? And the new velvety paint job? I love a good IKEA hack. Let me break it all down for you.
Here’s what you’ll need:
Old Furniture
Wood Filler
Screw Driver
1×2 boards
Sand paper
STEP 1: Prep!
First step is to clean and wipe down your entire piece. This is important so that the paint properly adheres to your surface. With chalk paint, you typically don’t need to prime or sand (unless surface is super glossy, I would sand). Wipe with a tack cloth to get off all dust.
Remove all your drawers and take off hardware.

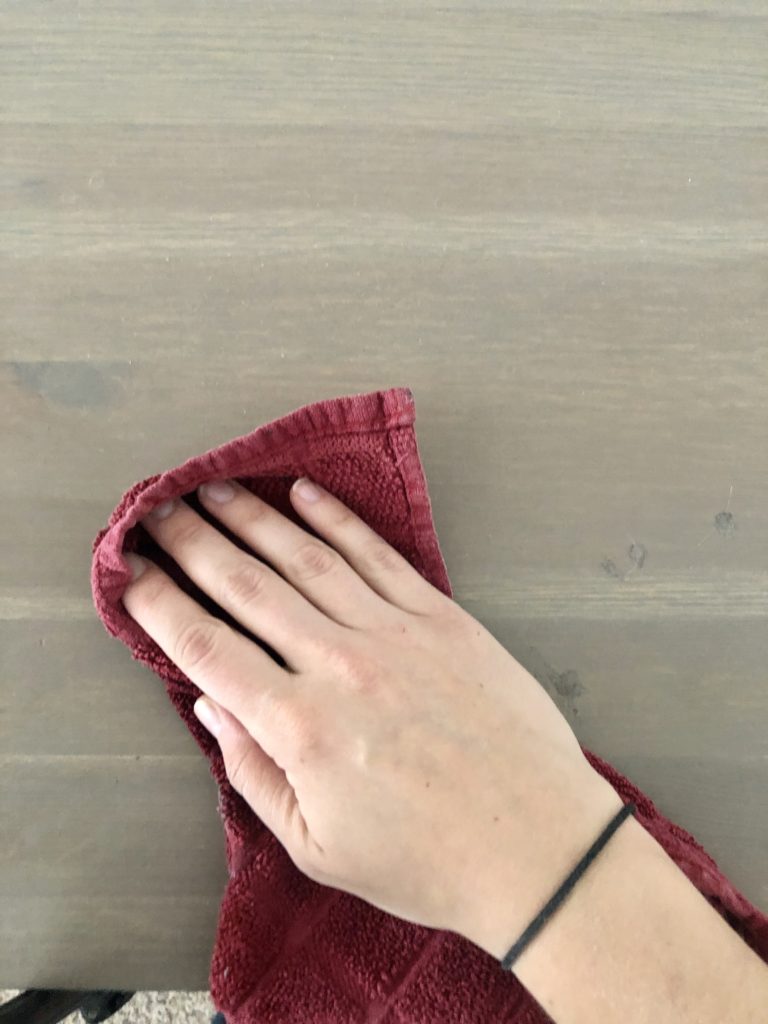
TIP: I put all my hardware in a labeled plastic bag so I don’t lose it and remember where it belongs!
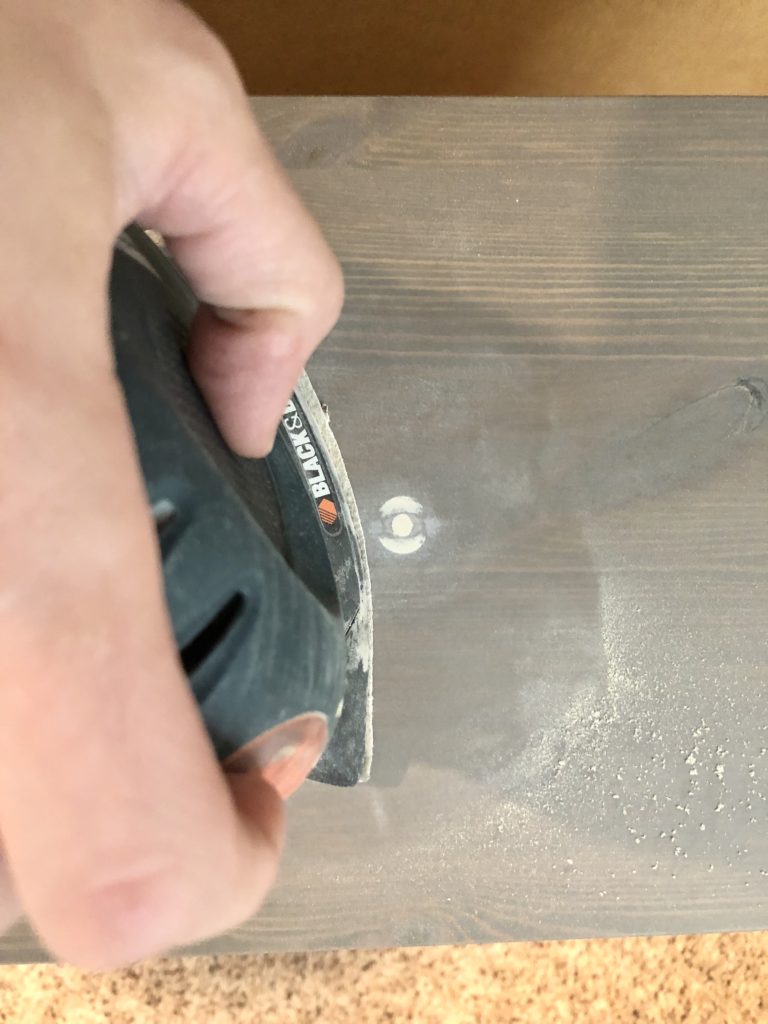
STEP 2: Fill holes (if you are putting on new hardware in a new location)
Using wood filler, I filled the hardware holes. I make sure to overfill. Once it’s dry, you sand it with 220 sand paper, and the surface should be all smooth.
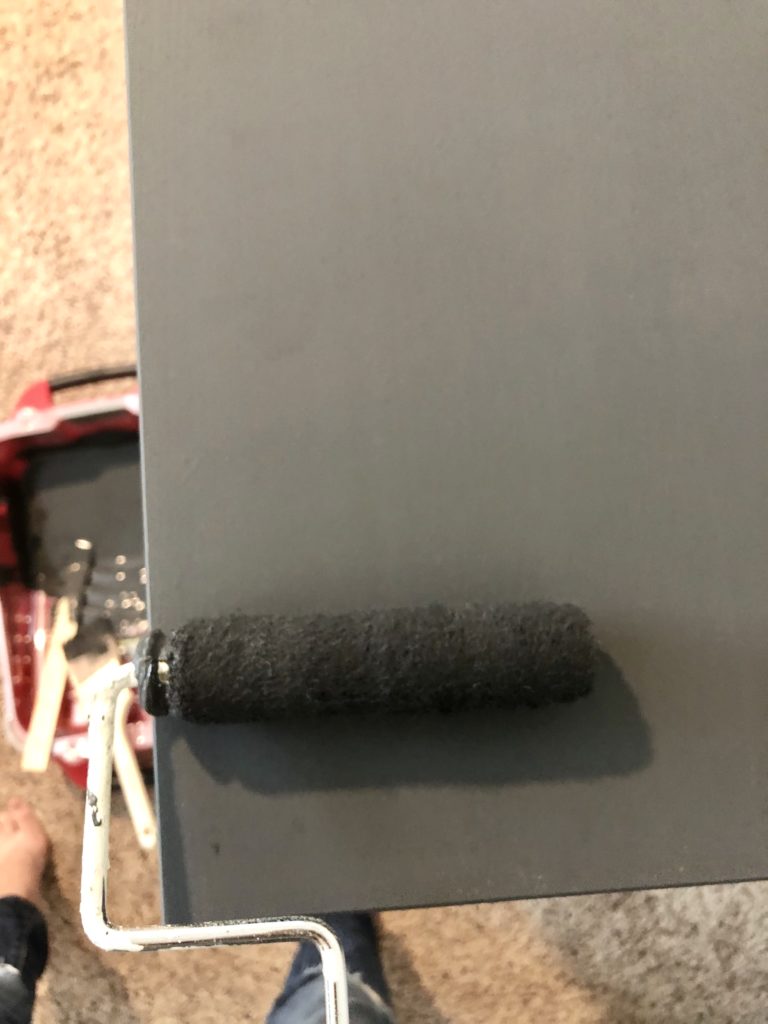
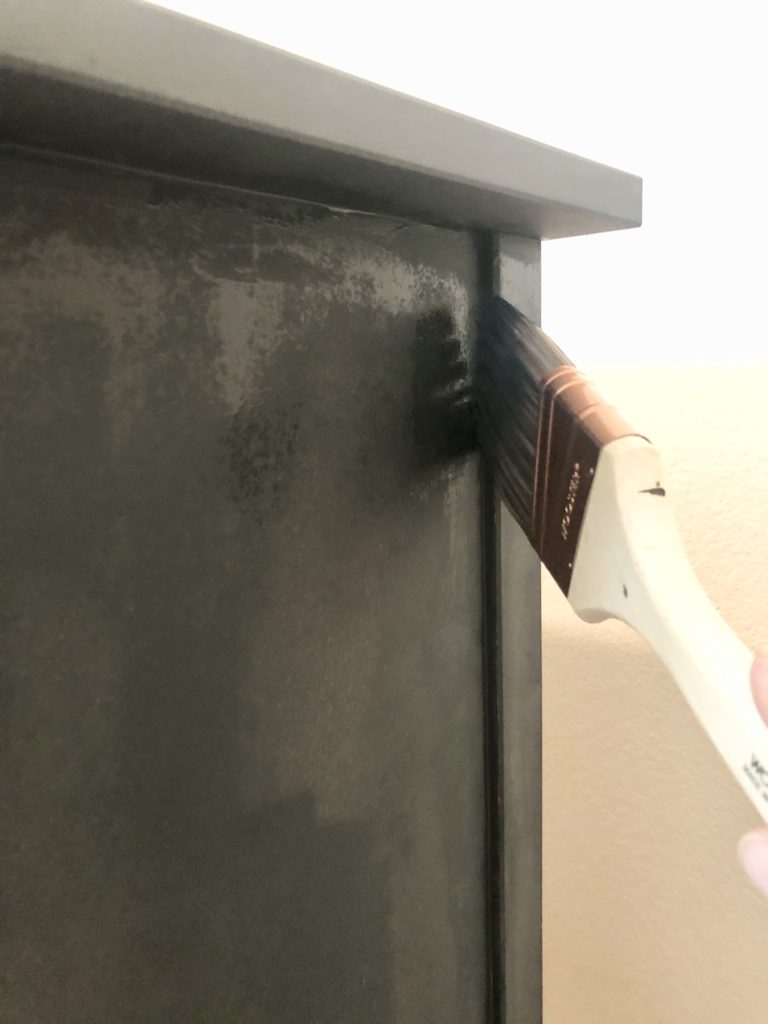
STEP 3: Paint your piece!
Here comes the fun part…the paint! I am using Rust-Oleum Chalked paint because I like a matte velvety finish. I also like that I don’t have to sand or prime! I like to use a 1/4 nap roller for the smoothest finish. I used the color Charcoal and did 2 coats.
TIP: cut in with a high quality bristle brush, and then use your roller to smooth it out and paint the flat surfaces.
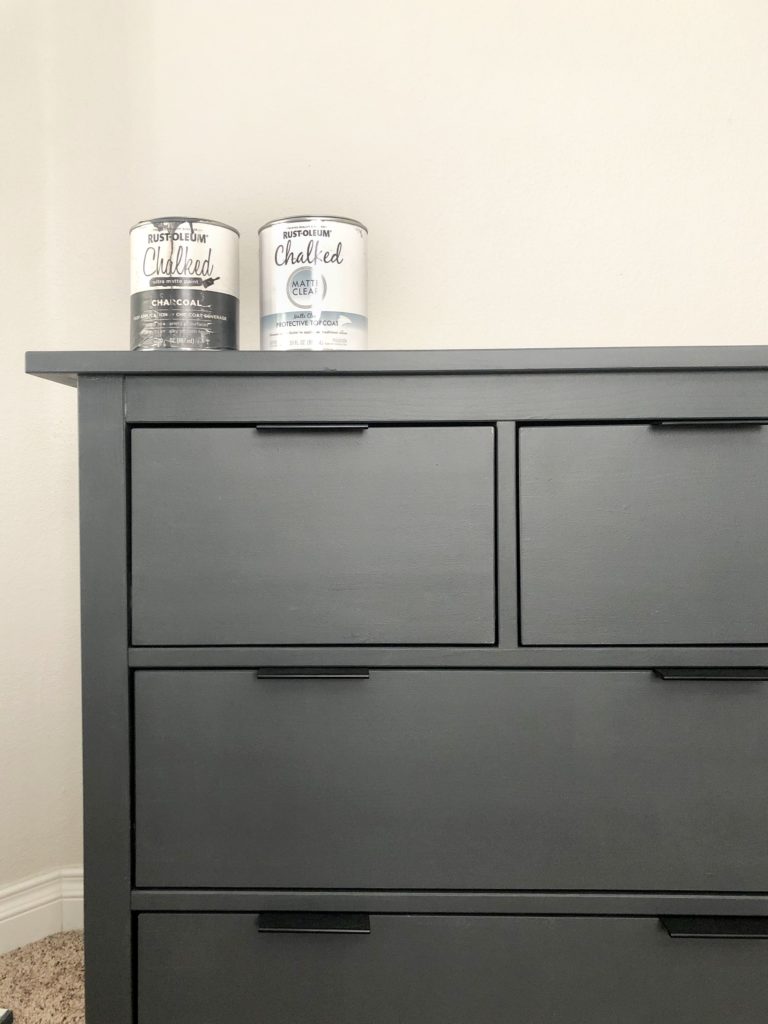
STEP 4: Top Coat.
To finish off your piece, you want to protect it with a top coat. Also, Chalk Paint has a chalky feel, until you use a top coat which enriches and deepens the color as well as protecting your piece. I used the Rust-Oleum Top Coat in Matte Clear because I didn’t want my piece shiny, and I wanted to maintain the soft velvet matte look and feel.
STEP 5: Add Hardware.
Here is the hardware I used! To attach hardware, I measured to make sure there was the same distance on both sides, marked with a pencil, and attached with screws.

STEP 6: OPTIONAL…modernize your legs (the furniture legs I mean)
Using 1×2 boards, I turned my normal IKEA Hemnes dresser legs into cool modern legs. First, I sanded off the existing stain on the legs. Then I cut and attached the top board with brad nails, and then used pocket holes (you could also just glue) to attach the bottom board. The result is a cool modern rectangular leg! Stain with your favorite stain.
Best IKEA hack ever right? Follow me @angelarosehome for more tutorials!