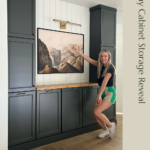
While I was dreaming up ways to add more storage to our home, the hallway cabinet storage project was born. I have lovingly been calling it, “OPERATION: What Do You Do When You Need More Storage – You Build Your Own Dang Storage”. This is one of the many reasons why I love DIY. It gives us chances to find creative solutions that ultimately spark joy. And let me tell you, now that this DIY project is finished, it is sparking so much joy! If you are anything like me, you are also looking for ways to make more storage in your home. So, here’s my how to guide for my hallway cabinet storage reveal so that you can dream up something similar for your home.
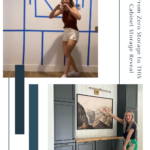
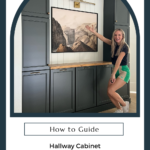
How to Guide: Hallway Cabinet Storage Reveal
This project all started with figuring out an affordable way to create cabinets that looked like they were built in. The problem is that built-ins can be really expensive and I needed to get this project done without breaking the bank.
PRO-TIP: Home Depot carries unfinished cabinet boxes for about $70 each cabinet box. This style of cabinet is unfinished and can easily be adapted to fit the needs of any project. Which means you get the look of customized storage built-in cabinets without spending a ton.
The Basics of Creating Built-in Cabinets
- Get walls and baseboards ready
- Build bases for premade cabinets
- Anchor cabinets to each other and the wall
- Finishing details (caulking, trim, etc.)
- Paint cabinet boxes
- Install cabinet doors and hardware
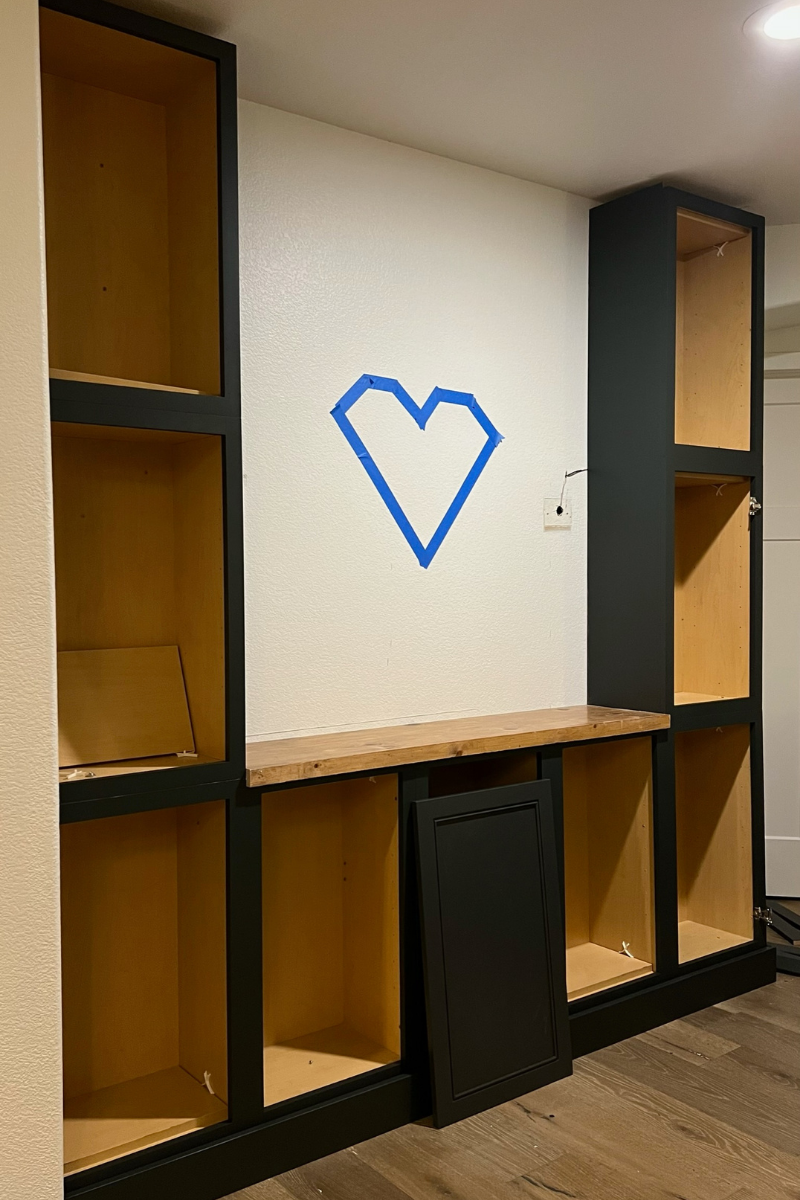
#1 Get Walls and Baseboards Ready
Before you can start installing the built-ins, we have to get the walls and baseboards ready. Always, I repeat always, remove the baseboards when transforming pre-built cabinets into built-ins. Otherwise, your cabinets won’t fit perfectly. If you want the cabinets to look like they were always meant to be there, remove the baseboards
First, while the baseboards are on the wall, use a mini tool to cut them to the measurement that your cabinets will be. Then, use a blade to score the caulk at the top of the baseboards you are removing. The only thing you have left to do is to pry the baseboards from the wall with a crowbar. Just remember to go slowly so you don’t harm your wall.
#2 Build Bases for Premade Cabinets
To create built-in cabinets with premade stock products you need to build a base for the cabinets to sit on. To make the bases, cut 2x4s to fit the dimensions of the cabinets you are installing. Once the wood is the right size, clamp your 2x4s in the right position and screw the pieces together. I promised you this DIY project was going to be easy! Repeat the process until you have all your bases built. Then
#3 Anchor Cabinets to Each Other and the Wall
Once you have your pre-built cabinets on top of their bases, it is time to anchor everything together. To anchor the cabinets together, you will want to add a spacer in between each cabinet that touches. This keeps everything spaced right and keeps it nice and secure. I used some extra wood I had around. Once everything is lined up how you want it, clamp the cabinets and spacers together up so they don’t move when you begin screwing things into place. Grab your drill and start screwing your cabinets together (through the spacers) to create one large base cabinet. Once you check to make sure your cabinet base is level, then you can screw your “new” large base cabinet into the wall. Make sure to find your studs when securing.
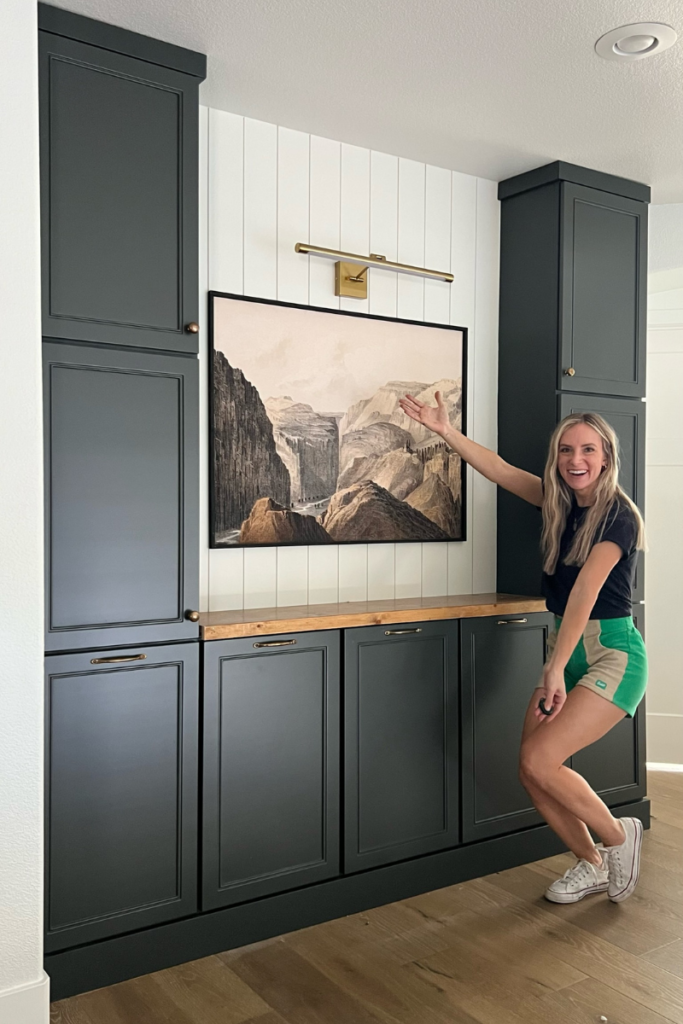
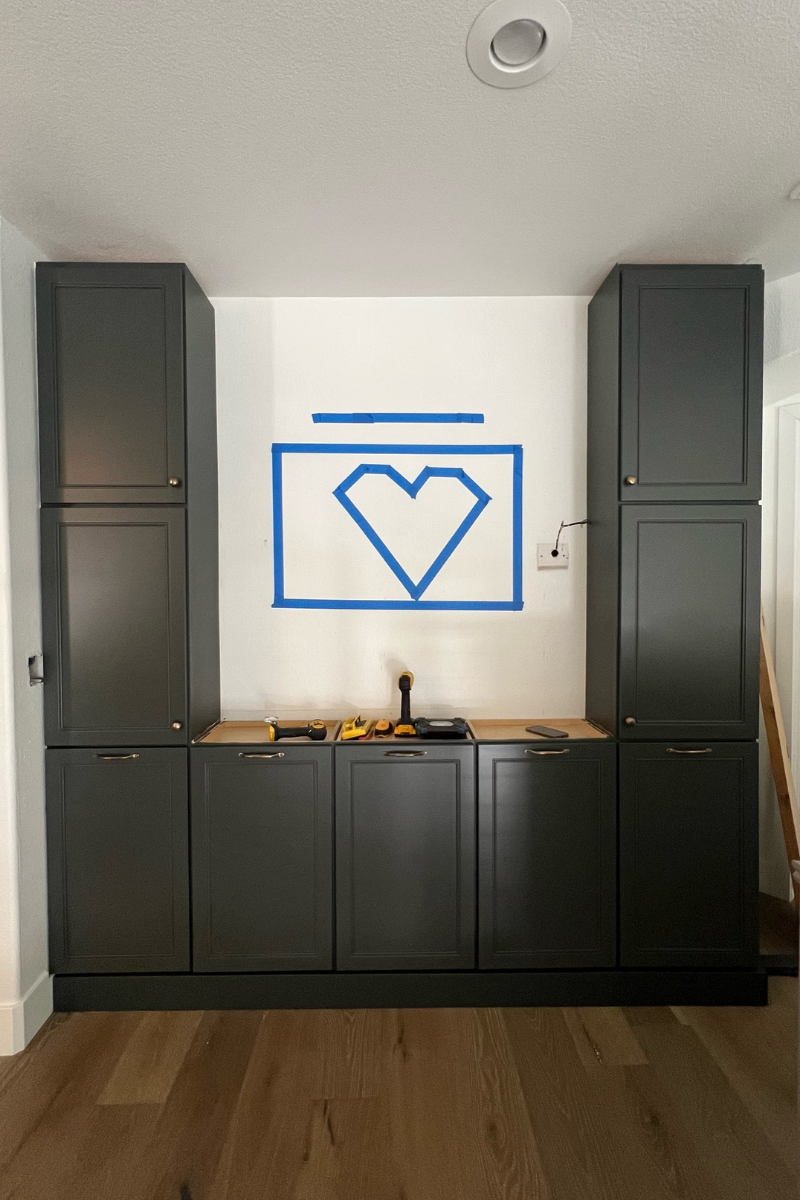
If you want some of your cabinets to also go vertically, all you have to do is start building up since the base you created is level. For my hallway cabinet storage, I stacked the pre-built cabinets to create two towers. Of course, anchoring as I went.
#4 Finishing Details
At this point, the building is done and it is time to give your project the “built-in” look. To do this, we need to caulk the cracks between the cabinets and the walls. If you have any cracks between your walls and cabinets that are really big from your walls being uneven, try using backer rod to fill in the crack before caulking. All you have to do is stuff the foam in your crack and then you place caulk right over it.
PRO-TIP: When caulking, use paintable caulk. That way you won’t run into any problems when painting your cabinets later on.
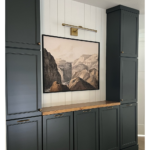
You also need to cover the sides of the cabinet towers because the stock cabinet towers come unfinished. To do this, I grabbed some thin Eucaboard from my scrap pile and cut it down to the right size on my table saw. Once you know the panel fits just right, secure it with liquid nails and your nail gun.
The last thing you need to do before painting is to add trim to the top and bottom of the cabinets. Aside from caulking the cracks, trim is what brings a cabinetry project to the next level making look like built-ins that have always been there.
#5 Paint Cabinet Boxes
Let’s talk about cabinet doors. I know we aren’t at that step in the process yet, but I have to mention them before we can talk about painting. I didn’t love the cabinet doors that came with the premade Home Depot stock cabinets, so I ordered some trendy cabinet fronts from Nieu. Have you heard of Nieu? They are amazing! (I fell in love with their products when I did my kitchen remodel). If you aren’t sold on the premade stock cabinet doors either, use code ANGELAROSEHOME5 to get 5% off your order with Nieu.
Here’s why I am bringing up the cabinet doors even though we aren’t in that phase of the project…Nieu has matching Sherwin Williams colors for all of their products so you can easily match and paint the cabinet boxes. For my hallway cabinet storage, I painted the cabinet boxes to match the slim shaker door fronts I picked.
# 6 Install Cabinet Doors and Hardware
Once your cabinet boxes are dry, it is time to install your hardware (if you are using different cabinet fronts). I installed slow-close hardware which I purchased from Nieu when I purchased the cabinet door fronts. Once the hardware is installed, all you have to do is attach the cabinet door fronts. And remember, You can use code ANGELAROSEHOME5 to get 5% off your order with Nieu.
The very last step to finishing the cabinetry is installing hardware. It’s all about the details for me so I decided on brass hardware that I upgraded to look antique. When everything is put together your cabinet storage will be so special!
How to Guide: Countertop
Once I had my cabinets built, installed, and painted I had one final spot to finish off…the top of my base cabinets. I wanted this space to act as a countertop so I mentally separated it from my cabinet build.
I was lucky enough to have repurposed an old project for the countertop. And when I say lucky, I really mean lucky! The piece I used already had front trim and a nice top. All I had to do was cut it down to the right size. It’s made from pine boards glued and sanded together. Then I stained it with Early American.
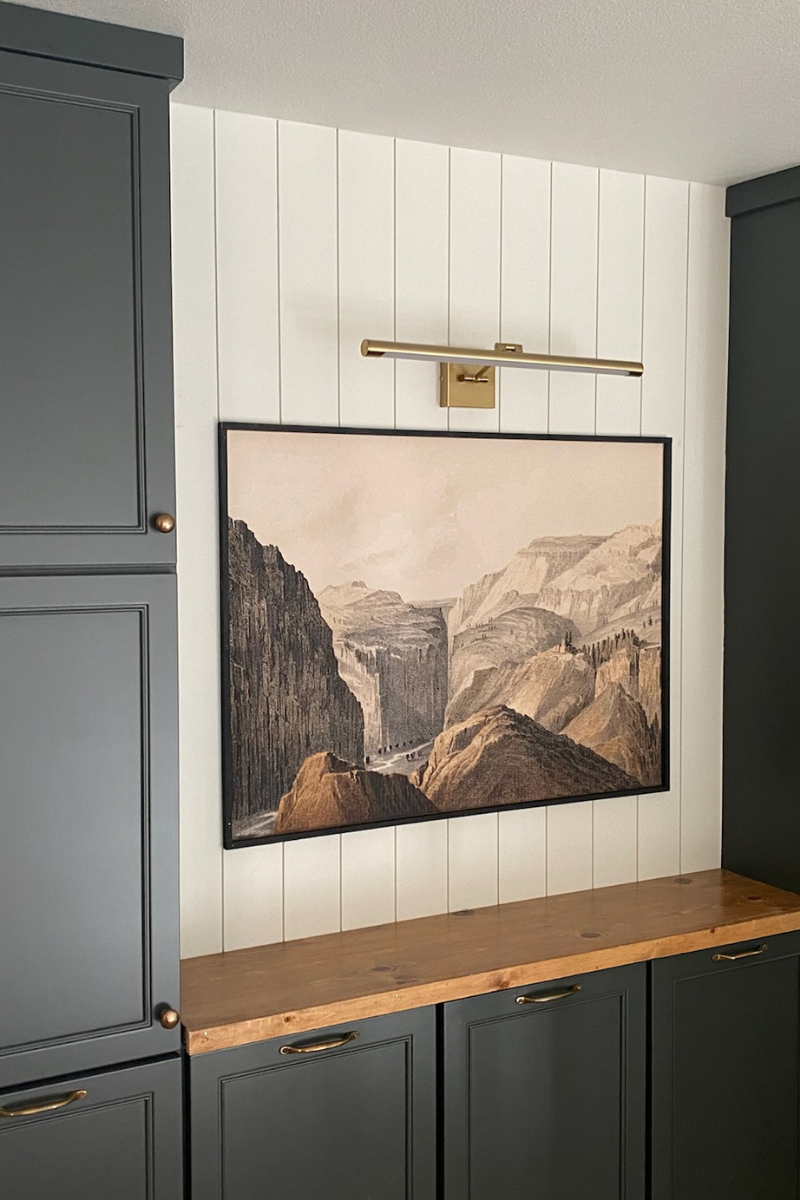
How to Guide: Vertical Shiplap
Who doesn’t love a good shiplap? I may or may not have it scattered throughout my whole house as well as other wood trim accents. There was an unfinished small-ish space in between the two cabinet towers that needed some love and I knew adding shiplap would tie the whole space together. To keep the space feeling tall and airy, I decided to install the shiplap boards vertically.
There are a few kinds of shiplap out there, but what is so great about the shiplap boards I used is that they lock together. All you have to do is nail them to your wall to keep them secure. I know this may sound crazy, but shiplap doesn’t always have to be anchored to a stud. I know, I know. It sounds like I saying pigs can fly or that Harry Potter is real (but he is right? I mean, I’ve been to Hogwarts!). But, unless you are going to be attaching anything heavy to the shiplap, you don’t need to worry about studs. Do you know why? Because I have a trick for you!
STUD-FREE NAILING TRICK: If you aren’t needing to anchor into a stud, use your nail gun to drive your nails into your board at a 45 degree angle. Repeat the process from two different directions to form an “X”. When the nails cross they anchor each other to support the wood piece you are installing. Awesome, right? Your turn to try it!
Finishing Touches for the Hallway Cabinet Storage
You know me and the finishing touches. It’s what brings everything together and adds the magic and the end of your DIY project. Not saying you won’t run into problems, that happens to me plenty of times, but it is the pretty part.
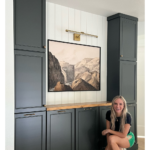
I decided to add some art, from my friend @juniperprintshop. The only problem was, that I couldn’t find a frame that I loved, and framing large art is expensive. So, in true Angela Rose form, I built my own LARGE frame.
Step 1: Create a Backer Board
I went to my extra wood pile to see if I had anything that I could use. I didn’t end up having the right size thin board (Eucaboard) so I pieced two together. Was it ideal? No, but life isn’t always ideal. And DIY is all about getting creative. Once the sizing was right, I nailed the backer board into place.
PRO-TIP: Always nail in the middle first. That way, the board “holds itself” in place while you make sure everything is level.
Step 2: Attach the Art
Now, this step is super fancy. Grab some double-sided sticky tape and your art. You may be thinking, “Angela. Did you just say double-sided tape?” Yes, I did! All you have to do is apply the double-sided sticky tape to the back of your art and then put it on the backer board. When putting up the art, make sure you smooth from the middle out to the edges.
! I love that there isn’t any glare from the glass and that the velvety matte finish of the print can be enjoyed.
Step 3: Build the Frame
Frame time. I cut down ½-inch wood strips to create the frame that I ultimately decided to paint black. In my opinion, every room needs a little bit of black to ground the space. Once the wood strips were dry, I grabbed my nail gun and attached them around my art print.

The last finishing touch for this project was hanging a picture light above the dreamy large wall print. Think beauty over function because I didn’t actually wire it in. But, it looks awesome so it is totally worth it, right?
To install a light without wiring, you remove the metal plate from the light fixture, screw the metal plate to the wall, and attach the light fixture to the metal plate.
How to Guide: Hallway Cabinet Storage Reveal
This hallway cabinet storage has been a journey, but I wanted you to know my process so that you could do something similar yourselves too. Remember…Stop pining. Start doing. Use this how to guide: hallway cabinet storage reveal as a jumping off point and make magic happen in your space. Don’t forget to tag me @angelarosehome on Instagram when you do! I want to be a cheerleader for you like you were for me on Instagram and TikTok while this project came to life. And if you weren’t hanging out with me then, come hang out with me now.
Disclosure: I only recommend products I would use myself and all opinions expressed here are our own. This post may contain affiliate links that at no additional cost to you, I may earn a small commission. Read the full privacy policy here.