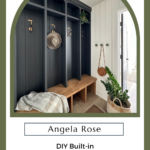
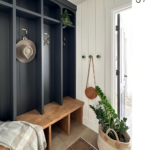
Sometimes when I start a project, my vision for it changes along the way. For the most part, this DIY built-in mudroom project turned out pretty close to what I imagined. I combined a few different elements from the inspiration photos and put together a list of my must haves: moody paint, a stained bench, vertical planking, gold hooks, and the finishing touch – arches! While I debated doing open or closed lockers, I figured the extra step to open the lockers and hang a backpack wouldn’t work well for my kids. So I went with open dividers and I love the way it turned out!
I’m sharing with you all the steps I followed to create a DIY built-in mudroom for my kids (and myself!) in our house.
1. Clear the Space and Tape Out Your Design
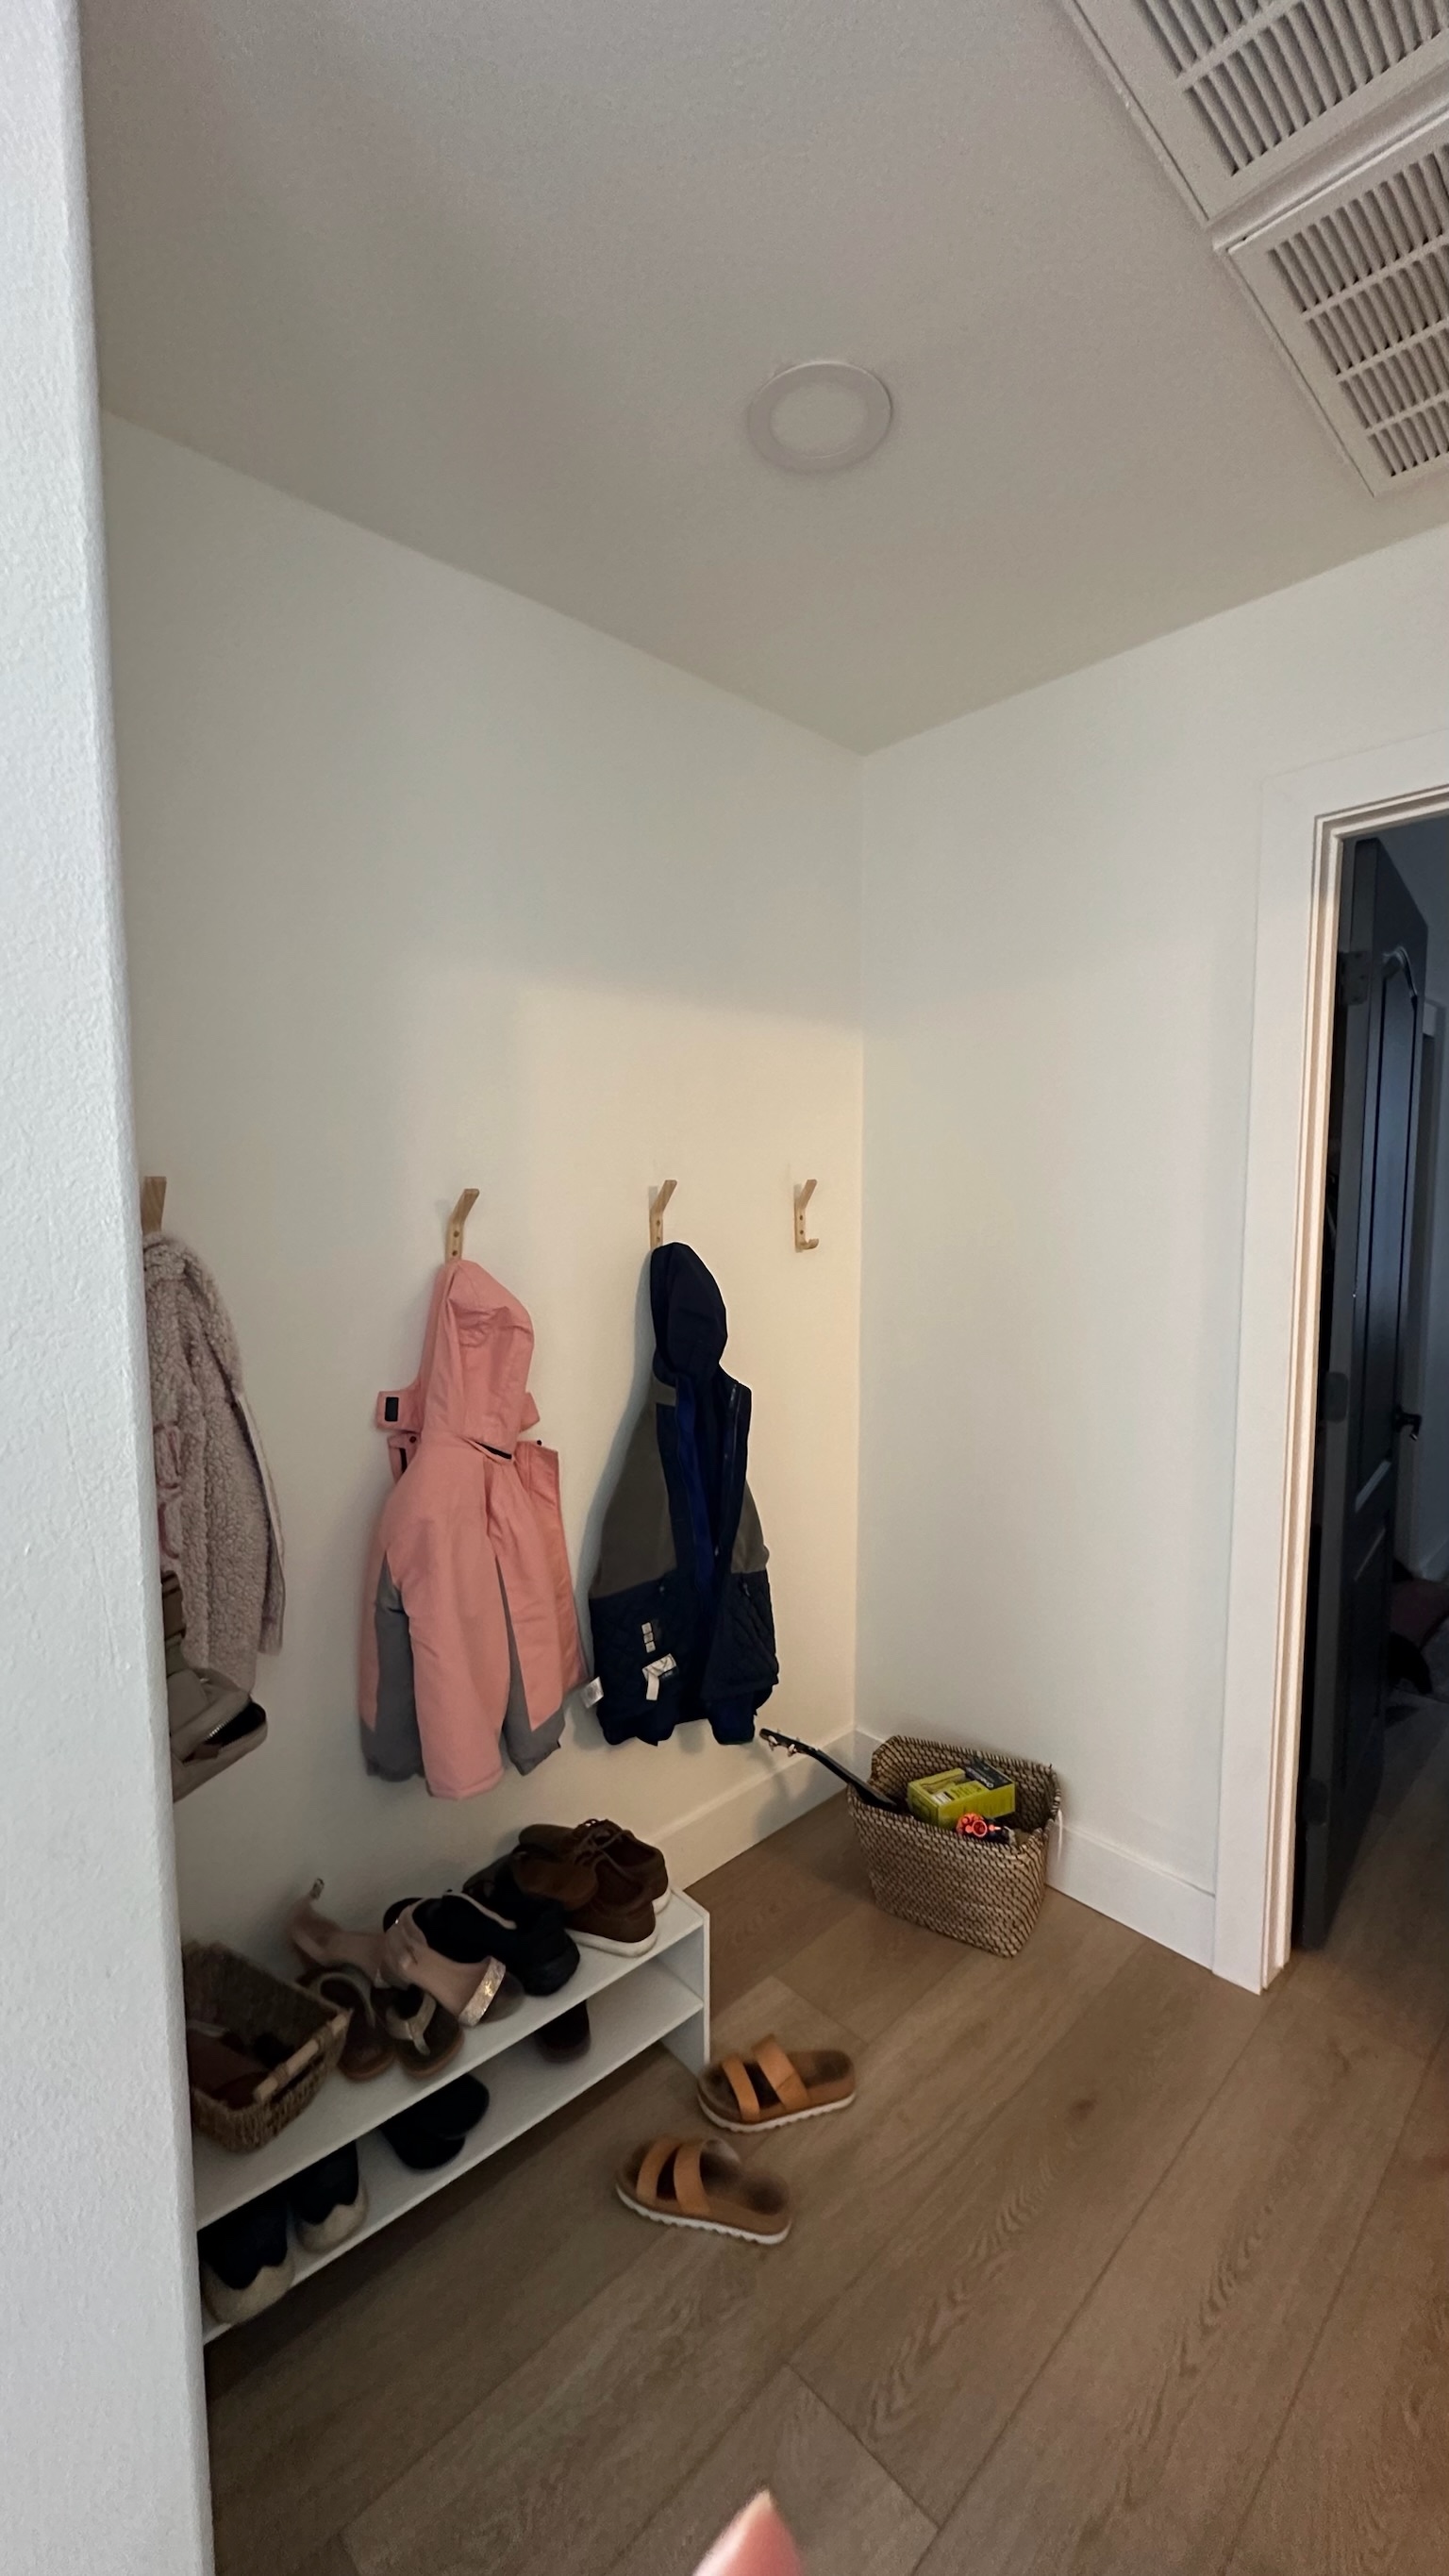
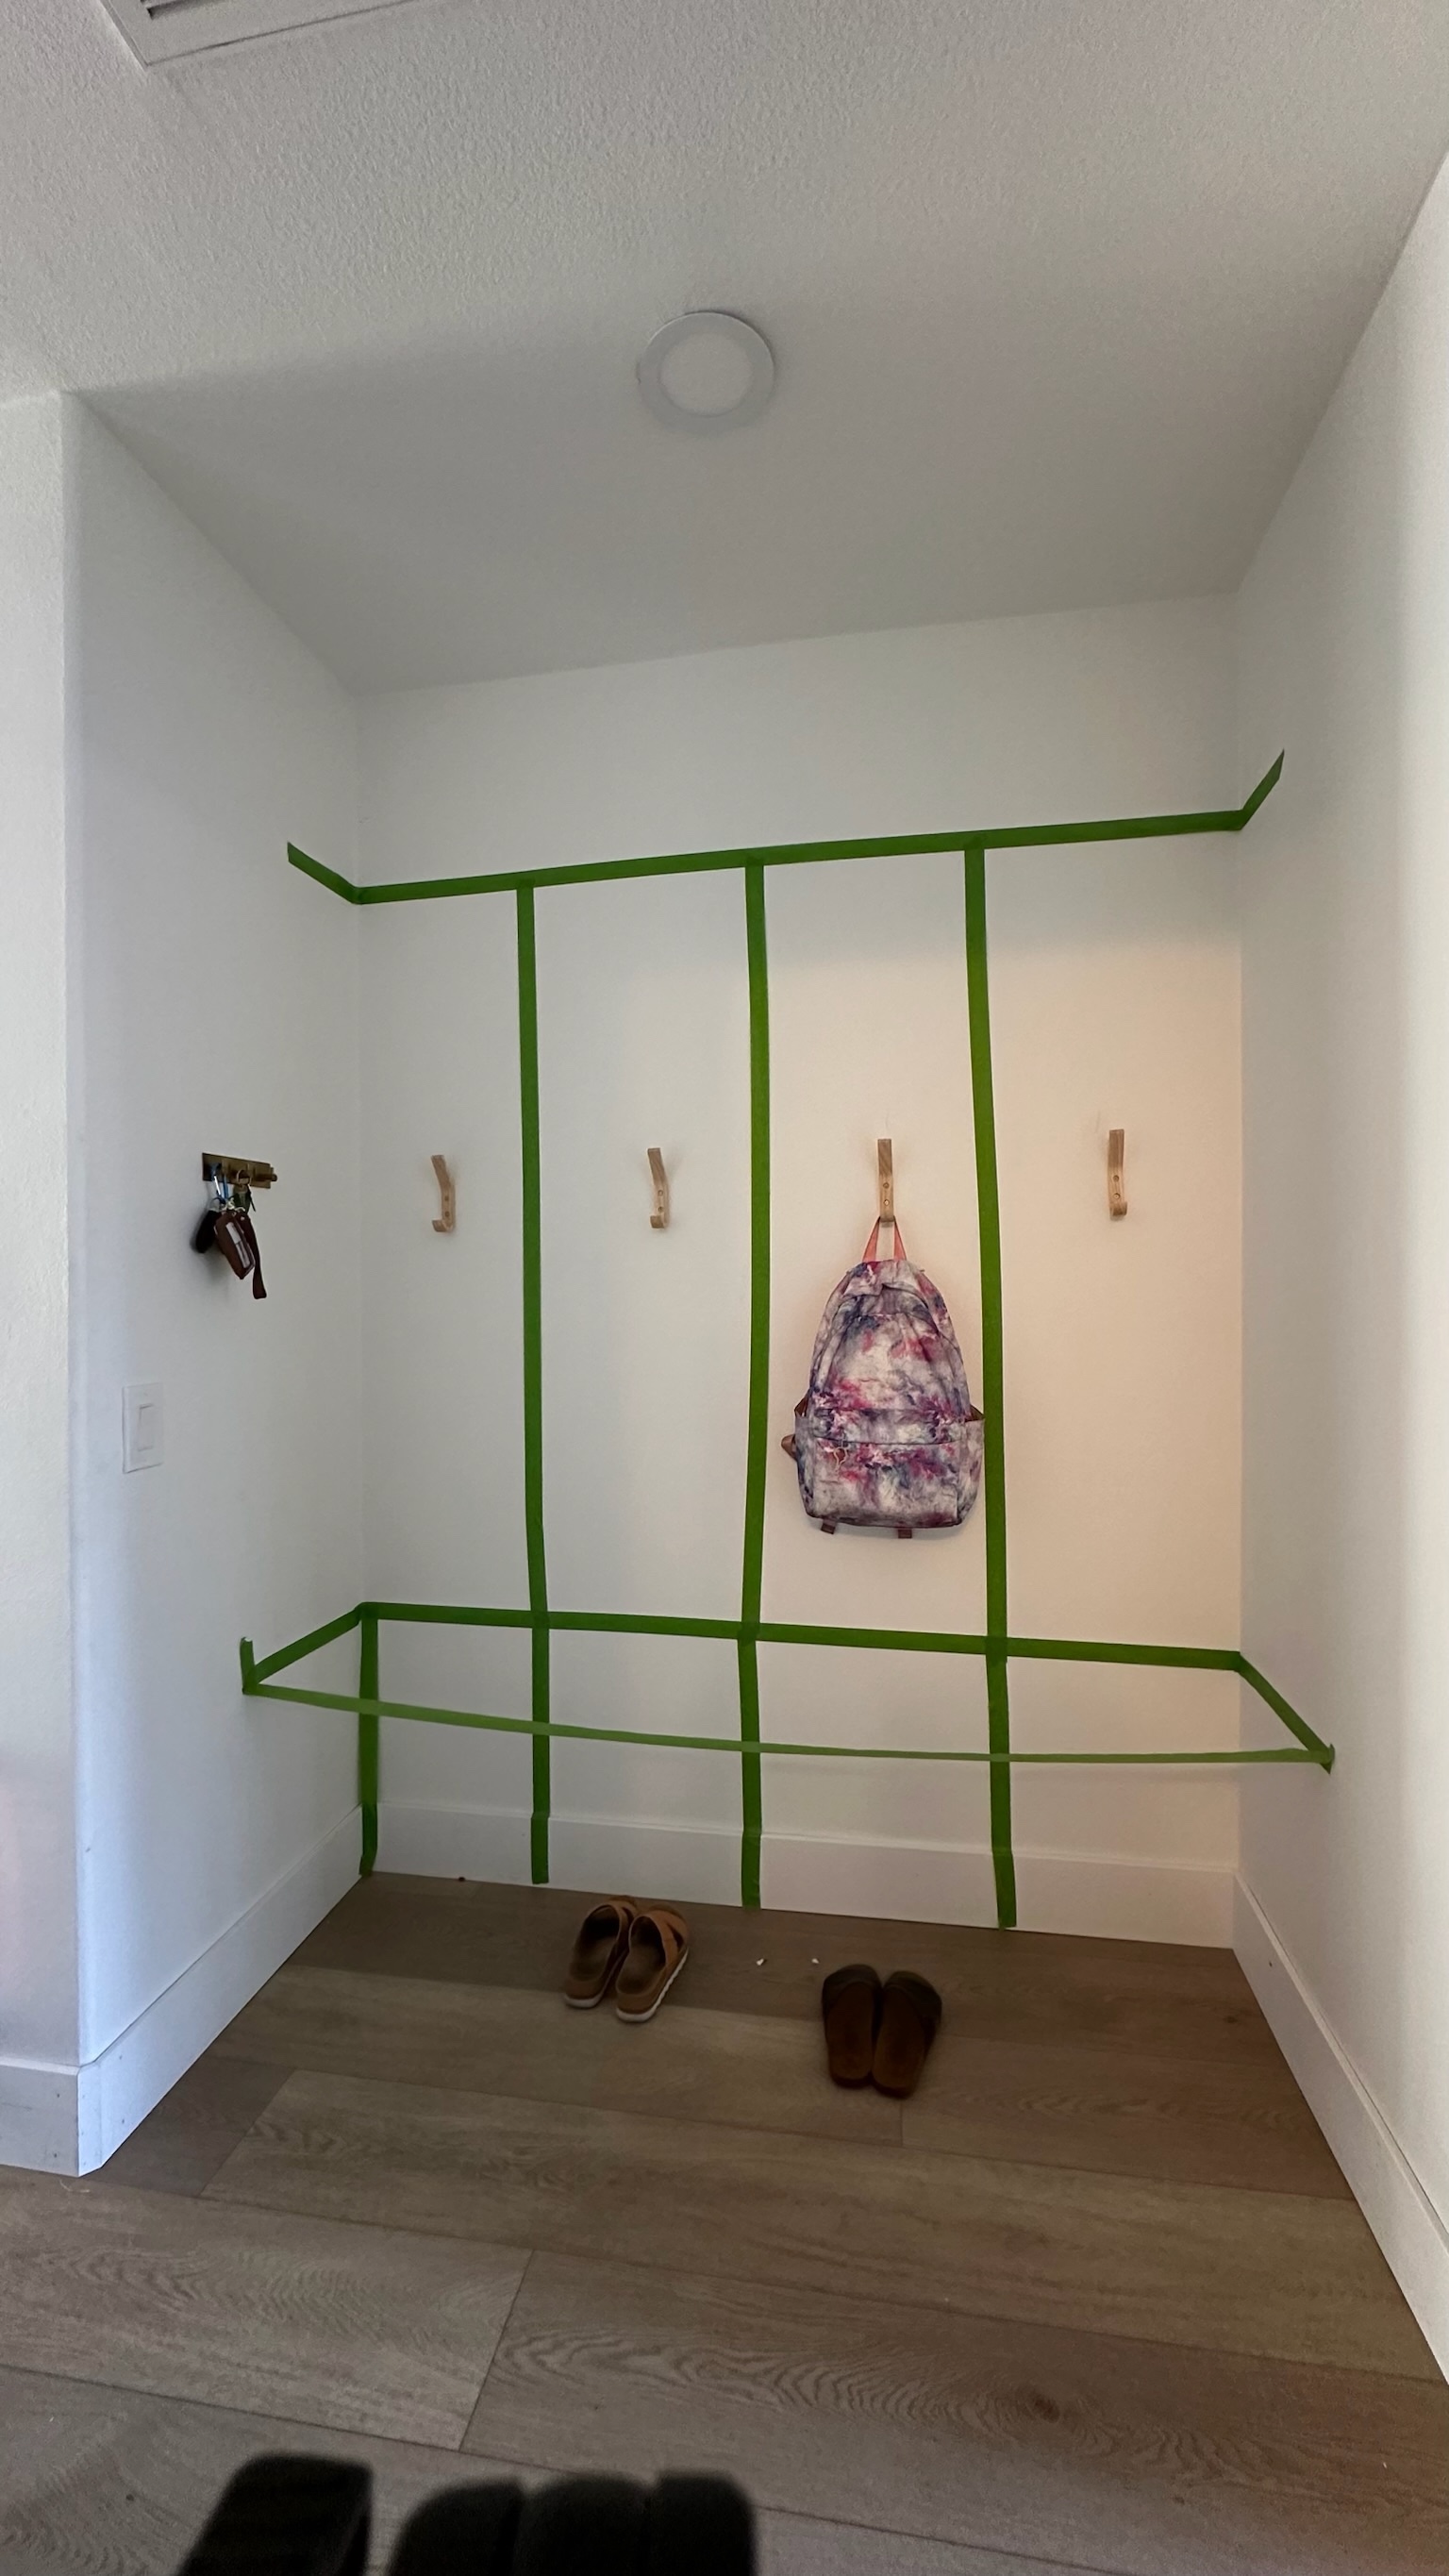
First, empty out the space where you’re going to add the mudroom. The photo above shows what our space looked like before. We had a small shoe rack and some wall hooks, but I wanted something a little cleaner and more organized. If you’re doing a built-in, remove the baseboards in that area. Then, I like to use painter’s tape to help me visualize a project from the start. This helps me see if the dividers are the right size and make any necessary adjustments. Make sure the bench is at a height that will be comfortable to sit on.
2. Measure and Cut Your Wood
Once you’ve decided on the design, it’s time to measure and cut your wood. If you don’t have all the tools at home, you can ask the workers at the hardware store to cut it for you. This also makes it easier to carry. I used primed plywood for the cubbies. The bench top is ¾ birch plywood. Remember to include trim pieces, like a 1×2 select pine to finish off each section.
Pro-tip: Check your boards to make sure they’re all straight by looking down each side.
View this post on Instagram
3. Assemble the Bench and Locker Frames
This is the fun part when things start to come together! I assembled the bench, then the lockers, and finally the top shelves. Make sure each of the vertical dividers line up. Use a level and test your bench to make sure it’s stable before moving on to the lockers. Nail each section together. I attached the bench and the middle dividers together, then anchored all of them to the wall. I assembled the top cubbies in the garage and then attached the entire piece to the top of the lockers.

4. Add Trim and Anchors to Each Section
Glue each piece of trim onto the front of the dividers. Press it firmly against the boards. Then, secure it with finishing nails. I also put in extra boards at the top and bottom of the middle section to anchor them to the wall. This provides a foundation for the planking in the next step.

5. Add in Planking
If you want to do vertical planking like I did, you’ll add it next. The boards we added in the previous step give the nails something to grip onto when you add the planks. I used 6-inch wide MDF shiplap from @84lumber. You could just add the shiplap to the main section of lockers. But if you’re crazy 🤪 like me, you’ll want to add the planks under the bench sections and in the top cubbies as well. Better to do it now than regret not adding it in later, right?

6. Design and Install Arches
The next step is the arches! I love how timeless the inspiration photo from @plankandpillow was. I knew I had to add in this finishing touch. I went the unexpected route for this and used a flexible ruler to design my arch template. I measured 4 points on each side and made sure they were level with the opposite side. You could also trace a plate or use a pencil and string to make it symmetrical on both sides. I cut out a board with my four arches across the top and nailed it to the top cubbies as the top piece of trim.
7. Sand and Caulk Everything
I know you’re probably getting anxious to paint right now, but don’t forget to sand everything! This is one of the most important steps to be sure your paint comes out flawless. I caulked and sanded the mudroom for 11 hours before it was ready for paint. Make sure your edges are smooth and add caulk to the corners. Use a finger to smooth out the caulk so there aren’t any drips.
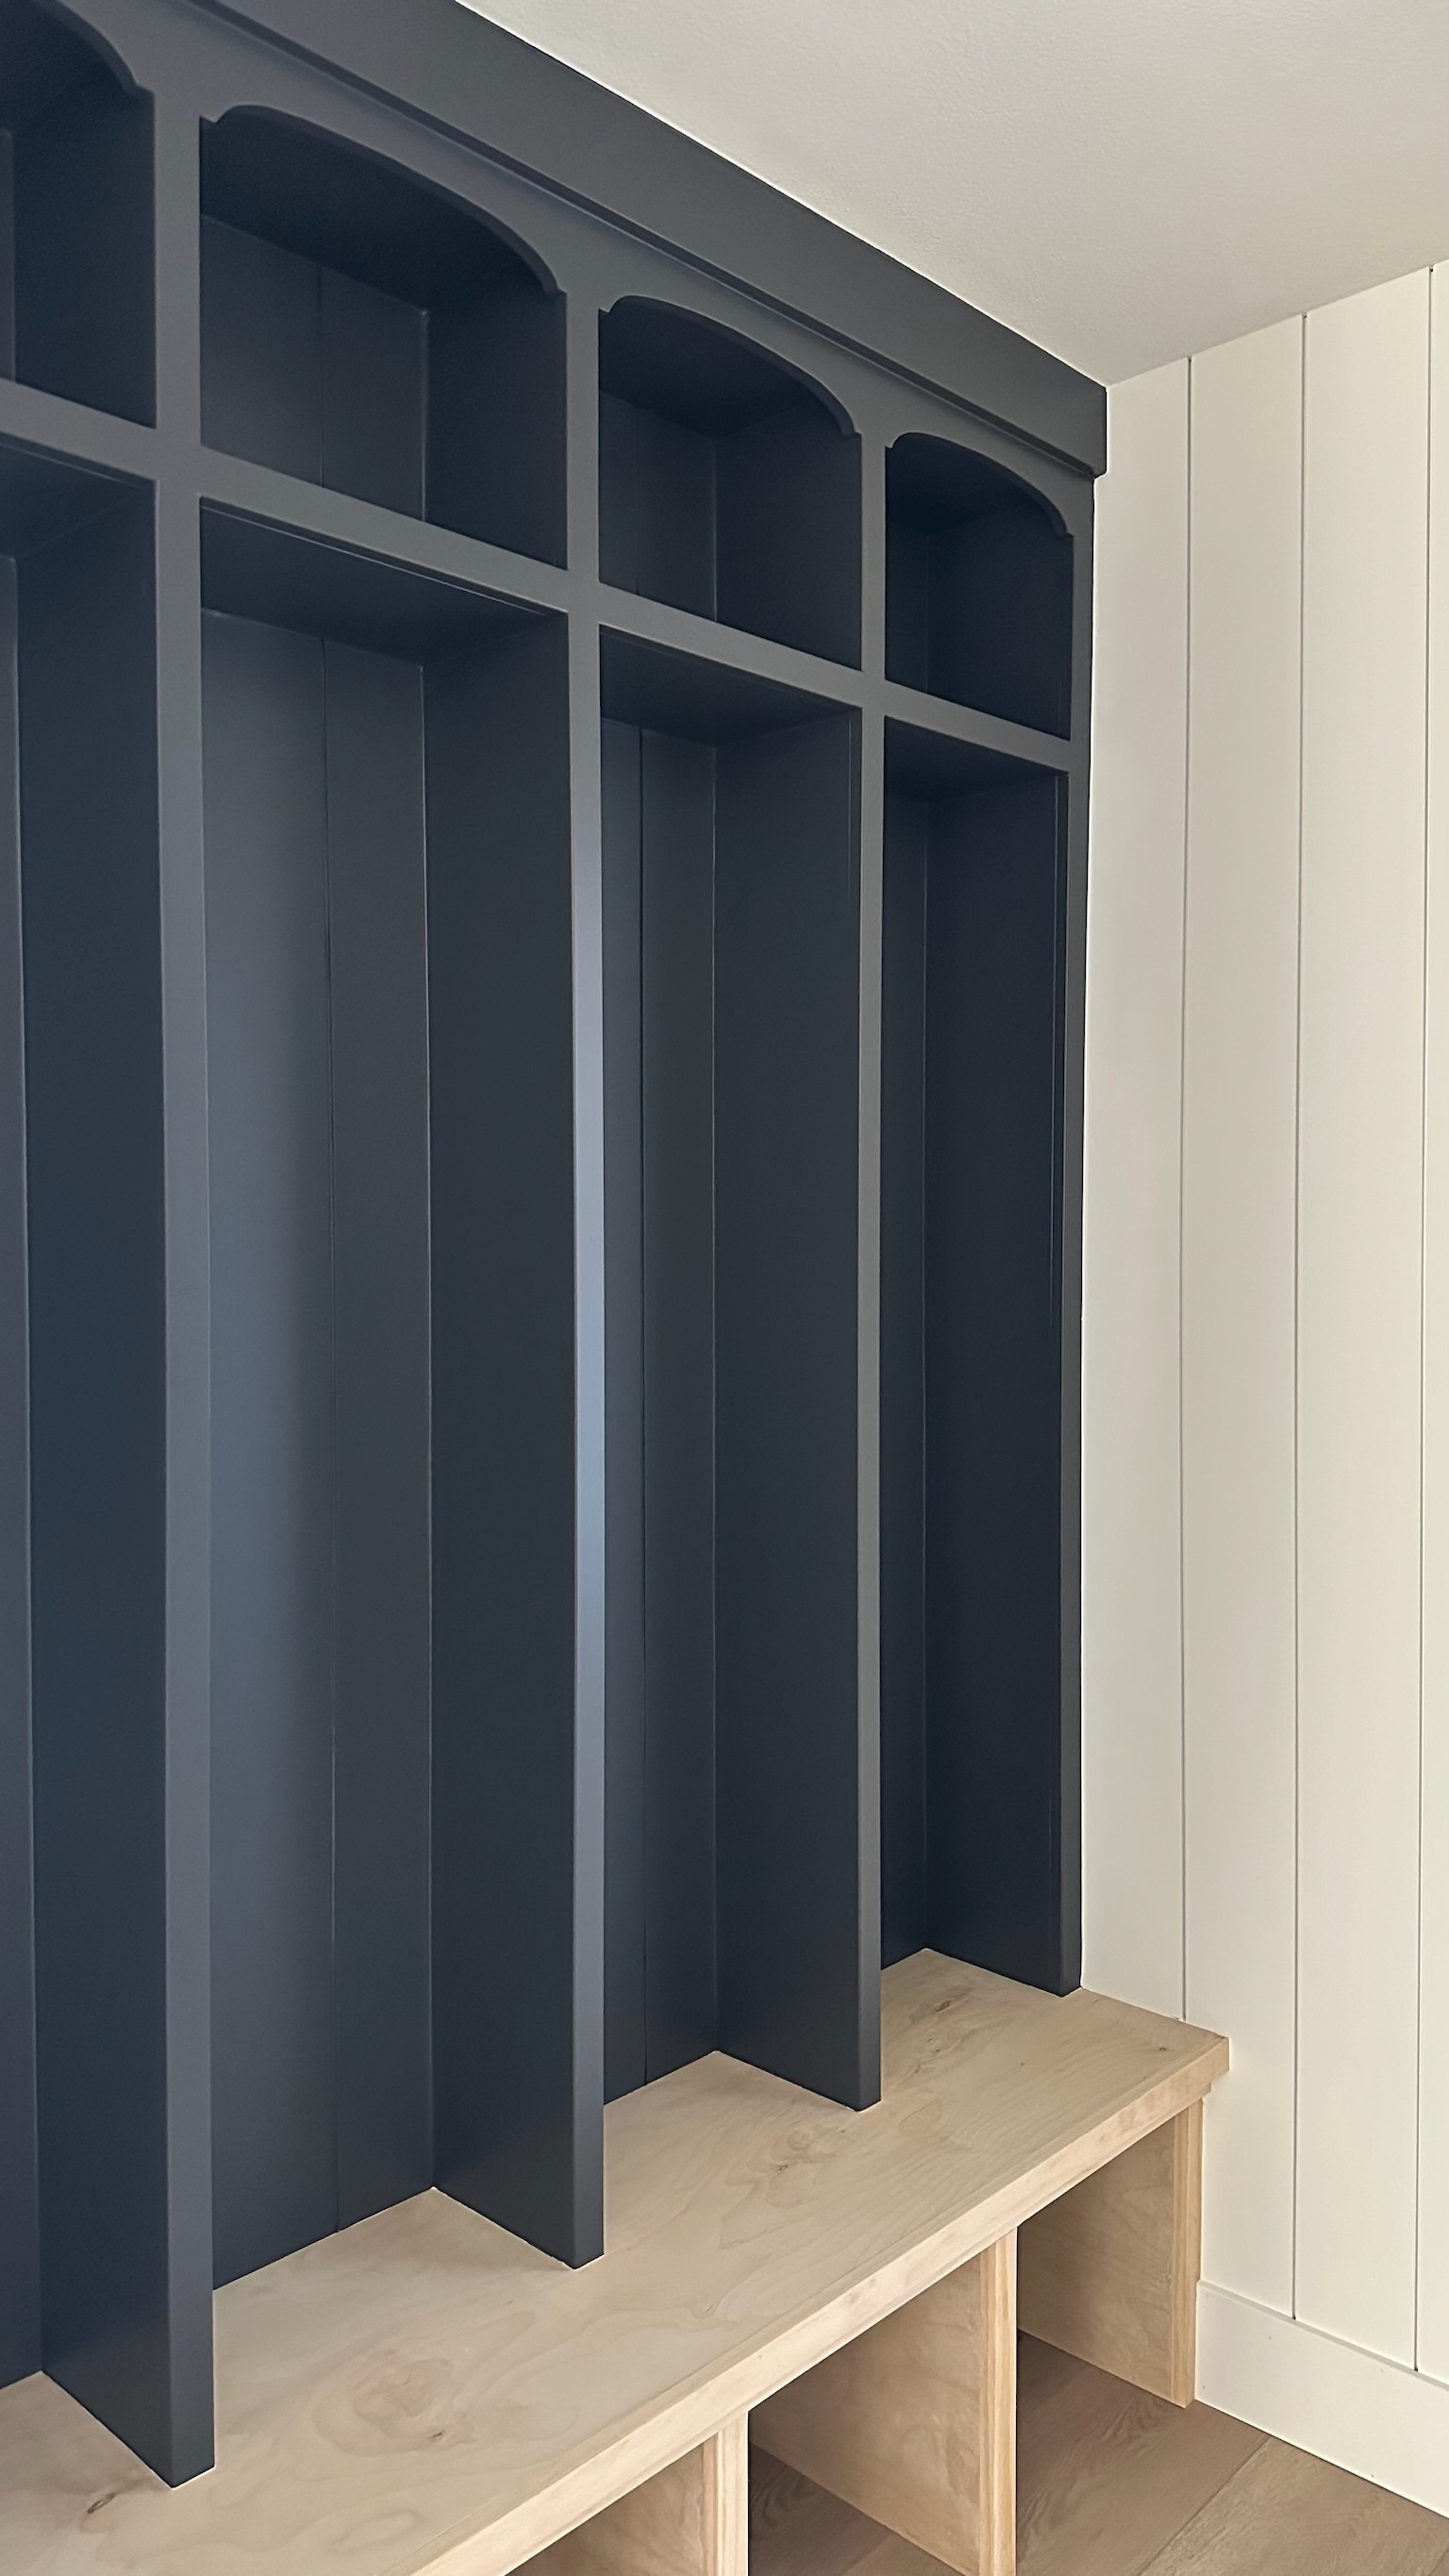
8. Paint the Lockers
Next, it’s finally time for paint! Use painter’s tape and a drop cloth and cover any areas you don’t want painted if you’re using spray paint. I went with Iron Ore by Sherwin Williams for the color because I love the moody hue and it matches the doors in my house. It’s the perfect soft black/gray/blue. Cover up the bench with plastic because we’ll stain that later on. First, you’ll want to prime each section. Then, spray paint the locker sections and top cubbies, making sure to get into all the corners. Let it dry a bit and then come back and do a second coat of paint.
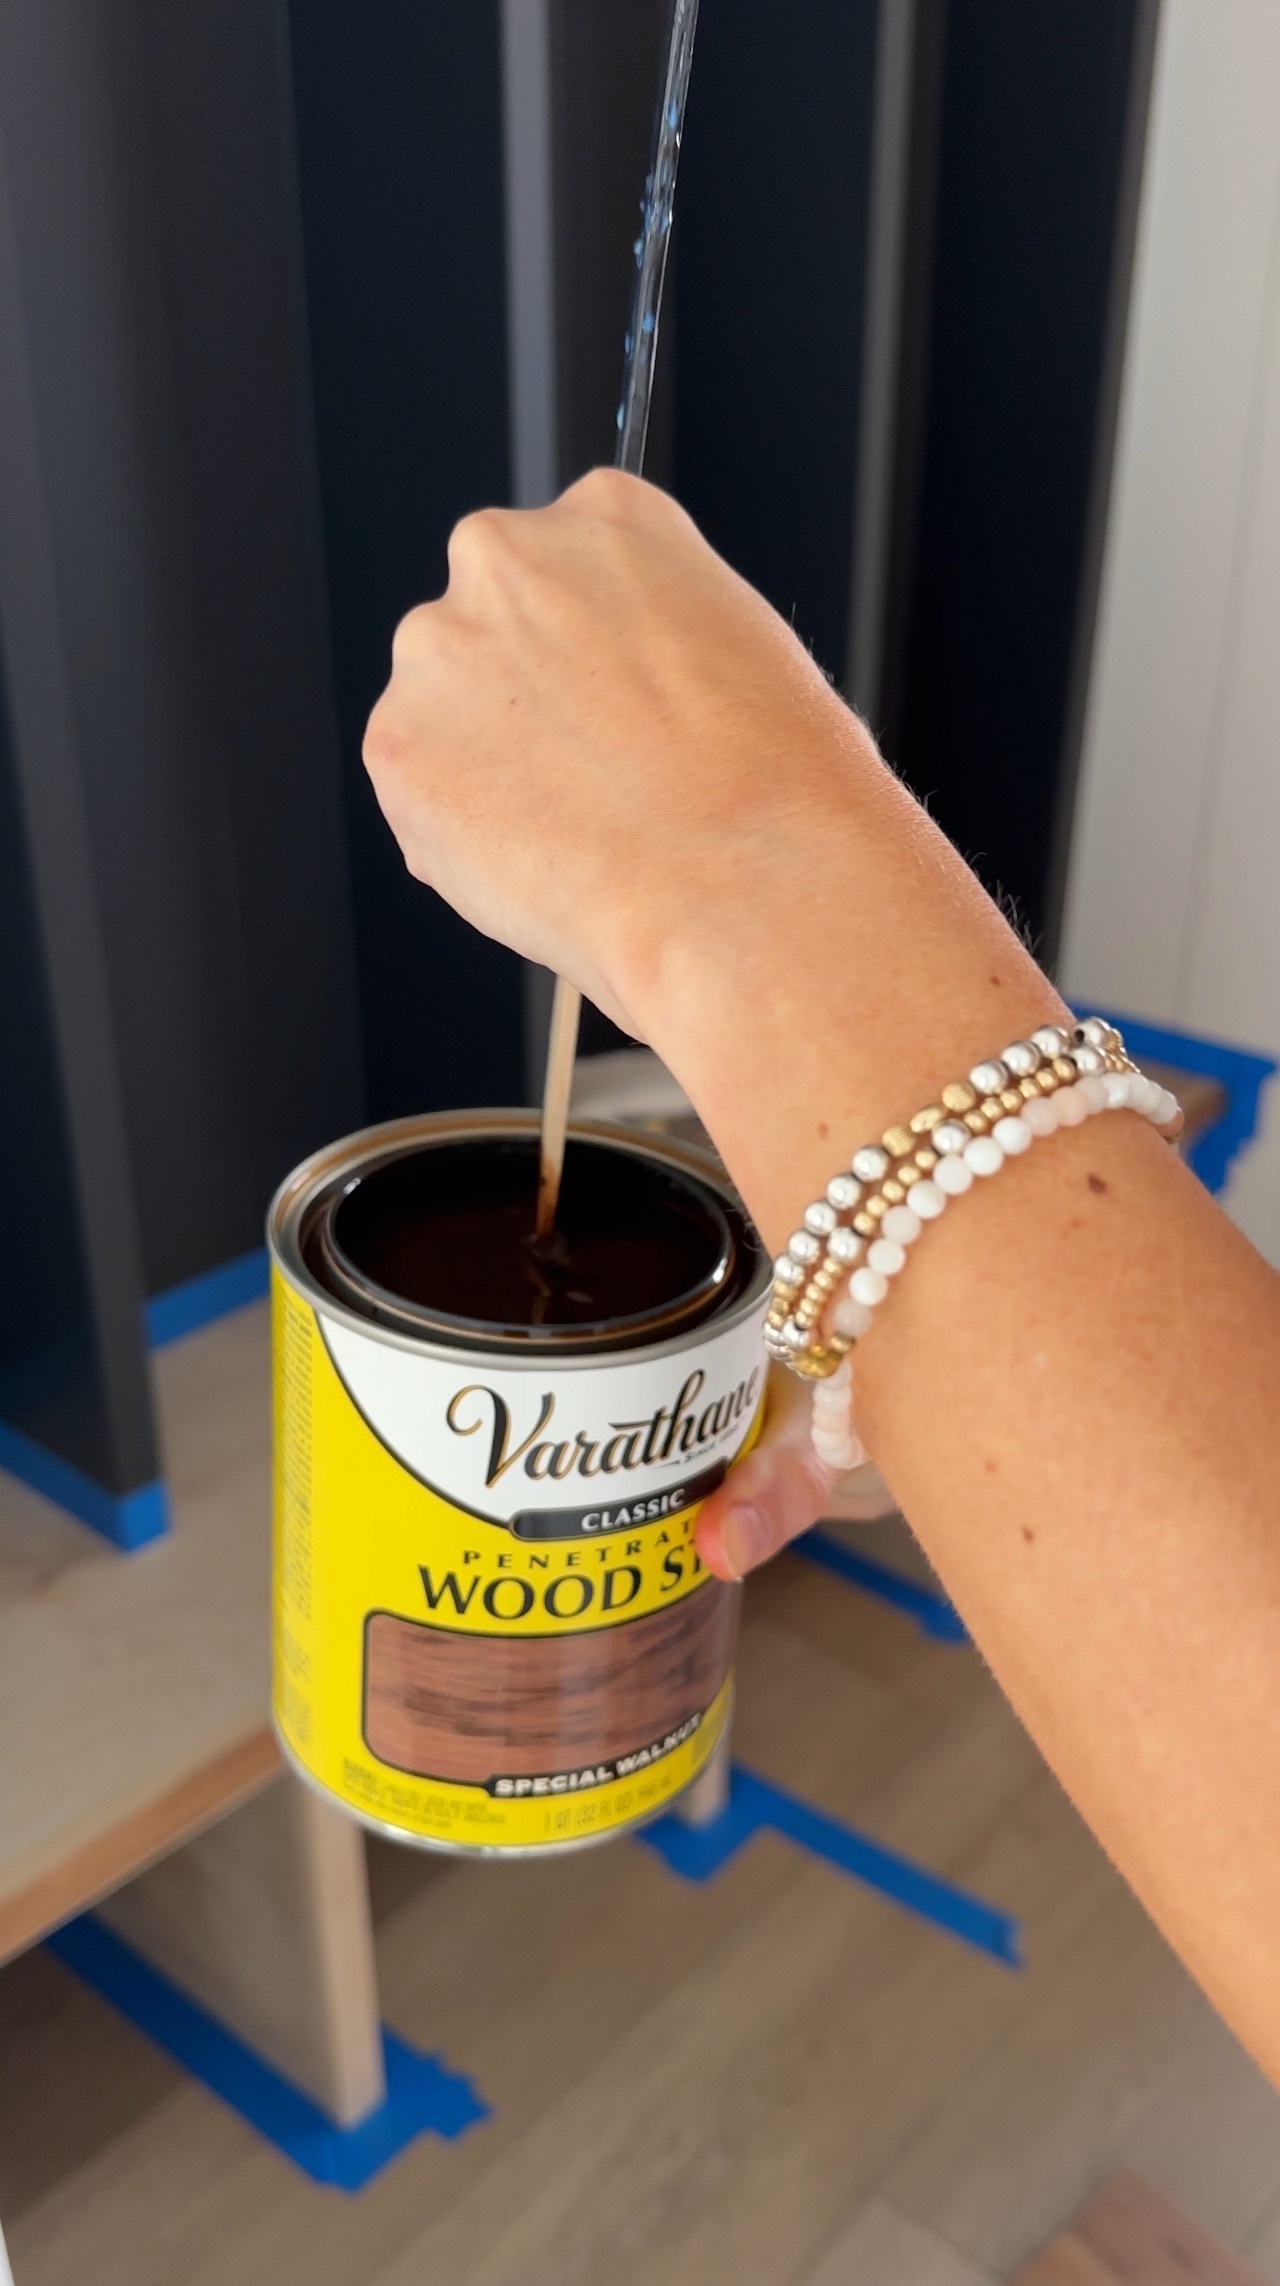
9. Stain the Bench
Once your paint is dry, remove the tape and drop cloths. Get your stain and brush ready. If you’re deciding between two stain colors, you can test them out on some scrap pieces of wood. I used the color Special Walnut by Varthane. Gently brush it over the top of the bench, bottom trim pieces, and planks underneath (if you added them). Make sure to do two coats of stain as well.
10. Add Hooks and Nameplates
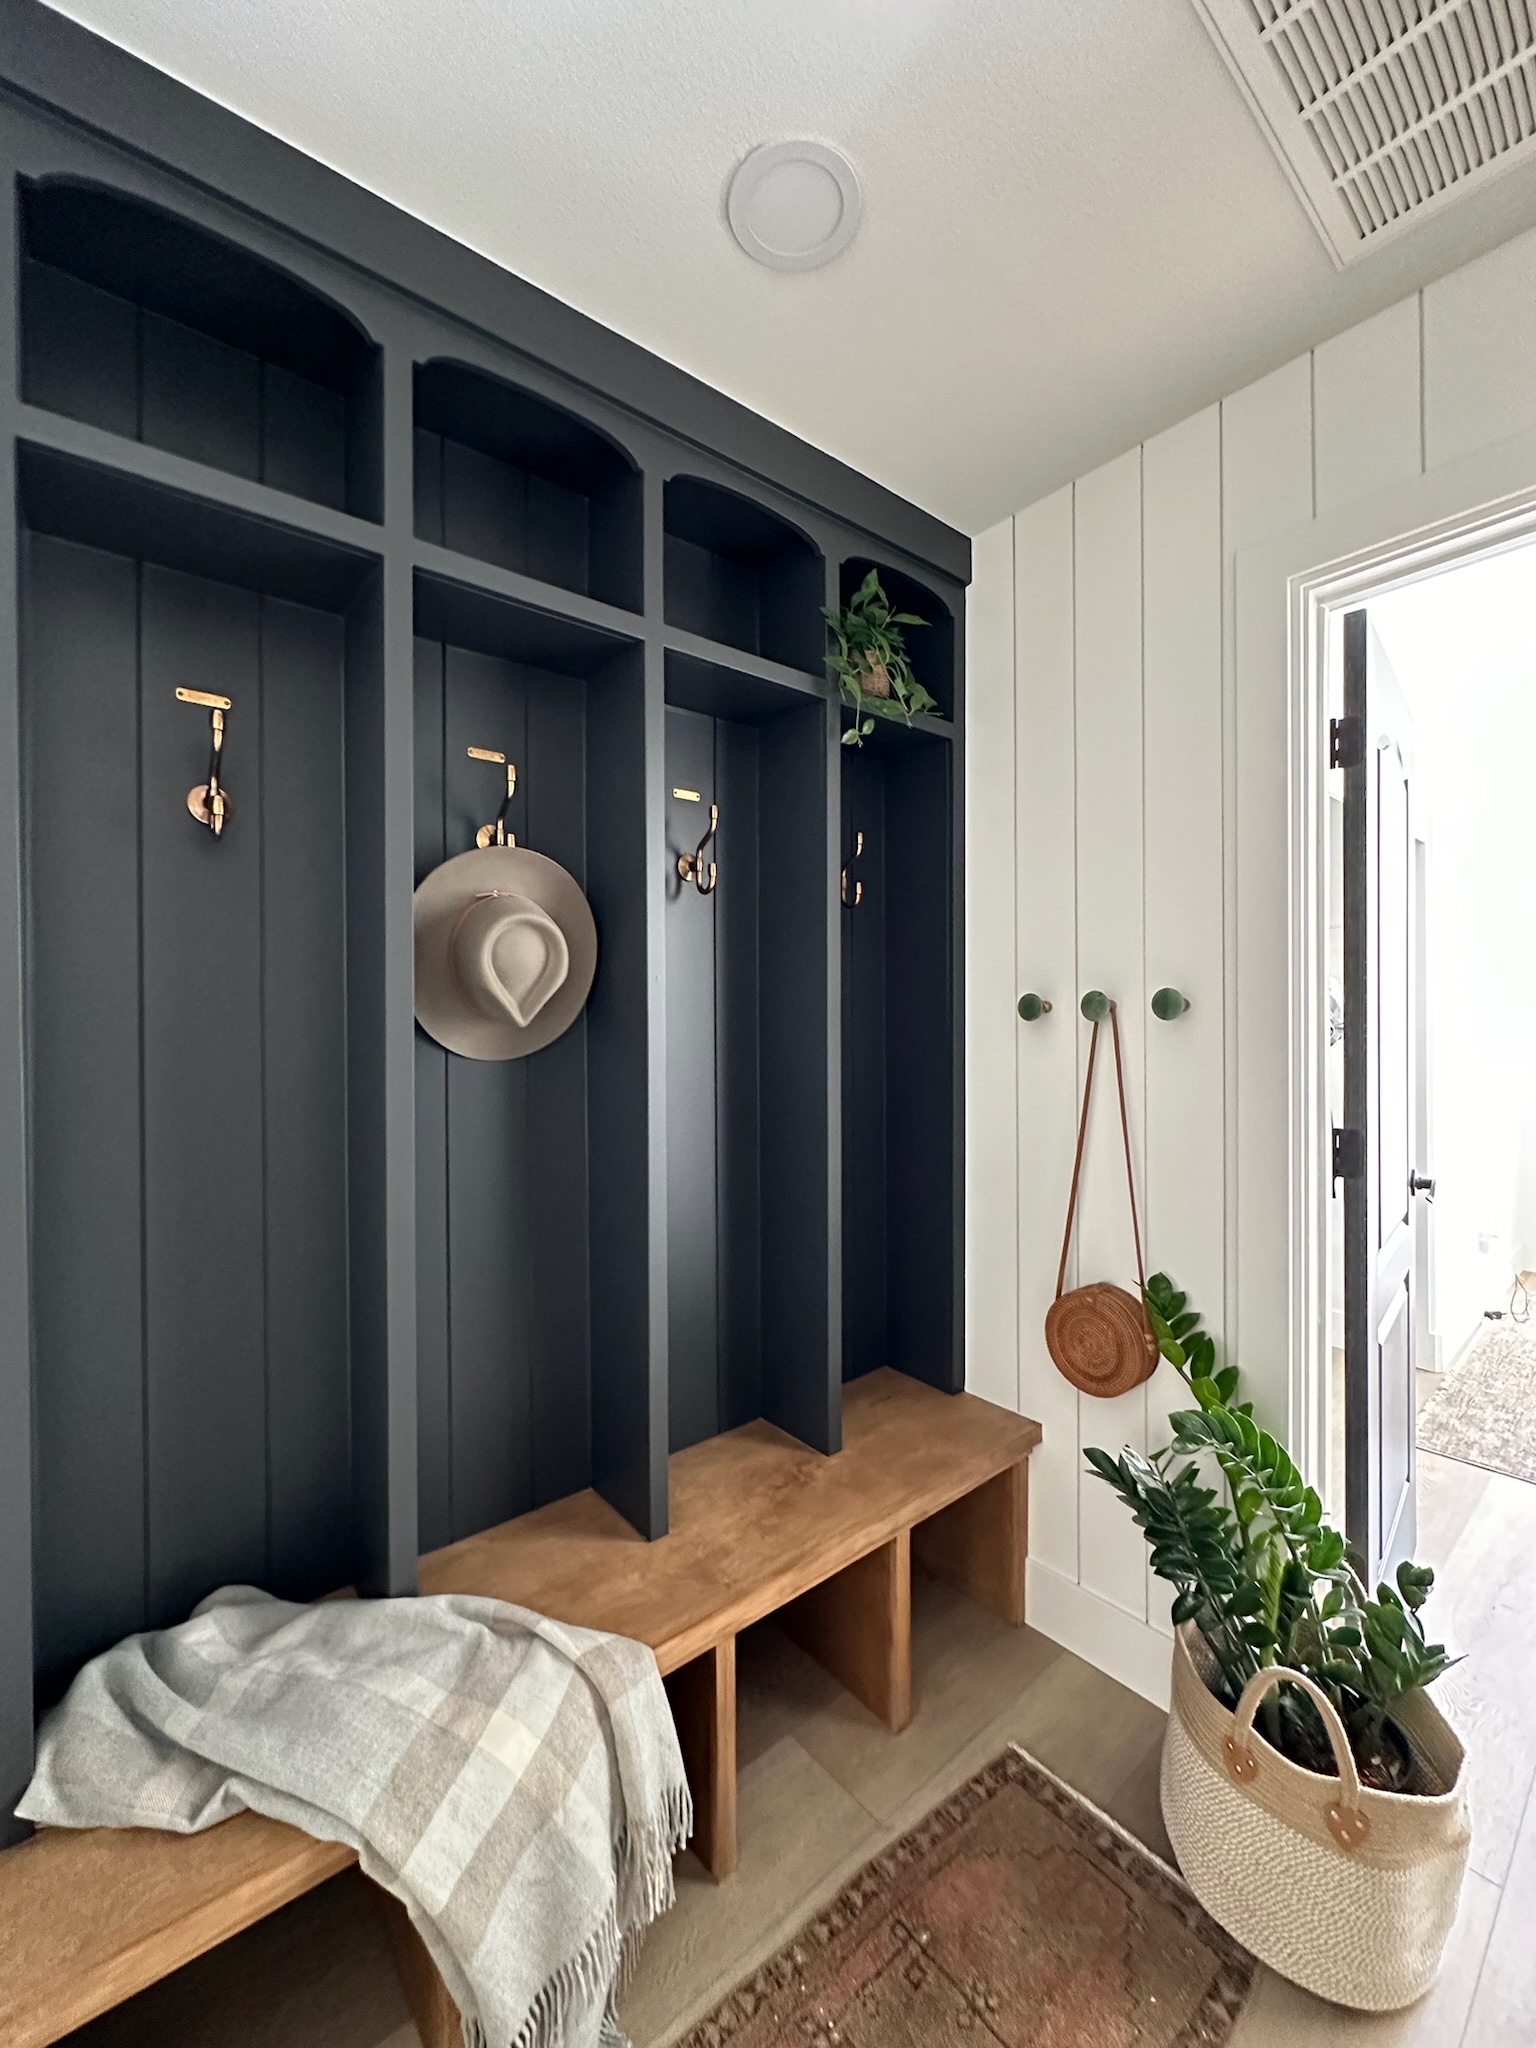
Finally, you’ll add in the hooks! I ordered a few different options for hooks and knobs that you can find HERE. My favorite was the gold double hook from Rejuvenation. But in true Angela fashion, I had to make it a little different. I decided to do an aged unlacquered brass finish. It was super easy and gave it a more antique look that I was going for. Just dip about half of the hook in the liquid for 7 seconds and then flip and do the other side. Wipe each one dry and use steel wool to buff.
Before and After:


Attach the hooks to each section. For small bags and purses, I added a few knobs on the side wall. I also added a nameplate for every member of our family. There was a big debate about what mine should say (Mom vs. Angela). In the end, Angela felt more like me!
DIY Built-in Mudroom
I’m so in love with the way this DIY built-in mudroom turned out! It was definitely a labor of love, but in the end, it was so worth it! I’m always so proud of myself when I finish a project and it turns out even better than I could have imagined. It’s not only a functional space that we use every day, but it’s also a beautiful spot that matches perfectly with the style of the rest of the house.
Make sure you are following me on Instagram and TikTok so that you can see all my latest DIY projects and building tips. Whether you’re a beginner or a more advanced DIY-er, I’d love for you to follow along!
Disclosure: I only recommend products I would use myself and all opinions expressed here are my own. This post may contain affiliate links that at no additional cost to you, I may earn a small commission. Read the full privacy policy here.