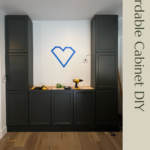
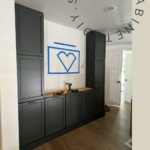
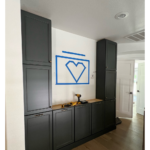
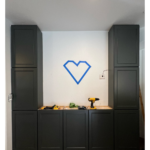
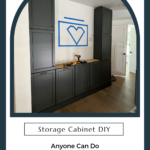
Have you ever wondered what to do when you don’t have storage? We DIY-ers know…you make your own! I love building projects from scratch, but it is also totally fine to be resourceful in order to make things easier. Recently, I have been updating the hallway in my home to add storage cabinets. Come along with me to see my project. It is a storage cabinet DIY that anyone can do.
In our house, we don’t have a lot of storage. So, I’ve been dreaming up ways to add more storage in the underutilized pockets of our home. If you have been hanging out with me for a while, you know I love built-ins. Who doesn’t, right? The problem is that built-ins can be really expensive. I was looking to create storage without costing a ton. Because of this, I needed to find a way to get a built-in look at an affordable price.
Once I realized the hallway was the perfect spot for adding additional storage, I got to work making a plan. I knew I wanted the storage to look like it had always been there, and I wanted the project to be affordable. That is why I landed on premade stock cabinets as my solution.
Home Depot carries unfinished cabinet boxes in-store (not online or else you know I’d have a link for you) and they run about $70 for each cabinet box. Since the cabinets are unfinished, they can easily be adapted to fit the needs of any project. This means I accomplished my goal of creating a customized storage cabinet without spending a ton.
Transform Premade Stock Cabinets to Custom Built-ins
Are you ready to see how I added more storage to my home by using a bunch of premade Home Depot cabinets? Before we can start installing the built-ins, we have to get the walls and baseboards ready. Always, I repeat always, remove the baseboards when transforming pre-built cabinets into built-ins.
Here’s how to do that:
- Cut baseboards with a cordless mini tool
- Score caulk with a blade to separate the baseboard from the wall
- Pry the baseboard off the wall with a crowbar
The reason you want to remove baseboards is that it gives a more custom built-in look. Your cabinets will fit perfectly and always look like they were always meant to be there. And, no one will know that you did this project on your own the easy way! It really is as easy as the three steps above. First, while the baseboards are on the wall, use a multi-tool to cut them to the measurement that your cabinets will be. Then, use a blade to score the caulk at the top of the baseboards you are removing. Then pry the baseboards from the wall slowly so you don’t harm your wall.
Make your Own Base for the Premade Cabinets
The base cabinets that I like using, don’t have a base. So next, we will need to build a base to set the cabinets on top of so that they are off the floor. Plus the base gives you room for a toe kick which allows the doors to open and close. Each cabinet box will need a supported base on the floor. Plan out how many bases you need to create. To add storage to my hallway, I needed a total of 5 bases. If you were following along on Instagram and TikTok when I was doing this step you might remember I initially only made 4 bases. I forgot that I wanted 5 bases in the space instead of 4, but it was no big deal because this step is super simple! Plus, DIY is amazing because you can adjust as you go.
To make the bases, cut 2x4s to fit the dimensions of the cabinets you are installing. Once the wood is the right size, clamp your 2x4s in the right position and screw the pieces together. I promised you this DIY project was going to be easy! Repeat the process until you have all your bases built.
Are You Ready to Assemble?!?
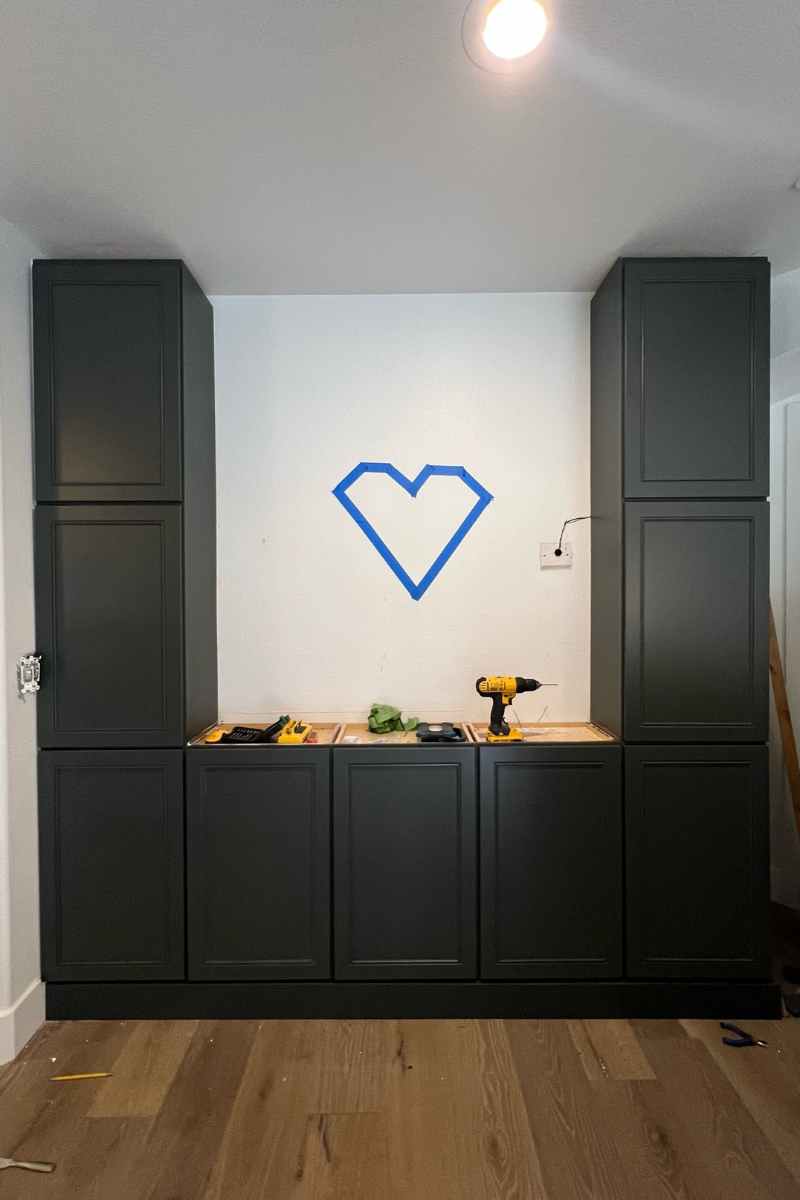
We have done the prep work, now it is time to start putting everything together. To build a base for our DIY built-in storage, we need to anchor our cabinets. From the base, you can add more cabinets vertically as I did, or in whatever configuration that works best to bring in the most storage for your needs.
Once you have your pre-built cabinets on top of their bases, you will want to add a spacer in between each cabinet that touches. This will keep everything spaced right and keep it nice and secure. To do this I use extra wood I have around. The goal is just to keep everything tight. Now that everything is lined up how you want it, clamp the cabinets and spacers together up so they don’t move when you begin screwing things into place. Grab your drill and start screwing your cabinets together to create one large base cabinet. After you check to make sure your cabinet base is level, then you can screw your “new” large base cabinet into the wall. Make sure to find your studs when securing.
Here’s a breakdown of the anchoring process:
- Add spacer in-between cabinets
- Clamp to keep everything lined up perfectly
- Screw individual cabinets together
- Check that cabinets are level
- Screw cabinets and bases into the wall
All that is left is to finish out your custom configuration. For my space, I knew I wanted to continue my storage vertically. And since the base I created is level, all I had to do was build up. I stacked the same pre-built cabinets to create two towers anchoring as I went. I’ve got a plan for the space in between the towers, but I will share that later in a full-blown project reveal.
It is All About the Details
At this point, we have everything built and are ready to move on to detailing. Because we are going for a built-in look we need to caulk the cracks in between the cabinets and the walls. Do you have any cracks between your walls and cabinets are really big from your walls being uneven? Try using foam to fill in the crack before caulking. You stuff the foam in your crack and then you place caulk right over it. Also, don’t forget to use paintable caulk. That way you won’t run into any problems when painting your cabinets.
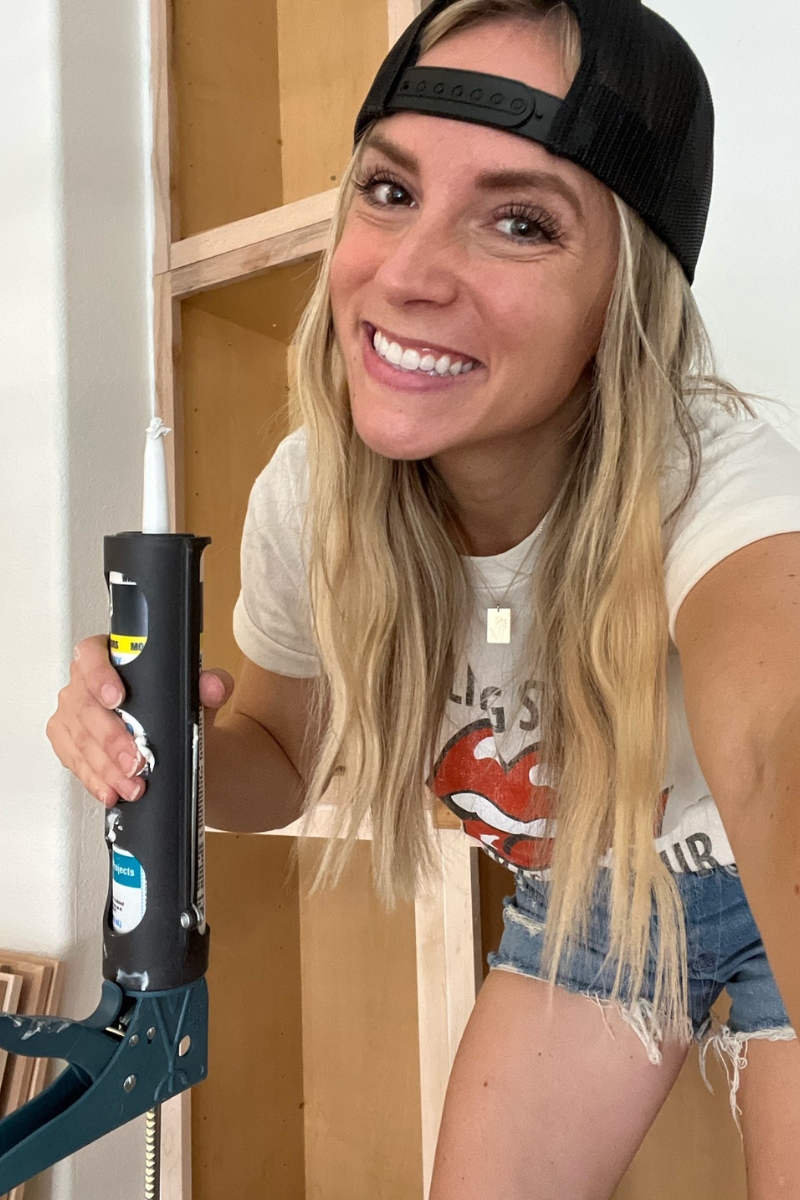
I also needed to cover the sides of the cabinet towers I created. I grabbed some leftover material from my scrap pile and cut it down to the right size on my table saw. Once I knew the panel fit just right, I secured it with liquid nails and my favorite nail gun. I may or may not have written a secret message with the liquid nails.
The last thing I needed to do before painting was to add trim to the top and bottom of the cabinets. Aside from caulking the cracks, trim is what brings a cabinetry project to the next level making look like built-ins that have always been there.
Cabinet Doors for Storage
Next, let’s talk about cabinet doors. I didn’t love the cabinet doors that came with the premade Home Depot stock cabinets, so I ordered some trendy cabinet fronts from Nieu. Have you heard of Nieu? They are amazing! I fell in love with their products when I did my kitchen remodel and now I use their products any chance I get.
If you aren’t sold on the premade stock cabinet doors either, use code ANGELAROSEHOME5 to get 5% off your order with Nieu. Nieu has so many different cabinet door options from slim shaker to cottage style. I guarantee they will have a style you love!
Before installing my Nieu cabinet door fronts, I painted the cabinet boxes to match the slim shaker door fronts I picked. Which is easy because all of Nieu cabinet doors have matching Sherwin Williams colors. Then I installed slow-close hardware which I purchased from Nieu as well. The last step to finishing the cabinetry was installing the brass hardware I upgraded to look antique. When everything was put together it looked so dreamy! It’s all about the details for me.
Storage Cabinet DIY Anyone Can Do
So, what do you think about this storage build? Are you ready to tackle your own DIY storage built-ins? I know this project may seem daunting, but really, anyone can do this. Don’t forget to tag me @angelarosehome on Instagram when you start tackling your own storage project. Then make sure you’re following along on Instagram and TikTok for more fun project updates. I’m still finishing this hallway storage cabinet area and I would love to have you with me while I wrap the project up. Remember, it is when you stop pinning and start doing that the magic happens.
Disclosure: I only recommend products I would use myself and all opinions expressed here are our own. This post may contain affiliate links that at no additional cost to you, I may earn a small commission. Read the full privacy policy here.