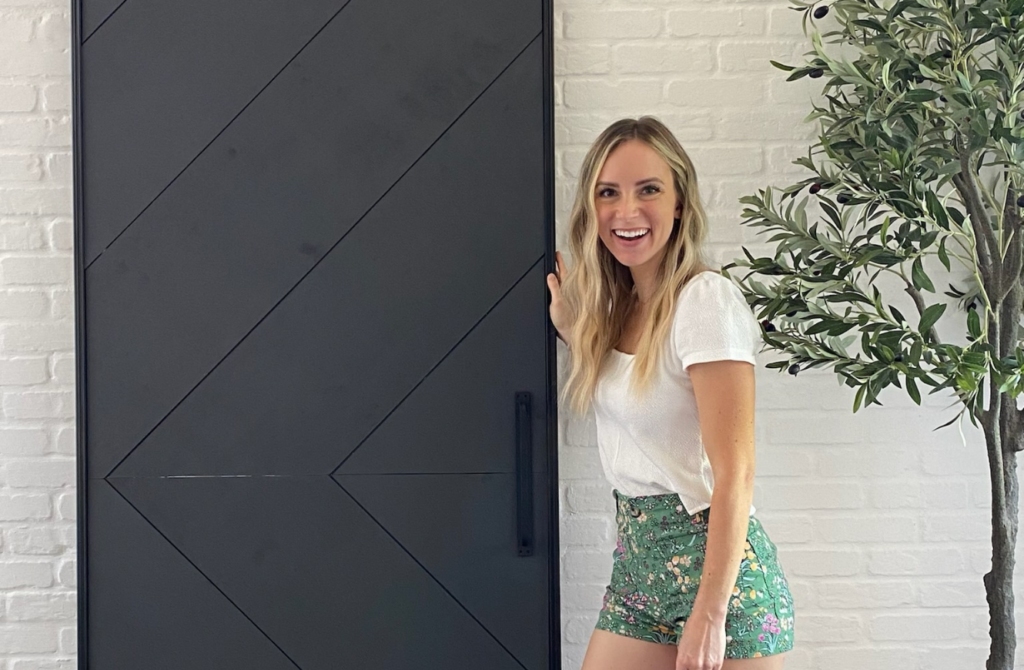
$20 DIY Closet Mirror Door Makeover
I decided to take my old gold mirror closet door and upgrade it! Because life is too short to not love your closet doors, right? Right! Recently I shared with you how I DIYed my son’s closet shelves, but you know I couldn’t stop there. The old gold mirror style door was almost 25 years old and was killing the whole vibe of his room. And instead of spending the money to buy an entirely new door, I DIYed this one for only $20! Plus it’s a super easy DIY project for beginners. Which makes this $20 DIY closet mirror door makeover easy, beautiful, and affordable! I know you’re going to love it, let’s get started!
What You’ll Need for This DIY Closet Door Makeover:
Plywood
Gorilla Heavy Duty Construction Glue
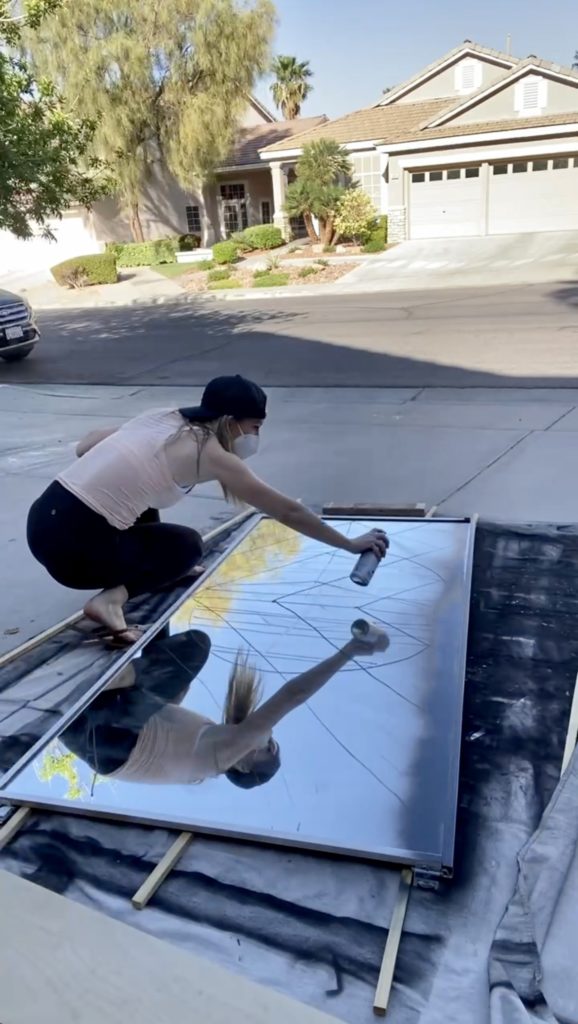
Getting Rid of the Gold Trim
To start, I needed to get rid of the gold trim. You’ll want to take the door out of the closet frame and start by cleaning off any dust on it. Then I brought the door outside and laid it on an old paint tarp. I used black spray paint to completely cover the entire gold frame of the door. Don’t worry if you get any on the mirror because you’re going to cover it up with wood panels anyways!
Resurfacing Your Mirror Closet Door
Next, you’ll need to pick out one large flat piece of plywood for each door that you are resurfacing. Or you can pick out a few smaller pieces if you can’t find one sheet big enough to cover an entire door. Measure the door you’ll be resurfacing to make sure that you get enough plywood. I used one big sheet of 2.7mm plywood for this project.
Layout and Cut Your Design
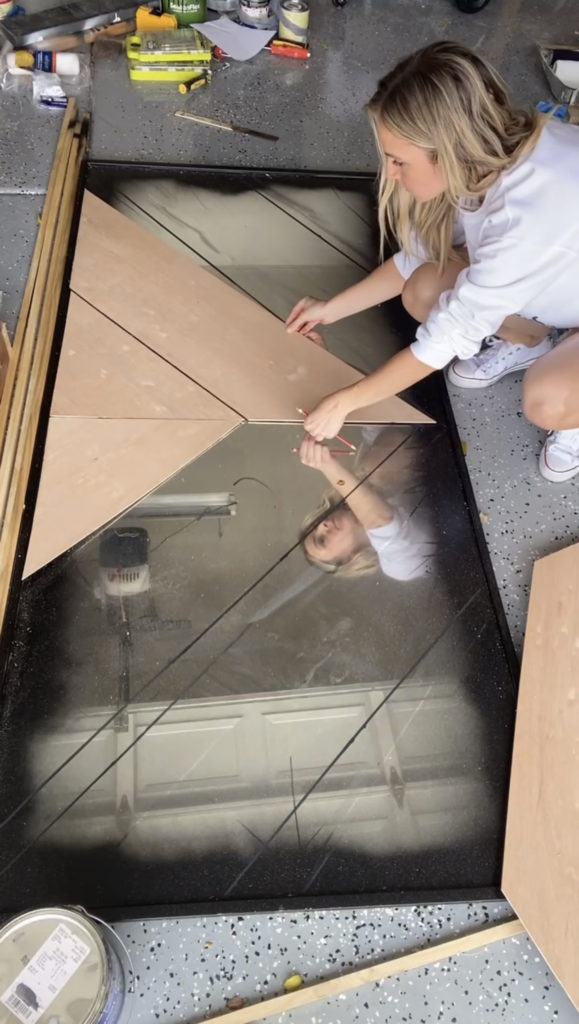
This part is so fun! To envision the closet door layout I quickly sketched a few ways to place the plywood panels; horizontal, vertical, or diagonal. I’ve made a paneled closet door before with a horizontal layout and this time I decided to go with a diagonal pattern.
To make the panel cuts I first measured the door and decided how wide I wanted the panels to be and how many would be needed to cover the door completely. Then I marked the measurements on the plywood and used a miter saw to make the cuts. I suggest making each cut one at a time and checking that each panel fits perfectly on the door.
*In between each panel you’ll want to leave a small gap of about 1/8 of an inch. I used horseshoes tile spacers to keep the gap size consistent.
Painting Panels and Filling Mirror Gaps
Now it’s time to paint the panels! I decided to paint the plywood the same color as the shiplap ceiling I DIYed in the same bedroom it was going in. The paint color is Ore by Sherwin Williams. Before applying the paint I lightly sanded the edges of the plywood to get rid of any splinter pieces that might be sticking out. Then I used a paint roller to paint the panels. To avoid warping you’ll want to paint both sides of the wood.
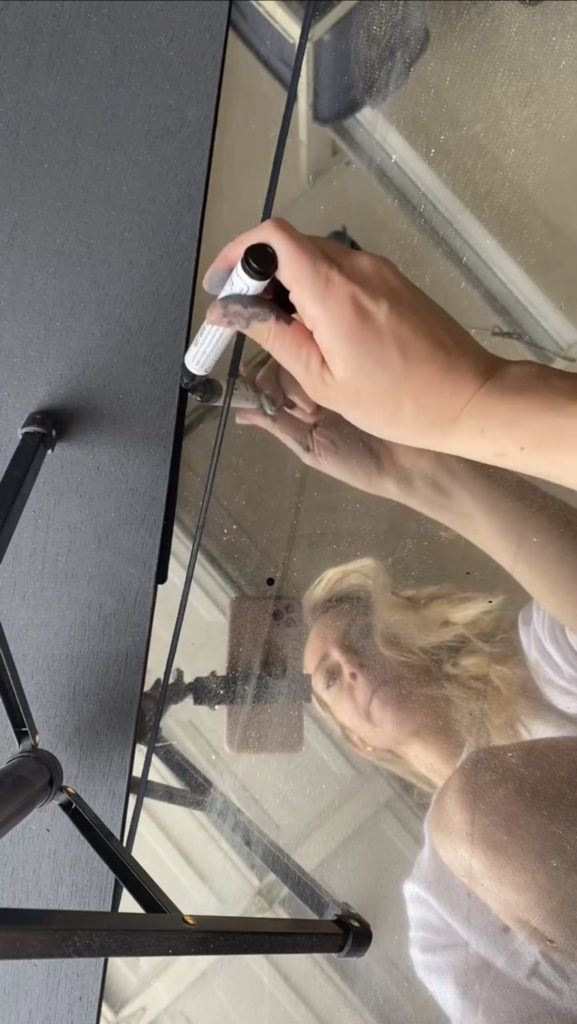
To fill the mirror gaps in between each panel I used a black glass marker. I did this as I went, using the marker after I glued each panel. You could also use the same spray paint that you used on the frame to paint the mirror behind the panels. But you would want to do this before you glue the panels down. The black marker method works great, but be sure you don’t miss any gaps! I made a mistake and forgot to fill a gap in the middle of the door and now the mirror shines through a little bit. But hey, mistakes are part of the process! Live and learn!
Gluing Panels to the Closet Door
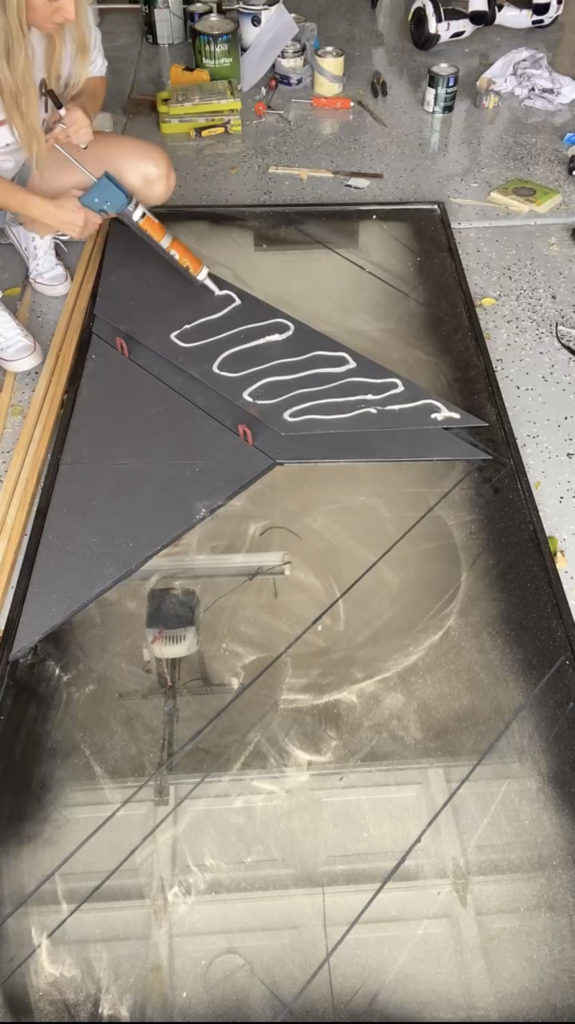
To glue the panels onto the door I used Gorilla heavy duty construction glue. Lay each panel onto the door before you glue it down so you can make sure that you’re gluing the right panel in the right position. Pro tip – keep a blow dryer handy when you’re gluing the panels to blow away any debris that gets on the door. Your door should be clean and free of dirt before you glue.
To apply the glue I put the glue bottle into a caulk gun and made a zig-zag pattern on the back of each panel. Be careful not to apply too much glue near the edges of the plywood or it will squeeze out over the sides! You have about 10 minutes after you’ve put the glue on each panel to get it into place on the door. So you’ll want to glue each panel one by one and immediately secure them onto the door. Once you’ve applied the glue, press the panel to the door for 20-30 seconds and you’re done! The glue will completely cure in the next 24 hours, but after 30 seconds it will have a strong hold.
DIY Door Handle
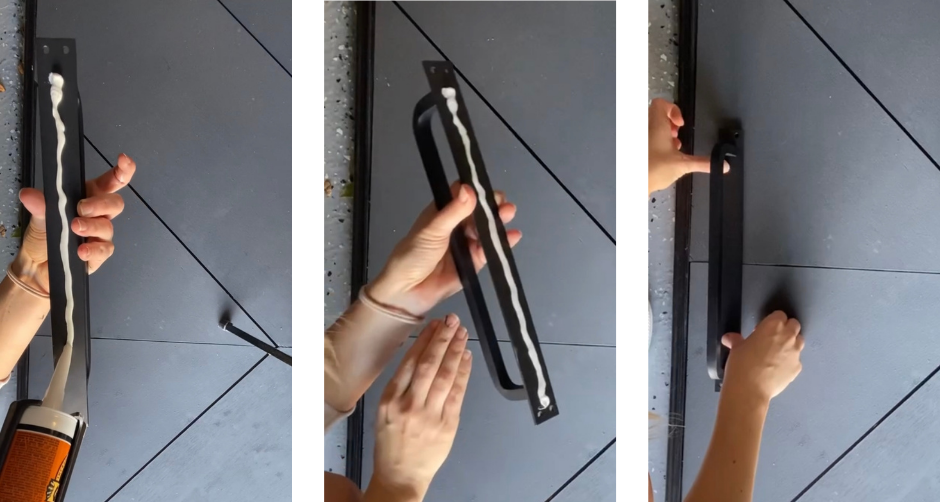
The last step is to add a door handle. You can’t screw a handle into a mirror door or it will shatter the glass. But I’ve used glue to attach a door handle like this in the past and it’s held up great so I decided to do that again. First I measured and marked where I wanted the door handle to sit on the door. Then I used the same Gorilla adhesive on the back of the door handle and attached it to the panels. Hold it for 30 seconds just like the panels and let it cure for 24 hours. And you’re done!
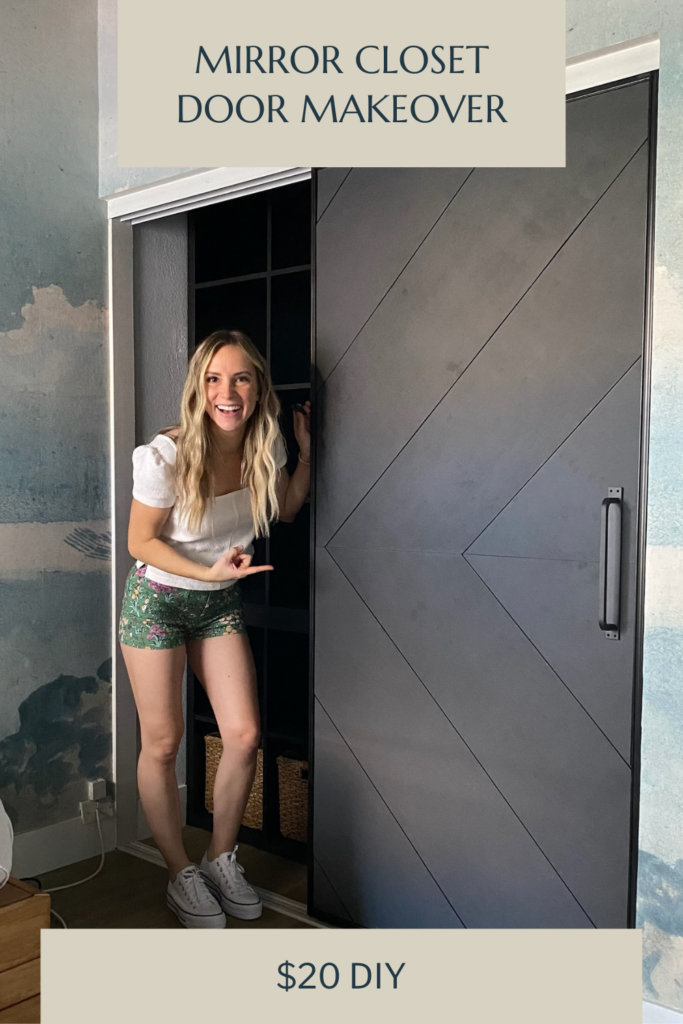
DIY Closet Door Makeover
Now that you’ve finished your $20 DIY closet mirror door makeover, how does it look in your room? Tag me on Instagram @angelarosehome so I can see! This is a great DIY project for a beginner who might be a little nervous about making updates in their home. Re-doing a closet door was actually one of my first DIY projects. And I learned that it’s okay if I mess up or make mistakes, it’s just a door! Starting with small projects like this is a great way to learn how to DIY and become more confident with your skills. To learn more DIY tips for beginners you can read my blog here. It’s time we all stop pinning and start doing!