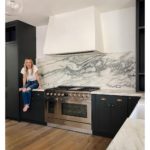
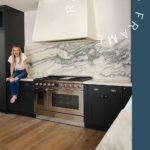
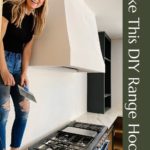
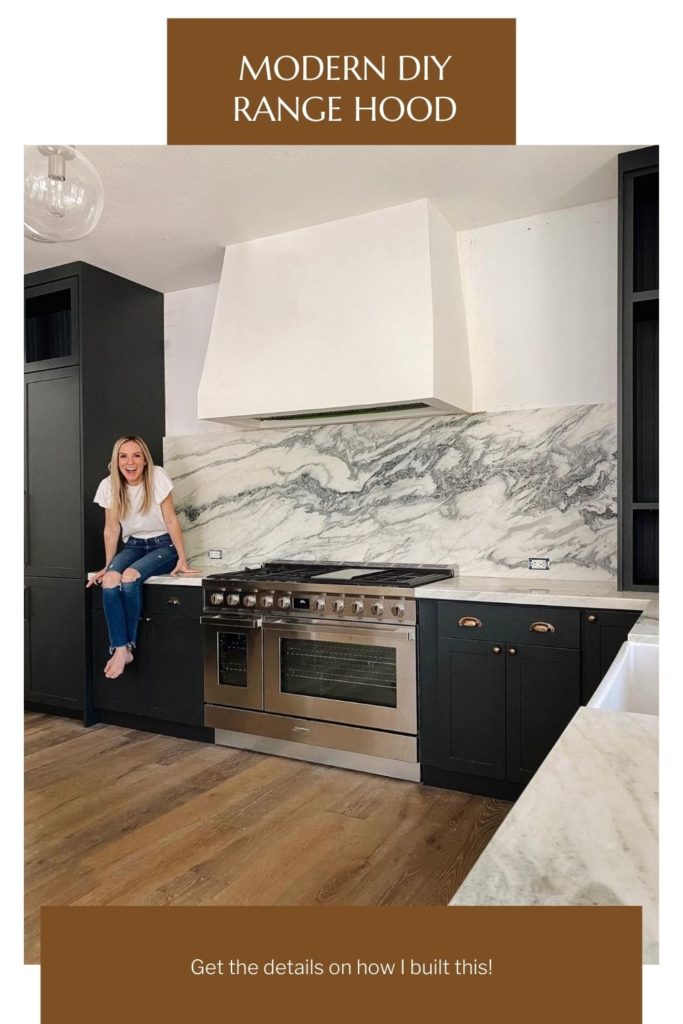
DIY Range Hood Tutorial
This year I turned the kitchen I didn’t love into the kitchen of my dreams. It was a lot of work, but so worth it. A special part of this big renovation was building a modern-looking range hood. Have you been wanting to do something like this in your home? Let me show you my process for this DIY range hood so you can make your kitchen dreams come true too.
Step #1 Build The Range Hood Supports & Frame
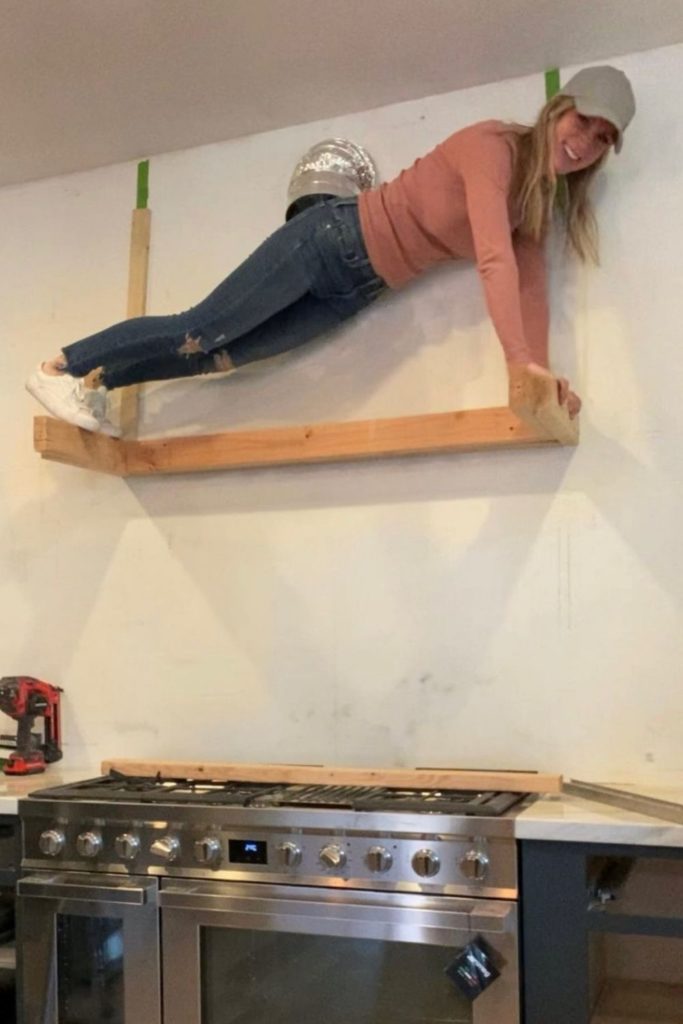
Since I was renovating my entire kitchen, I already had the old cabinets removed and things stripped down to the drywall. Of course, if you’re just DIYing a hood you don’t need to worry about those extra steps. For this project, I used a ZLINE 46” range hood that I was going to build a frame around. You can get a similar hood here. To start this project off right, I needed to build some supports for the hood. I did that by grabbing a 2×4 cut to the length I wanted and sandwiching it in between other 2×4 boards that I had attached flush to the wall. The perfect way to test your supports is to give them the ‘ole plank test. Kidding, but it was fun anyway. Now that some supports were in place, it was time to build the frame.
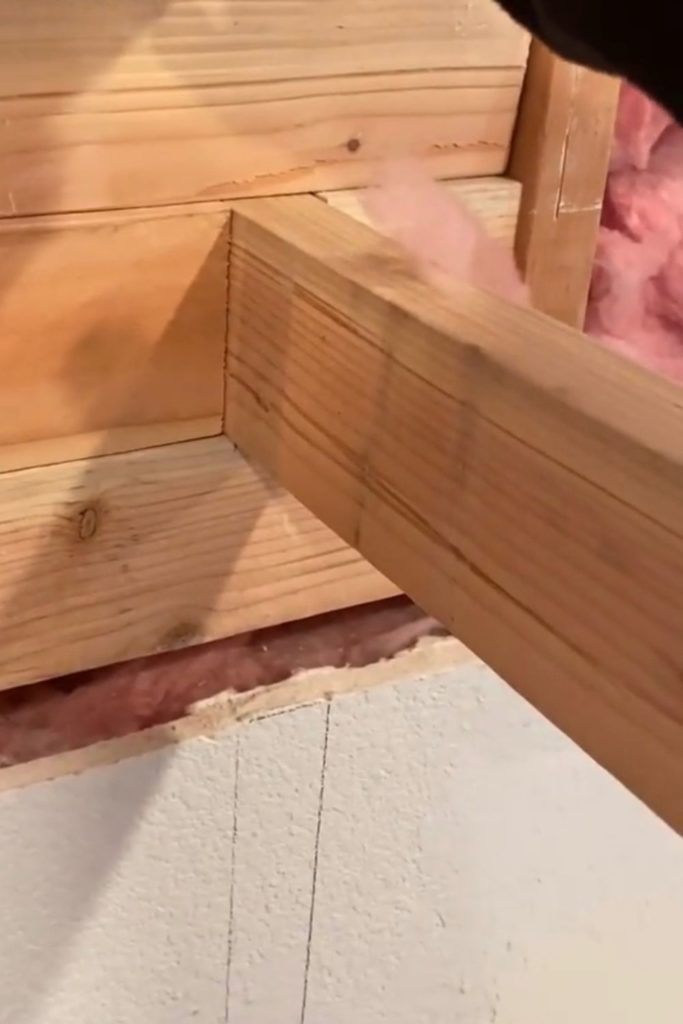
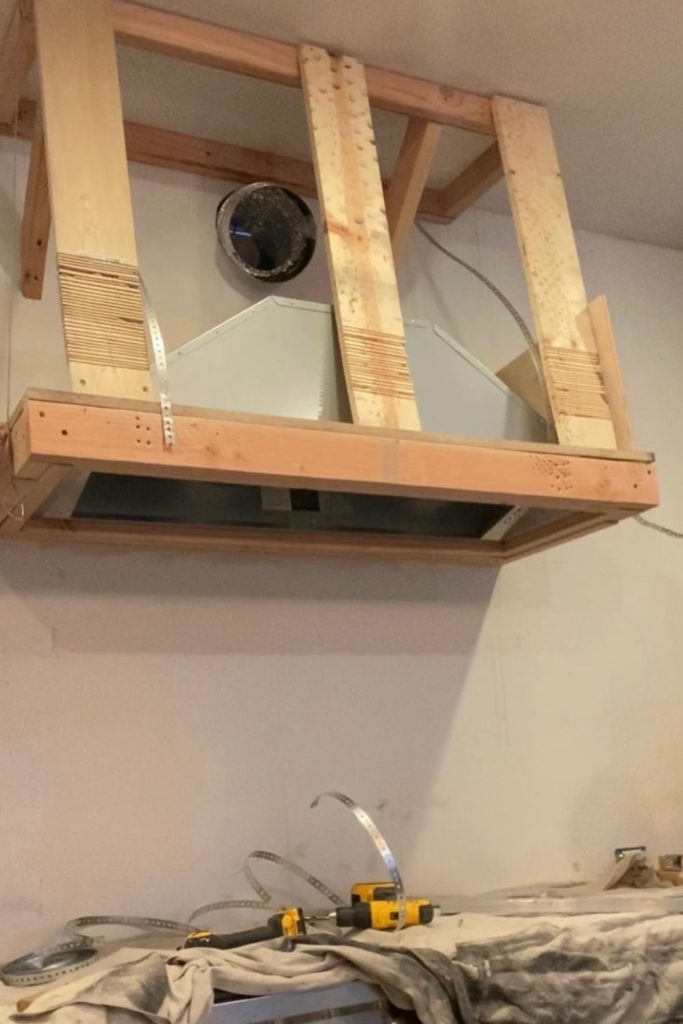
Using some 2×4’s again, I built the bottom part of the frame the range hood would rest on. To be honest, I used my feet to hold the boards in place while I drilled. But, clamps would definitely be easier. I also attached 2 metal brackets in each corner so the hood sat recessed in the frame. I wanted my hood to have a slight curve, so I made the top frame stick out a little less than the bottom. When I went to attach the top frame, I realized I couldn’t drill into the roof. So instead, I added a small piece of wood at an angle to each side of the frame and attached it to the wall. After adding in all those supports, the front was still sagging. So, I attached some metal strips for added support.
Step #2 Create The Perfect Curve
Once the frame was ready, it was time to figure out the amount of curve I wanted. To create the curve, I used a saw to cut multiple straight lines in 3 pieces of MDF board. Having those lines cut close together allowed the wood to bend. Cool, right? Once I had the right amount of bend in each board, I attached them to the front of the hood’s frame. Now here’s where the vision really starts to take shape.
The plan was to add drywall around the outside of the frame. At first, I grabbed some ⅜ inch drywall but it didn’t have enough bend to it. So, I switched it out for some ¼ inch drywall and that was perfect. Here’s a tip: when cutting drywall, use a straightedge to draw your line and then follow that as you cut the top paper. After the paper is cut you can snap off the excess piece. Before closing off the sides of the frame with the drywall, I made sure to hook up the vent. I also put in a piece of drywall behind the MDF boards to support the curve. Before I could move on to the mudding, I added some corner bead to create clean corners. I used vinyl bead for the curved edge of the hood and regular corner bead for the bottom of the frame.
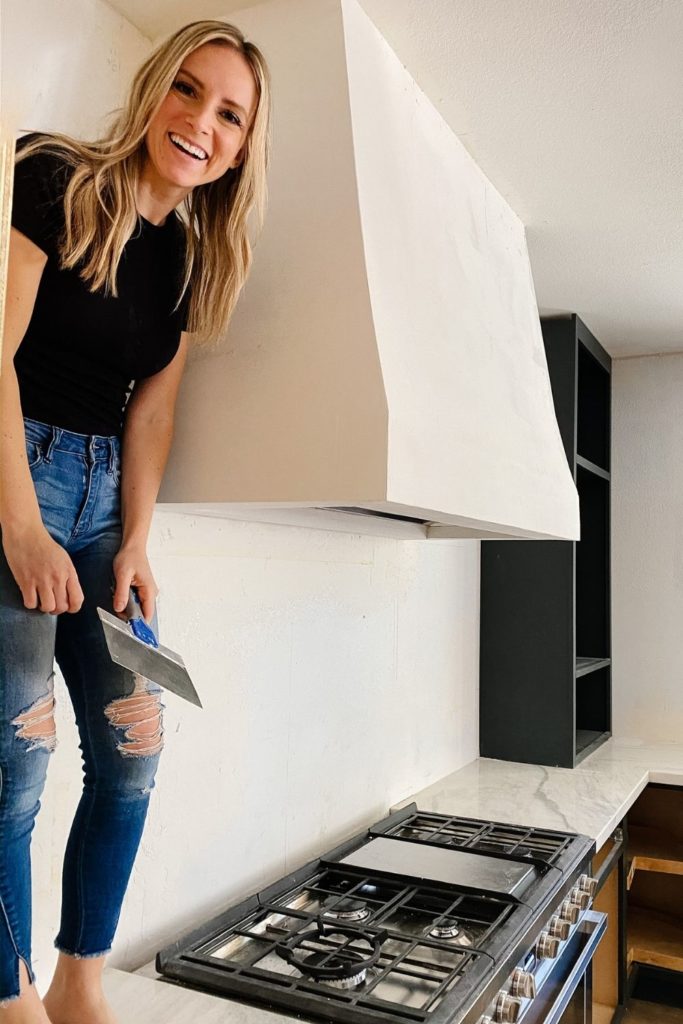
Step #3 Add The Mudding & Finish
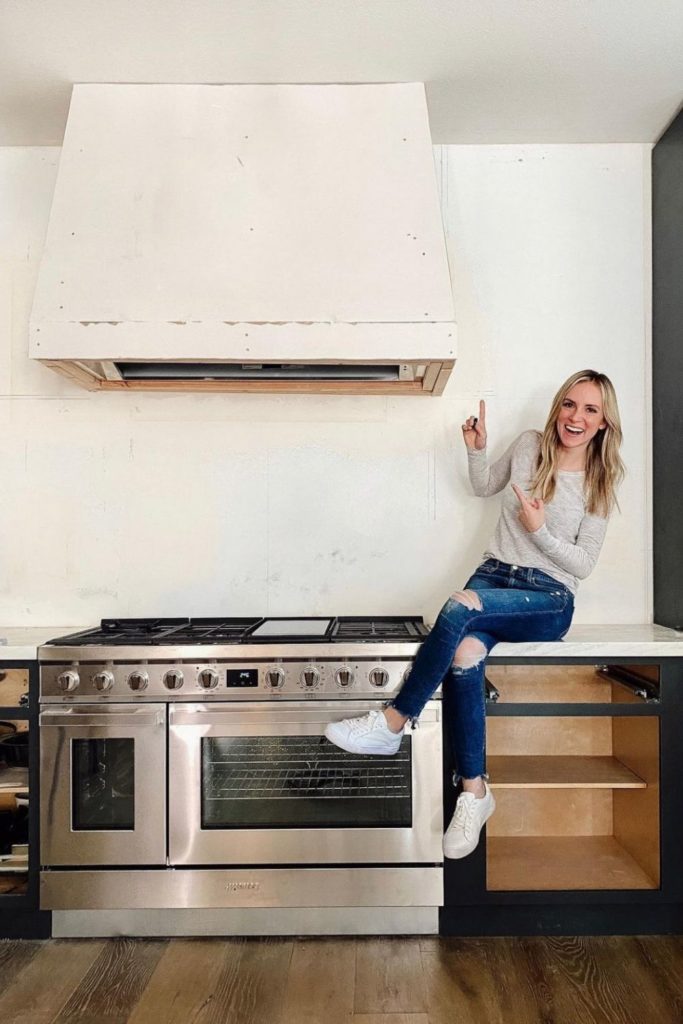
Okay, now on to the mudding. For this part of the project, I used Westpac’s premixed joint compound. Here’s a similar kind. When mudding, I always start with the thinnest taping knife and then move my way up to the widest. So, I loaded the first knife up and applied the mud to the frame. Then, switching between taping knives, I smoothed it all out. To get a seamless look where the frame hits the wall, I used some mesh tape. To do this, I stuck the tape where the frame meets the wall and then smoothed some mud over it. After the mud dried, the last thing this hood needed was some finish. I was deciding between roman clay (like I did on my fireplace) or paint. But in the end, I went with limewash.
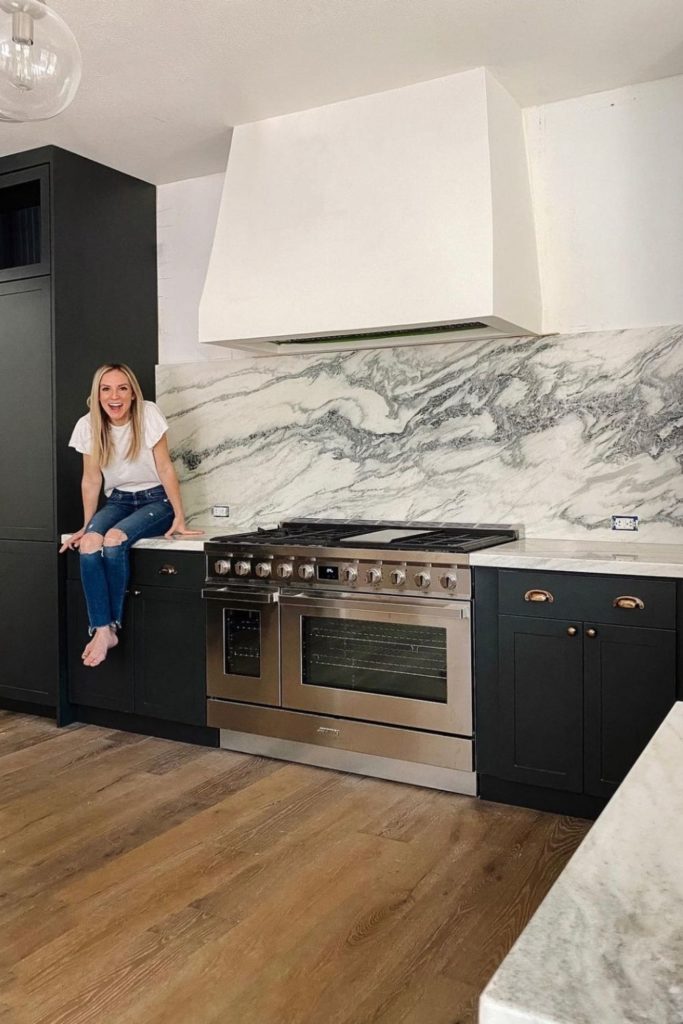
DIY Range Hood Tutorial
And there she is! What do you think of this DIY range hood? I’m in love! If you’re getting into DIY or starting a home project of your own, I have a tip for you. Always take a minute to step back and admire what YOU just made. Appreciating the process keeps the motivation up. Now, I can’t wait to see what you create! If this hood inspires a project or two in your own home, make sure to tag me on Instagram.
For a visual walk-through of this project, head to this Instagram story highlight. Want to see how the rest of this kitchen remodel turned out? Then check out this blog post!