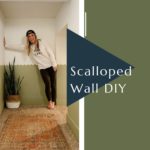
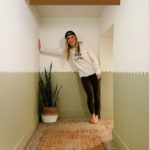
How To Paint A Scalloped Wall
Have you seen scalloped wall designs floating around Pinterest? I sure have, and I think they’re so fun. I’ve seen them done in bedrooms and nurseries and thought the design would be perfect for an under the stairs playroom makeover I did for my kids. When I surprised my kids with the playroom makeover last year, I took my Instagram followers along to show them how I did everything. So it’s about time I share my process with you here so you can recreate it easier. You ready? Let’s do this! Here’s how to paint a scalloped wall.
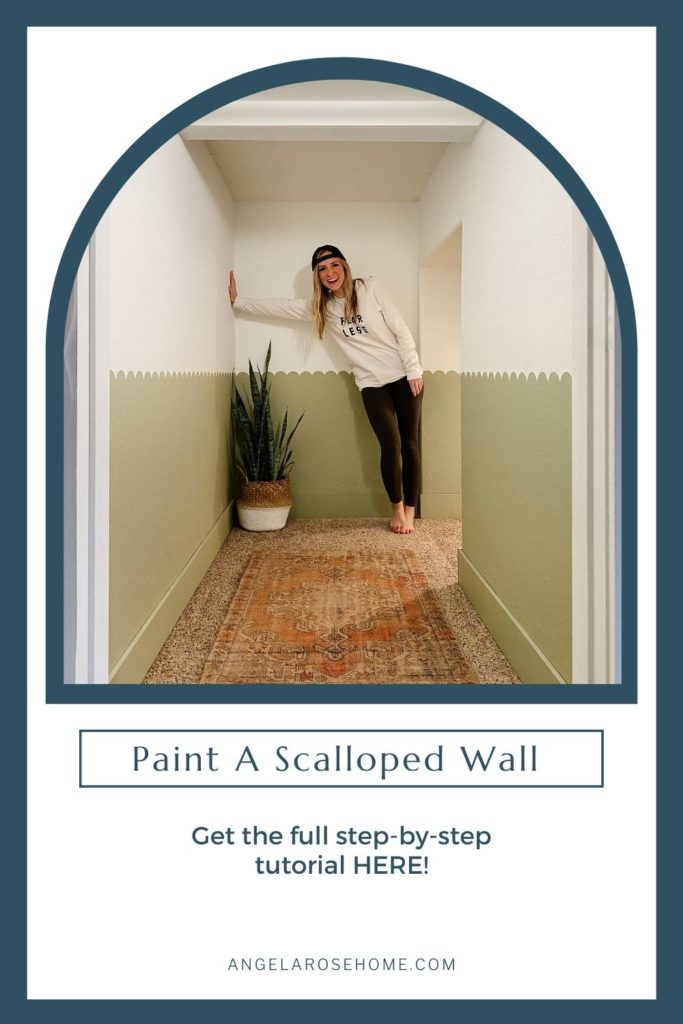
Step #1 Getting Everything Set Up for your Scalloped Wall Design
Before I started painting, there were a few things I had to do in this room to get everything ready. First, I started by removing the baseboards. If you are going to be removing the baseboards for your project, I have a few tips for you. Use a sharp blade to score the caulk along the wall first. That way when you pull at the baseboard, the drywall won’t rip with it. Also, When you are ready to take the baseboards off, I recommend using a crowbar or multi-tool. Either tool will make things so much easier for you. Once I removed all the baseboards, I painted the room white. If your walls are already the base color you’d like, no need to worry about this step.
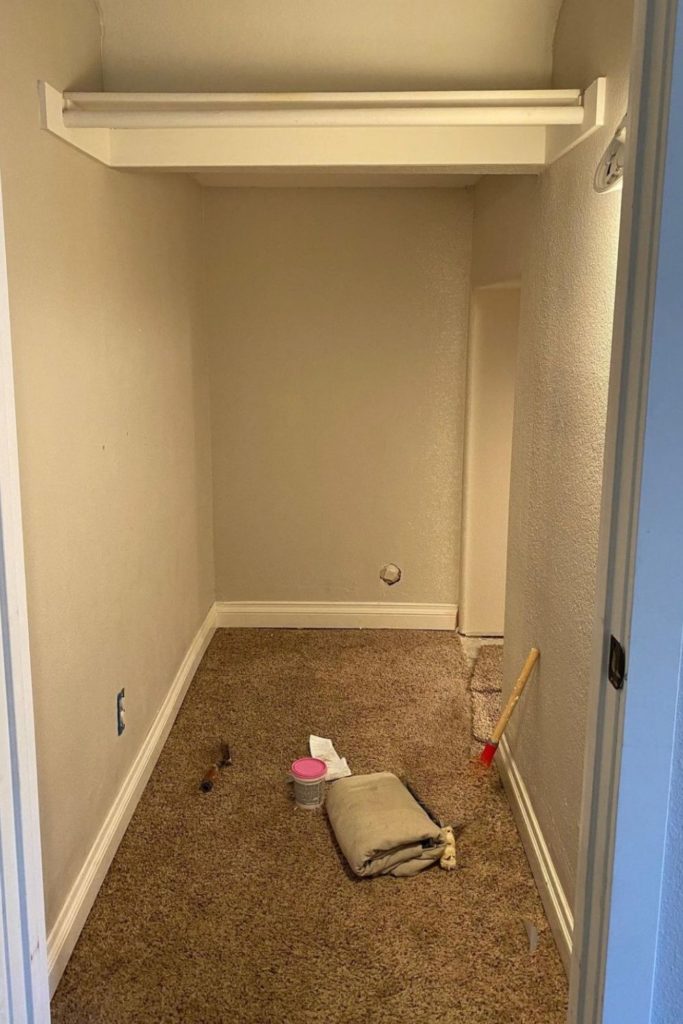
Step #2 Tracing The Scallops By Hand
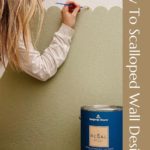
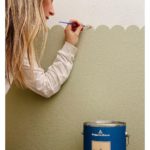
Now that I had a nice clean canvas to paint on, it was time to map out how I wanted my scalloped wall design to look. To be honest, I kind of just made up my own technique for this because I thought it would be easy. To keep things even, I first drew a straight line using a long level about where I wanted the bottom of the scallops to hit. Then, I grabbed a small plastic cup and used it to trace a scallop design about a third of the way up the wall. Never underestimate the power of a good tracing job!
You might be wondering, “Angela, why not just use a stencil?” The answer is, I have textured walls. Stencils and textured walls don’t mix well, because the paint easily bleeds. It’s hard to get a tight seal with the stencils against the bumpy texture. So to avoid hours of touch-up, I traced it all using my little plastic cup. To keep things even, I used some blue tape on the dish to mark how deep I wanted the scallop to go on each side.
Step #3 Painting The Design On Smooth
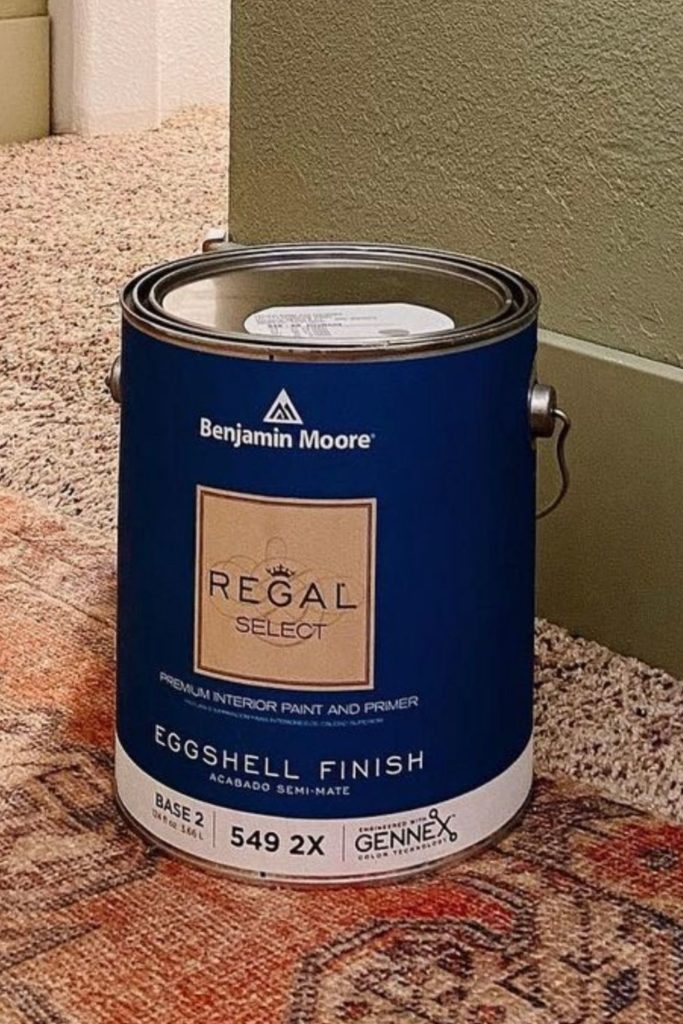
Once all the tracing was done it was time to start painting. Here is a quick paint sheen tip. For walls I use matte or eggshell, ceilings I use flat, and for baseboards I use satin. And another tip, sample the colors you’re considering on a small section of your wall first. Don’t just trust a picture. It always looks a little different when it’s actually on the wall. For my scallop design, I decided on the color Saybrook Sage from Benjamin Moore. I started by painting the scallops first with a small paintbrush. I didn’t want to tape off and paint the part below first, because I didn’t want a ridge left where the tape was. Another thing I did to create a seamless look was to feather the paint down as I went.
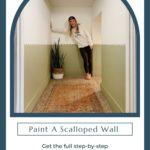
There’s a point in every project where you think, why did I think this was a good idea? Looking at all the scallops I had to paint was definitely where I reached that point. But, I made it through! After the scallops were done, I painted the rest of the wall below the design. I used a roller and my favorite paintbrush for this part. One more painting tip for you. Leave a wet edge and don’t go over areas that are already starting to dry. Going back and repainting is how you get streaks and flash marks on the wall. The last thing I did for this project was paint the baseboards the same sage green color and reattach them to the wall.

How To Paint A Scalloped Wall
There, It’s done! What do you think? Is this something you would like to try in your home? I hope this tutorial on how to paint a scalloped wall was helpful. If this project inspired you to grab the paint roller, make sure to tag me on Instagram so I can see what you’ve created. Also, if you’re not already following along on Instagram and TikTok, you definitely should. I’ve got some fun things coming!
Want to see more of this under the stairs playroom for my kids? Then check out this post on how I made a Giant DIY Lite Brite for this space!