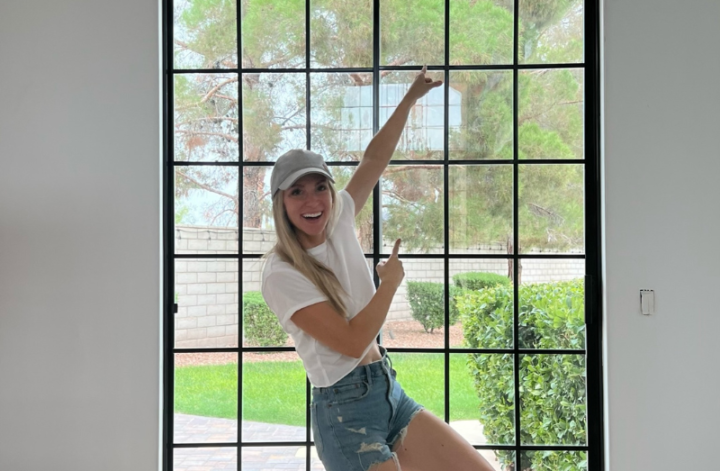
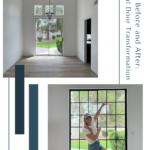
I cannot believe it! The first project in the newest Angela Rose Home has been completed. Of course, it’s a smaller part of a full room overhaul, but I think it needs its own glory moment! After some awesome Instagram polls, I decided to focus on updating the entry dining room. The first phase of the overall project was updating the old sliding glass door. Have a view you don’t like? Don’t worry, you can change it! Come learn how to upgrade old doors and windows.

Don’t Like Your View? Change it!
You guys almost broke Instagram polls when I asked for opinions about adding window pane grids to my sliding glass door. I totally understood the concerns about blocking the light and the view, but in the end, I had to stay true to myself. It’s truly the best part of DIY, creating things for your own personality.

I had a vision so I decided to make a drastic change and alter my view with some epic black windows. If you have been hanging out with me for a while, you know that I love how black windows look. I’ve actually painted 50+ windows black because they give a perfectly modern vibe that just speaks to me.
If modern black windows speak to you too, here’s what you’ll need to get the look in your home:
- All-purpose cleaner
- 220 grit sandpaper
- Tape/plastic combo
- Rustoleum primer paint
First off, you will need to prep the frame around your old doors or window. Start by cleaning the frame with your favorite all-purpose cleaner. Then, once the frame is cleaned, scuff it up with your 220 grit sandpaper. This gives your paint something to stick to when we start painting.
Now that the frame is prepped, it’s time to tape your frame and the area around it. I found this amazing tape/plastic duo. It’s perfect for projects like this because you don’t have to mess with attaching the tarp to the tape, they already come together! Once everything is taped, it’s time for my all-time favorite painting hack. Are you ready for it?
PAINTING HACK: Once your area has been taped off, use a small bit of paintable caulk on the tape line to secure the seal. This will prevent paint from bleeding under the tape and it will give you a perfectly straight line! Just make sure you peel your tape off when the paint is half-way dry so that the paint doesn’t lift.

Time to Paint
For painting windows, I like using Rustoleum’s satin black paint/primer spray paint. You may be thinking, “Angela, why not roll the frame with paint I already have?” If you were to roll your frame, there would be texture from your knapp roller once the paint dries. With this project, what we are looking for is a sleek smooth finish that seems like it’s always been there. Plus, using spray paint is a thinner application so it won’t peel off the PVC as easily. So trust me, go with the spray paint.
Once your paint is half-way dry, remove your tape. Removing the tape at this point helps to make sure the paint doesn’t pull up. And you guys, there is nothing as satisfying as removing painter’s tape to see a perfectly straight line! It makes me so happy. Every. Single. Time.
Building the Grid
The frames of your old door and windows are painted, now it’s time to build the grid. There are a few different ways that you can affordably give your windows a grid treatment. In the past, I’ve used electrical tape straight on the window. But for this project, I used thin PVC trim like from New Panes.
New Panes’ thin PVC is super easy to use! It almost feels like you are playing with legos because the pieces just click together. The PVC product comes white, so you’ll need to do a little prep work and then pull out your spray paint again.
Call me extra, but I still wanted to have the window panes look white when I was out in my yard. So, I added painter’s tape to one side of the PVC trim. Sounds hard? Nah! It’s just a little bit of tape. Once the tape is on, spray with your Rustoleum satin black paint/primer spray paint. It’s that simple.
PRO-TIP: Before spraying (and taping) your PVC trim, pull your connections apart slightly. This will make sure that when you click the pieces back together after the paint dries, your black will have a seamless flow without pops of white showing through.

Last, but Not Least
The last step for this old door and window treatment is to attach your grid. Want to know a secret? You don’t need any big tools to finish. All you need is some good old-fashioned double-sided sticky tape. That’s it! Then you get to enjoy your new view.
How to Upgrade Old Doors and Windows
Remember, if you don’t like your view, change it! You know my mantra…Stop Pinning. Start doing. Just because your windows and doors may be old doesn’t mean they aren’t great. You just have to know how to upgrade old doors and windows. Come be a part of my overall entry dining room overhaul on Instagram and TikTok. I am sharing the whole process along the way. But for now, the first project in the newest Angela Rose Home is done!
Disclosure: I only recommend products I would use myself and all opinions expressed here are my own. This post may contain affiliate links that at no additional cost to you, I may earn a small commission. Read the full privacy policy here.

