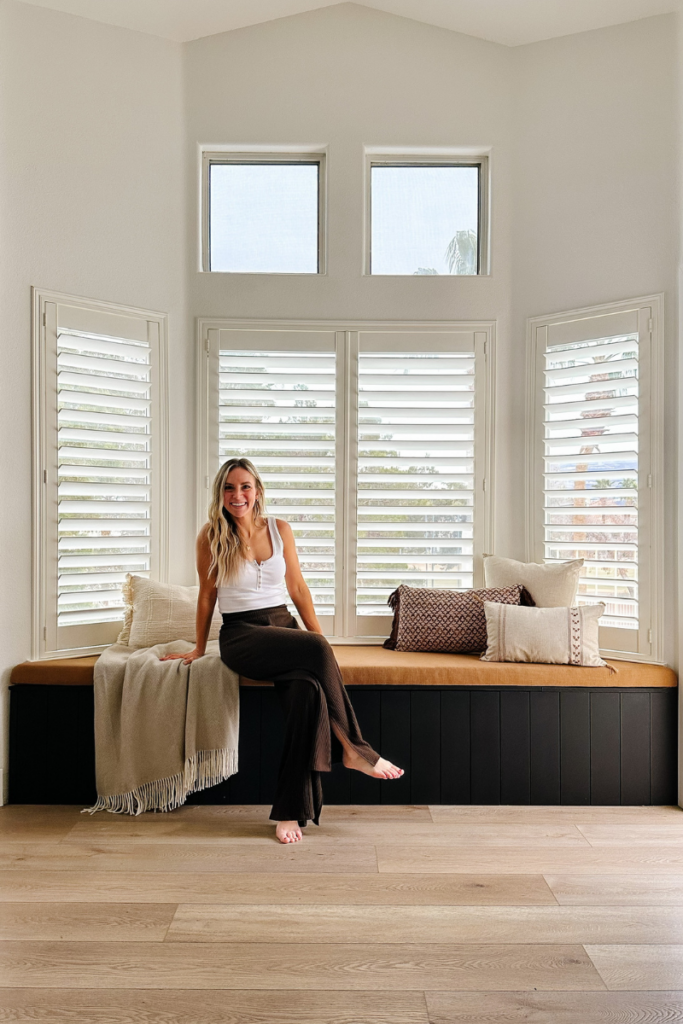
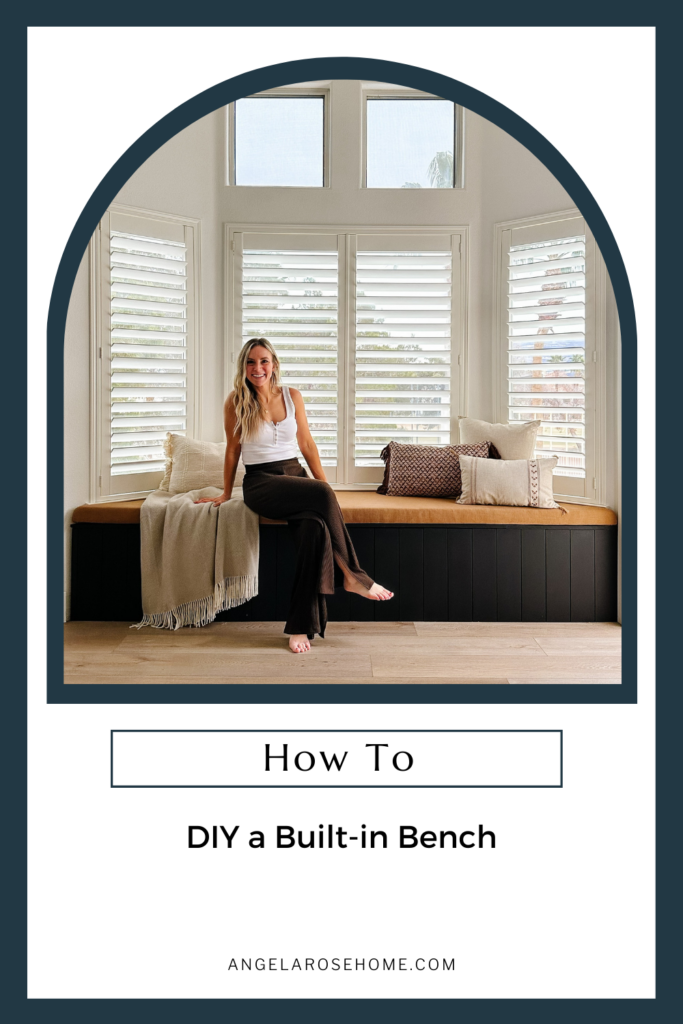
The next space I am DIYing in the newest Angela Rose Home is my primary bedroom. It feels like the right time to transform this space into a sanctuary that is just for me (and of course my kids when they are with me). My primary bedroom is going to be full of SO MANY good projects like a faux fireplace, ceiling details, and of course a bench built right into the window space. A girl has got to have a nook where she can meditate and dream big dreams (maybe even cry a little). Am I right? Benches are such a great way to utilize nooks and crannies in your home that may not have a purpose. I am going to walk you through the process of how to DIY a built-in bench so you can have one too!
Steps for DIYing Your Own Built-in Bench:
Step 1: Visualize the Bench
Step 2: Frame the Space
Step 3: Paint the Base
Step 4: Install Face
Step 5: No-sew Cushion (collecting supplies)
Step 5: No-sew Cushion (assembly)
Step 1: Visualize
It is really important to visualize your project in the space before whipping out the power tools. This is what I love using painter’s tape for! Painter’s tape isn’t permanent but visually lets you see and mark out the space you need. Every built-in bench will be slightly different depending on where you are building it, so use painter’s tape to help you in your planning process.
Step 2: Frame the Space
Now that we can visualize the bench in our space, it is time to frame it out! I like using the term frame because we are building a frame around the area we want our bench to be. Almost like a big box. I built my bench in a bay window space so that shape was very unique. If you have a cool rectangular niche you are filling, this step will be even easier than it was for me.
PRO-TIP: Create a list of cuts you will need before you build. It is easier to have everything cut and ready to go before assembling your bench. Did you know that home improvement stores like Home Depot and Lowe’s will cut wood at the store for you? Just make sure you have your list of cuts ready to go!
We are going to need 2 frames that are exactly the same shape and size. One for the top of the bench and one for the bottom. Once you have your top and bottom built from 2×4 pine boards, you will use smaller 2×4 pine boards to create vertical braces that will attach the two frames together. This will also stabilize the bench.
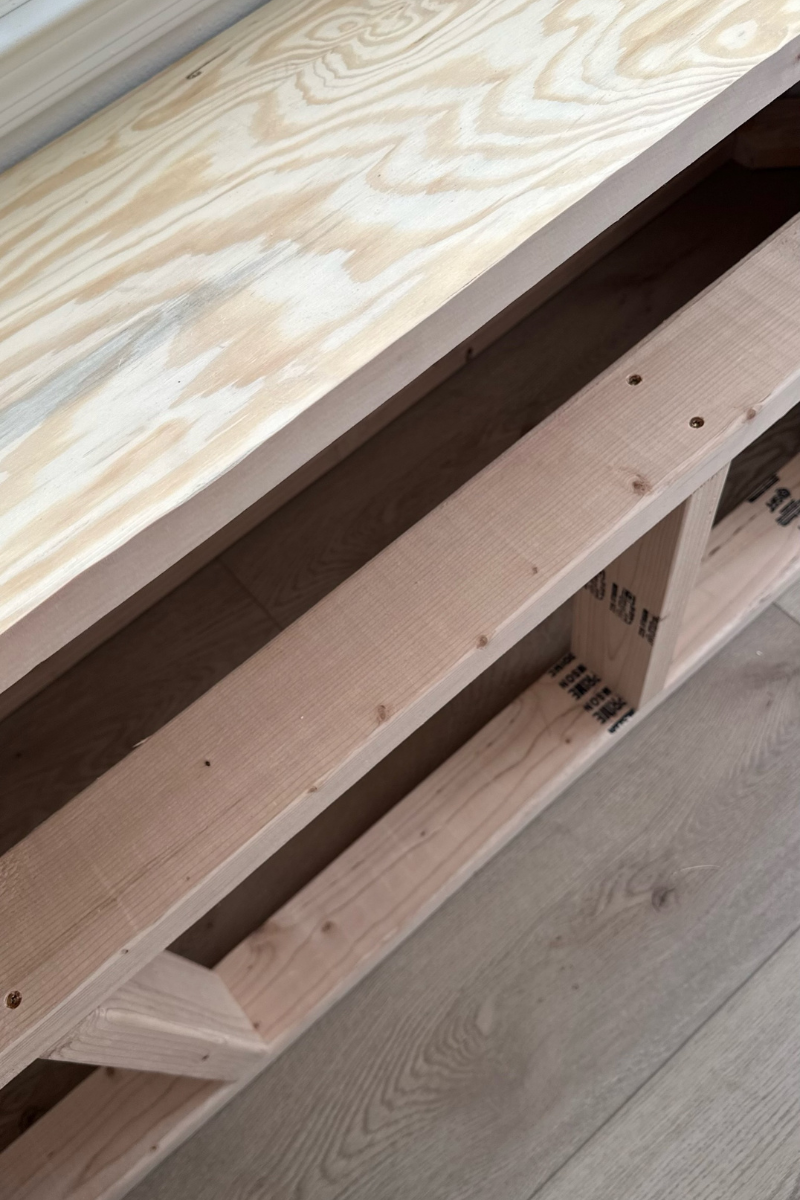
PRO-TIP: You want everything to be flat and flush so make sure you check your wood pieces for any warping.
You’ve screwed your frame together making the box for your bench and now you need to make sure it stays secure. I chose to secure my frame by screwing it into the wall studs because I didn’t want to ruin my new flooring.
Finishing the Frame
In order to transform the frame into a bench, you need to cut a piece of plywood to create a topper. I really wanted to make sure that this bench was not only pretty but could also be used for storage as well so I decided to attach the top with hinges. This way once the cushion is on, the whole top can be lifted giving me functional storage and access to cozy blankets and books. What are you going to store in your built-in bench?
Plywood naturally has an edge that isn’t super pretty. But don’t worry, I’ve got a solution! Have you heard of edge banding? Edge banding is pretty much magic! It is banding that you iron onto unfinished wood to give you a finished-looking edge. Since edge banding is made of wood, make sure your iron isn’t too hot or it will burn the edge banding. Once the banding is ironed on, just trim the edges with a knife and sand it smooth. The best part is that edge banding works like regular wood and can be painted and stained like the rest of your project.
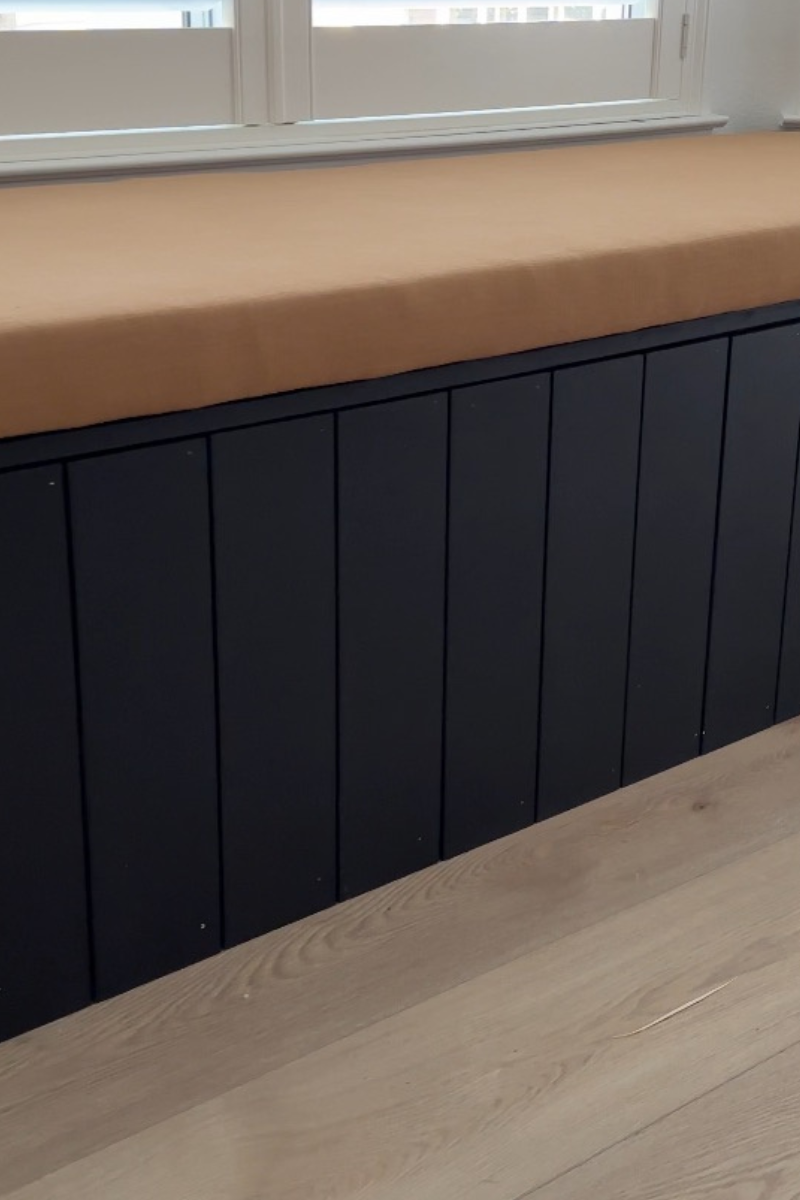
Step 3: Paint the Base
To figure out what color would look good for the base of the bench, I used the @morpholio app to mock up the room with furniture and finishings. If you are ever unsure about a project you should try it out. I’ve found it really helps me wrap my brain around spaces as a whole.
After seeing the mock-up on @morpholio, I ultimately decided that black would tie in my nightstands. Black Magic by Sherwin Williams turned out to be the perfect soft black for my bedroom. I can’t wait to see what color you go for! I know it will be stunning! If you need any tips for interior painting, check out my post here.
Step 4: Install Face
For this built-in bench, I was going for a clean simple look. To make things interesting but sleek, I decided to install 5-inch MDF pre-spaced shiplap for the face of the bench. For the perfectly spaced vertical or horizontal shiplap, use a pre-spaced shiplap. You will get the perfect spacing every time! For this bench I used MDF, but if you are using shiplap planking in a bathroom or other wet areas, use wood or PVC.
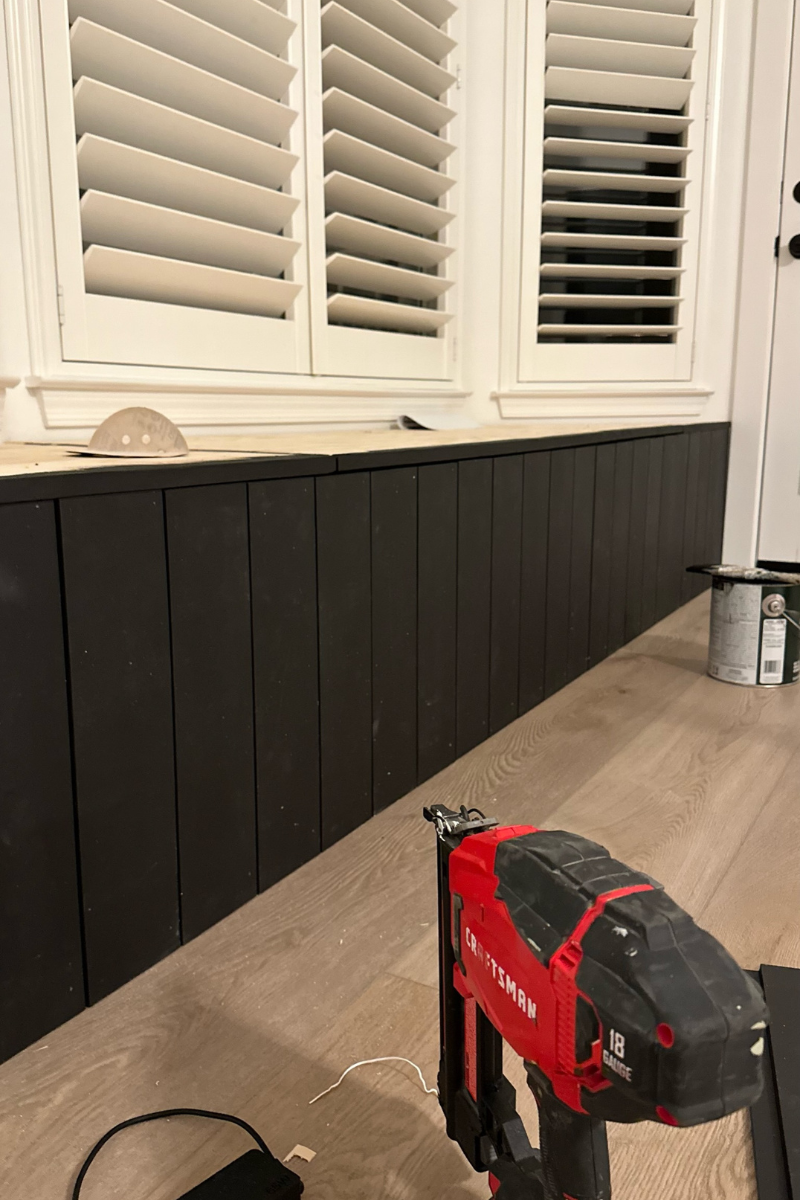
PRO-TIP: Filling in nail holes can be a DIY chore. With this pre-spaced shiplap, there’s a way that you can get fewer nail holes freeing up more time for fun. To get fewer nail holes, take your nail gun and nail through the lip of the shiplap so the nail heads are hidden. This way you only have two holes to fill in instead of four.
Step 5: No-sew Cushion (collecting supplies)
Did you know you can get fabric anywhere? We tend to think that projects like this require a big trip to the fabric store, but it doesn’t have to. If you are intimidated by the fabric store, try heading to your favorite home decor store instead. All you need is a curtain panel, tablecloth, or bedding that you like. It’s all about finding the fabric that is perfect for your space. There are no rules saying the fabric has to come from a fabric store!
I actually found inspiration for the cushion from my favorite new PJS that I got from Tommy John. I used the fanciest method of visualizing out there…I laid out PJs in different colors like burnt amber, olive green, and some neutrals so that I could see what the colors would look like in the space. You can do this too! Remember, fabric and inspiration can be found anywhere. Just lay out the clothes from your closet in the colors you are considering.
Step 5: No-sew Cushion (assembly)
Maybe the assembly of the cushion should be step 6 instead of step 5, but I’m calling it step 5 continued. You’ve got your fabric and now it is time to assemble the cushion. This no-sew cushion mirrors the bench shape. So first, cut out the cushion base with plywood to match the size of the top of your bench.
Once your plywood is ready, attach foam on the plywood base with spray adhesive. I bought foam squares for this cushion from Home Depot, but you can also get them at JoAnn’s. You could even order a twin mattress topper too! Whatever foam you choose to use will need to be trimmed to make sure it fits your cushion perfectly. I trim excess foam with a knife. If you are looking for a little extra fun, use an electric carving knife.
The next layer of your cushion is batting. You can buy it in a roll or have it cut by the yard. Lay your batting out and place the guts of your cushion foam side down on top of the batting. To attach, pull your batting around the cushion and attach it to the back of the cushion (wood side) with an upholstery stapler.
PRO-TIP: When attaching batting (and fabric) make sure you don’t have any wrinkles before attaching. You want to pull it tight (just not TOO tight) and staple it about an inch away from the edge.
The last part of assembling your no-sew cushion is the fabric. Lay your fabric out and attach it just like you did the batting. Be mindful of fabric patterns following the line of your cushion. You will want to start with the front of your cushion stapling in the middle then work your way from left to right. For the edges, I folded it over like I was wrapping a present and then stapled it. That’s it!
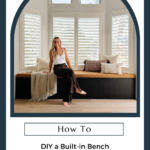
How to DIY a Built-in Bench
I cannot wait to cozy up on my built-in bench and dream up more DIY projects for us to do together! Now that you know how to DIY a built-in bench, where are you going to add one to your home? Make sure you tag me @angelarosehome in your project posts. I love seeing your creativity! Remember, this bench is only one of the projects that is happening in my primary bedroom. Follow me on Instagram and TikTok to see the entire space come to life!
Disclosure: I only recommend products I would use myself and all opinions expressed here are my own. This post may contain affiliate links that at no additional cost to you, I may earn a small commission. Read the full privacy policy here.