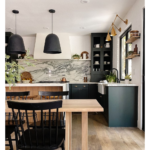
Have you ever had a spot in your house that is begging for a light fixture, but the wiring just isn’t there? Calling an electrician to rewire your wall for sconces and light fixtures can get really expensive, which is why I got so excited when I figured out how to add working sconces without hardwiring them into the wall. I want you to have the lighting of your dreams too, so let’s walk through how to add a working light fixture without hardwiring it.

Materials You’ll Need:
-Sconces
-Self-tapping screws
-Drill
–Puck lights
-Puck light adapter (optional)
On this materials list, you may have been surprised when I said you will need puck lights. Have you heard of puck lights before? They are pure magic! Puck lights are different from a regular light bulbs. They are wireless lights that work with different light fixtures and sconces that are completely controlled by a remote. This means you can use the puck lights with your sconces instead of traditional bulbs, which saves you from having to rip open walls to reroute electrical lines. When you add puck lights into your design you can’t even tell the light fixture or sconce isn’t hard-wired.
How to Add Working Sconces Without Hardwiring Them
Step 1
The first thing you need to do is to take your sconce apart so you can get to the mounting plate on the back. Just make sure that while you are tinkering, you don’t misplace anything. That could be bad when we put everything back together.
The easiest way to take apart the sconce is by removing the screws off of the light fixture. This will let you open the sconce and get to the hidden pieces. Once you can see everything behind the decorative facade, you will remove the mounting plate.
Step 2
Now that you have the mounting plate on its own, it is time to attach it to the wall. When I added the sconces in my modern hallway refresh, I used self-tapping screws. I love using self-tapping screws for projects like this because they act like a pre-drill and go into the wall a lot easier. Plus, you can use them on wood, brick, and even metal!
Step 3
Once your mounting plate is securely attached to the wall, it is time to put everything back together again. Slide your sconce over the mounting plate and put the screws back in. You didn’t lose any of those screws from earlier, right?
Step 4
After your sconce is attached to the wall, it is time to get the light fixture working! This is where the puck light comes into play. Each sconce is unique so you will have to figure out the best way to attach the puck light to your wall sconce. You can do this in a lot of different ways. Some of the most common ways to attach puck lights to light fixtures are wire, super glue, or even command strips. When I added sconces to my hallway, I used a fancy adapter piece that fit right into the spot where a traditional light bulb would normally go. This is also a great way because it’s not permanent. That way, if you ever did want to hardwire the sconce you can!
Now that you have attached the puck lights, your sconce is fully functioning. Can you believe how easy that was?!? You just turn it on and off with the remote and enjoy your gorgeous light fixture.
Favorite Wall Sconces
I love adding more light into my home with unique light fixtures. For some rooms I’ve DIYed light fixtures. But, I’ve also been known to hunt until I find the perfect fit because home decor can be so fun to shop for. It is all the fun finishing details that bring your whole vision together.
It is so important to add different lighting elements into a space. Ceiling lights, lamps, pendants, etc. They all bring different moods and layers of light. You can create cozy spots, draw attention to specific areas, and add depth and height. It is all about bringing life and energy in different ways.

In my hallway, I used these cute wall sconces by Passica Decor. They are the perfect modern finish because they have antique brass combined with a flared white fabric shade. I used them in my hallway design, but they would also be a great addition to a bedroom for bedside reading or in a dining room for

I am always looking for options that complement large wall art. When I was updating the hallway, these Mid Century sconces from West Elm caught my eye. It is similar to what I ended up using, but they have a more structured design. The base is made of metal and its white linen shade would pair so well with any space.

Along with the above sconces, I cannot fail to mention the industrial farmhouse wall sconces that transformed the space above my sink in my kitchen remodel. The adjustable metal arm allows me to position the lights perfectly above my sink so that I can actually enjoy doing dishes.
How to Add Working Sconces Without Hardwiring Them
To me, adding lighting to your home finishes off the space. I can’t wait to see where you decide to add additional light fixtures now that you know how to add working sconces without hardwiring them. Don’t forget to hang out with me on Instagram and TikTok for more DIY projects and how-to’s. I love sharing how to take on DIY projects so that we can all have those Pinterest-worthy houses because when we stop pinning and start doing, magic happens!
Disclosure: I only recommend products I would use myself and all opinions expressed here are our own. This post may contain affiliate links that at no additional cost to you, I may earn a small commission. Read the full privacy policy here.


