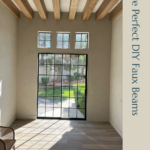
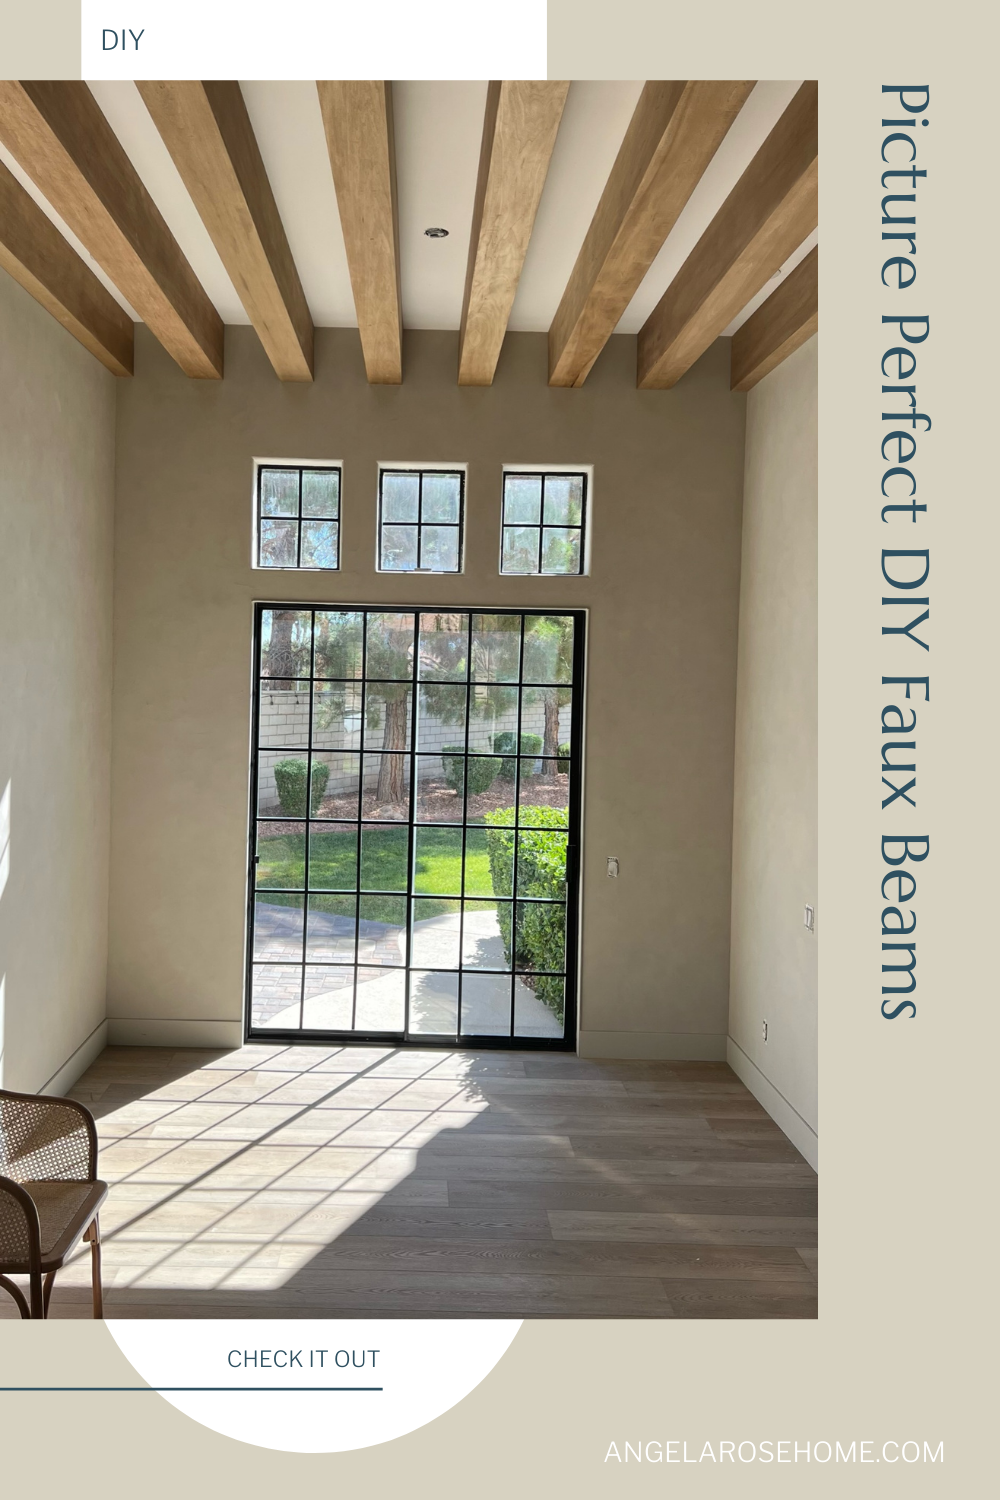
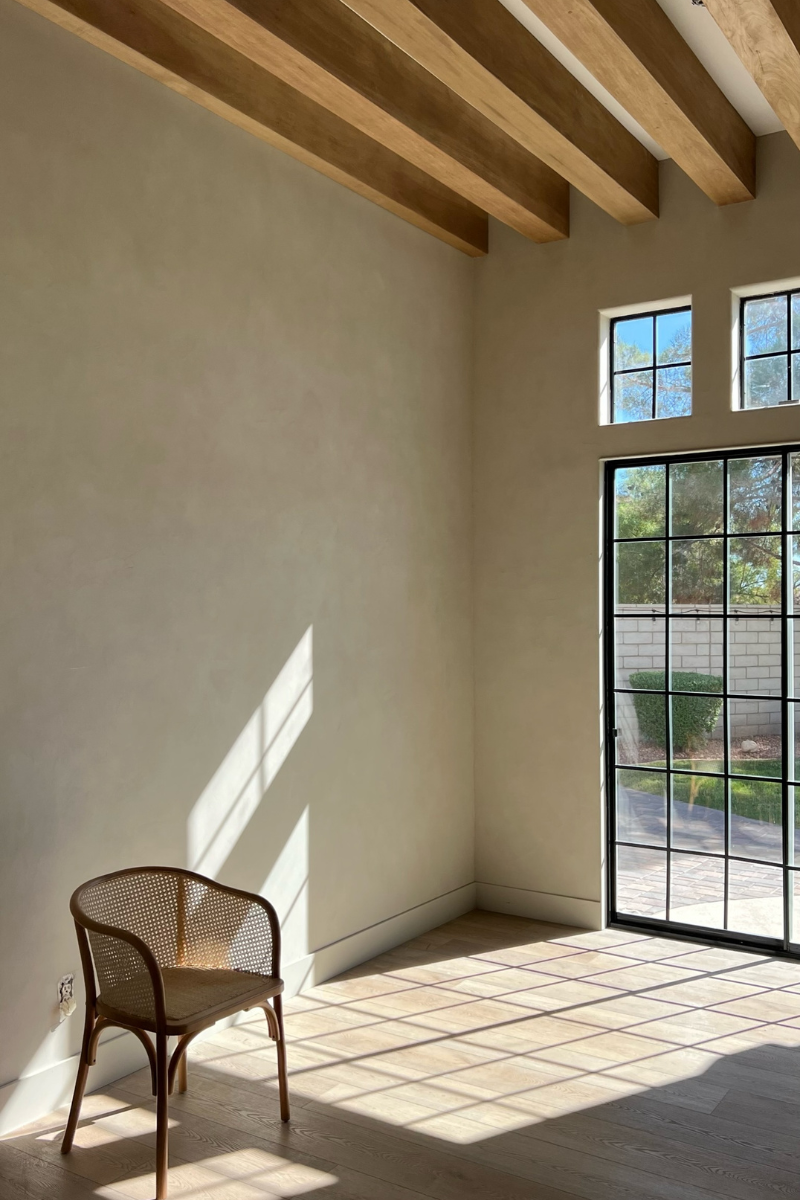
I saw a picture of stunning wood beams in a picture. I instantly loved them and I knew I needed to have them for my entry dining room. Everyone told me, “ Don’t do it.” “It’s going to be too hard.” But you guys, I have not been able to unsee that picture. I knew I had to have them. So, in true Angela fashion, I had to go for it! Come see how to build picture perfect DIY faux beams so that you can have them too.
Before Creating the Beams
Before we start creating beams, there’s a few things we need to do. First, you need to figure out your spacing as well as what size you want your beams to be. Painter’s tape is great for this! I love using painter’s tape to map out my projects. It helps me visualize the concepts I have in my head without doing anything permanent. Sometimes you have a vision in your head but it might need to be adapted to fit your space.
For this project, I taped out the dimensions for a few different beam sizes on my wall so I could make the best choice for my entry dining room. And since the planning stages were done with painter’s tape, my walls were totally fine and I didn’t waste time or money on big materials.
The second thing you need to do before creating your beams is to create a base for your faux beams to attach to. It may feel backwards to create the base before even creating the beams. But, building the base first will help you know how many beams you need to build and make sure your spacing is right.
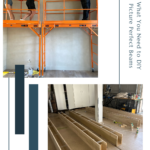
To make a base, screw 2×6 pine boards to the joists in your ceiling. Make sure these boards are anchored because once the beams are ready, the beams will slide over top of the base to make them look like they are floating.
Different Beam Methods
There are a few different ways to create faux beam details in your home. The two most common methods are the sandwich method and the mitered edge method.
Method 1-Sandwich Method.
The sandwich method is the easiest way to go when creating faux beams. I’ve done it a bunch of times and can tell you that it definitely works! The only problem is that you can see the seams of the joining boards so it doesn’t look like a solid wood beam. There really is nothing wrong with this method, but for this dining room, I wanted the beams to look like they were one big solid beam.
Method 2-Mitered Edge Method
If you want your wood features to look like a solid beam, you will want to use this mitered edge method. I’m not going to lie, it is DIFFICULT! I had so many people telling me to avoid this method because it was too hard, but in the end I knew what I wanted. There’s no way I would have been happy with anything less than my beams looking like they were one solid piece.
The reason I love this method is there is no seam. Once you are finished, you can’t tell that your beam originally started with a few boards. The mitered edge just makes it look so sleek and real!
I get why so many people were telling me that choosing to use the mitered method was going to be hard. I needed to create huge beams for my space. I haven’t used this method before. And, I don’t have a fancy workshop. But you guys, I couldn’t unsee that inspiration picture. So I decided to reach out to my friend @joshhescott to know what I was getting into.
Here’s Josh’s tips for making mitered edge faux beams:
- Use feather boards to keep board against rail and down flat
- Set blade to 44.9 degrees (use digital angle finder) instead of 45 degrees
- Use table or something for board to push off onto
- With large boards, 2 people is so much easier. Ask for help!
Chasing Dreams and Building Beams
Aren’t Josh’s insights the best? Obviously I used Josh’s suggestion and got out my miter saw to cut my edges at 44.9 degrees before building my beams. To explain a bit more, the reason you need to cut a 44.9 degree angle instead of the traditional 45 degree angle, is because it gives a super tight edge when you start getting your beam together. Once your edges are mitered, it’s time to start building beams and chasing dreams.
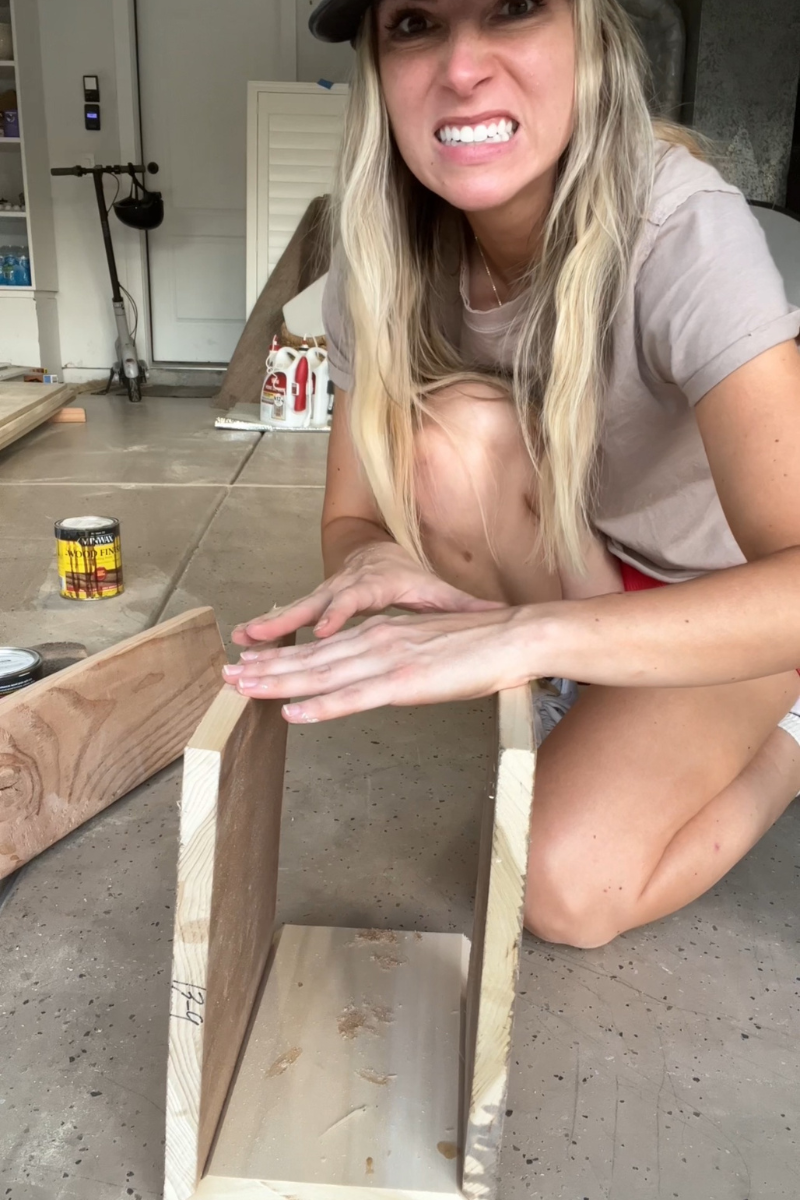
Step 1: Tape Boards
Tape mitered boards together with strong tape. Get ‘em tight! I used packing tape to do this. Taping your boards together helps make sure that your edges meet up perfectly. It’s how you get those sleek edges without being able to see a seam.
Step 2: Fold it Up
Now that your boards are taped, it’s time to flip them up and see what the beams will look like. Assess the edges and make sure everything is as tight as it can possibly be.
Step 3: Watch Those Edges
You have to watch your edges so closely because they are the detail that makes your faux beams look real. So, get those edges as perfect as you can with tape, clamps, and good vibes.
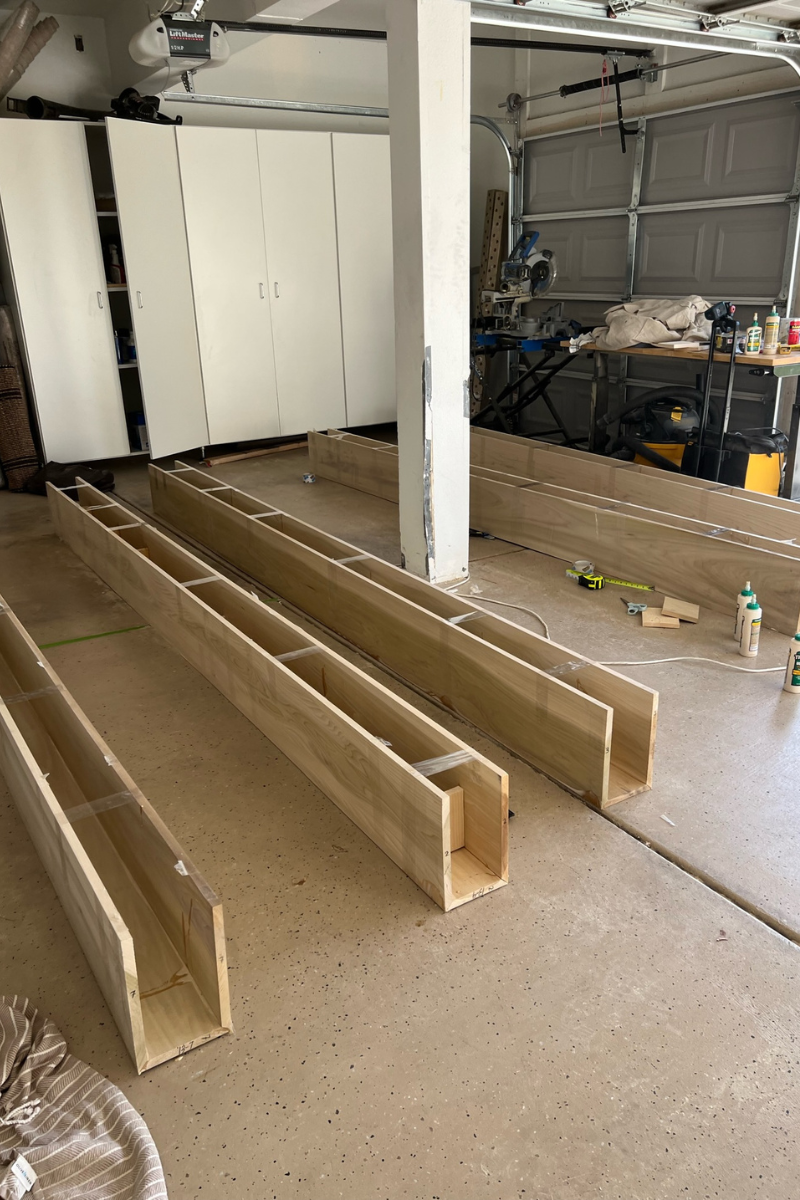
Step 5…6…7: Glue and Support
Now it’s time to glue your beams together. I know it sounds crazy, but wood glue is strong enough to hold your beautiful beams together. It can actually be even stronger than screws or nails. So grab your glue and let’s get to work.
Since your wood is taped, you’ll have to open up the tape to add glue to your mitered edges. You are also going to glue in block supports. You can add your supports before gluing your edges or after. Once you’ve applied your glue, tape (or clamp) to your boards, make sure the opening is the correct size to fit around your supports. Once your glue is applied, tape your beams back up while the glue dries.
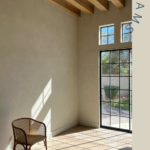
The Perfect Match
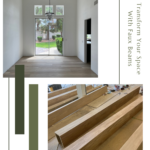
For my entry dining room ceiling, I built 8 beams total. You guys, these things are BIG! They are 13 feet long, 12 inches deep, and 7 inches wide. It felt like the equivalent of building 12 dining room tables. But, before they can be hung, we have to find the perfect color of stain to match the modern vibe we are creating.
I was concerned how the beams would take the stain because Poplar wood boards can be tricky to work with. I actually had to sand for over an hour before staining to make sure the wood was prepared to take the stain correctly. In the end, I found the perfect color match that complements my sleek cement walls. My secret stain combination for this project is a mix of Weathered Oak and Early American by Minwaxusa. You layer each stain one at a time to get the perfect mix of warm and cool tones. You can start with either color first, just make sure you don’t actually mix the stains together.
Tips for Staining Wood:
- Sand with a sander and 220 grit sandpaper
- Apply wood conditioner before staining
- Use a stain sponge
PRO TIP: Celebrate your successes along the way. Building faux beams is a huge undertaking. Finding joy throughout every step of the process makes a huge project more manageable.
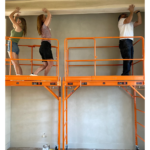
How to Install the Beams
Remember how I said that building these beams felt like I was building 12 dining room tables? Well, now it’s time to suspend that in the air! Are your muscles ready? Obviously this is not a one-woman-job, so I called in reinforcements and felt completely overwhelmed by all the help I received.
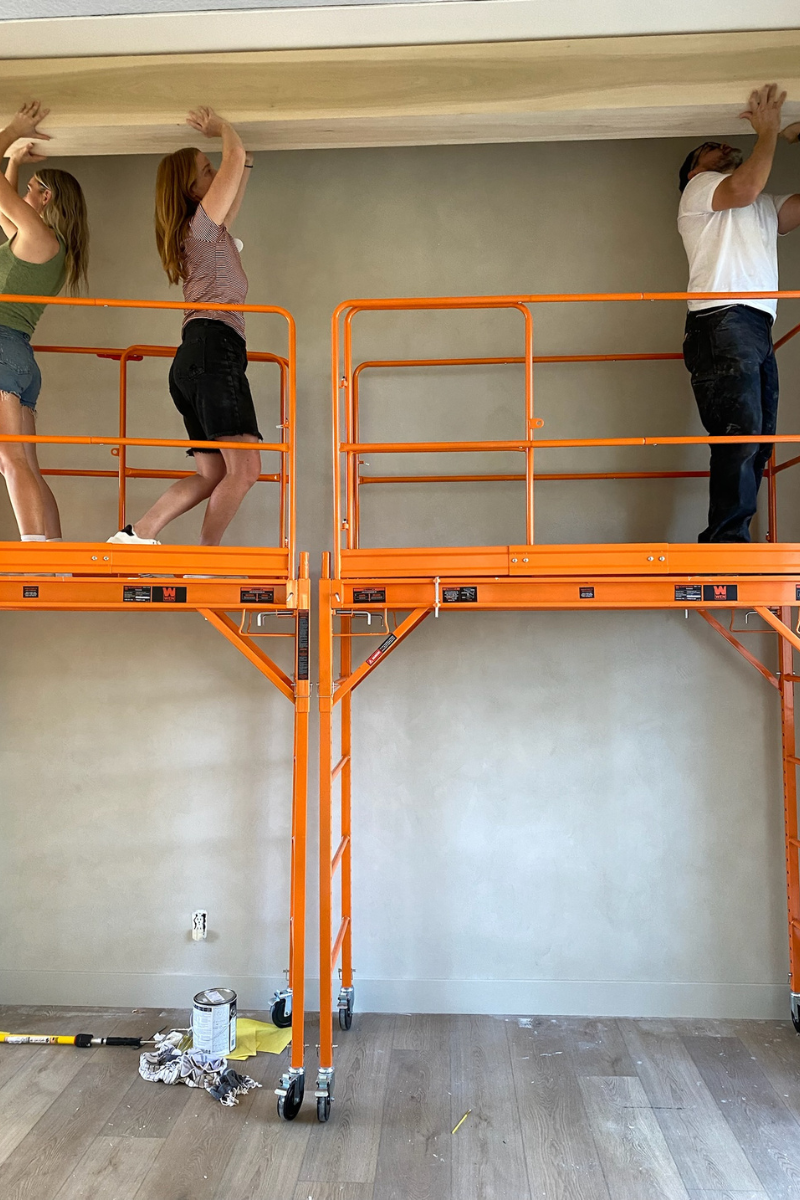
To install the beams one at a time, push each beam upward until it fits tightly around the 2×6 pine board support we previously installed. Occasionally use a rubber mallet to make sure the fit is tight. Once the beam is in the right position, grab your nail gun and drive 2 inch nails through the beam into the 2×6 pine board. You will need to repeat this every foot for the length of your beam on both sides. It may feel crazy that nails are attaching these beams, but I promise they aren’t going anywhere!
Picture Perfect DIY Faux Beams
All that’s left is to do is breathe and take it all in! The hard things in life are worth it. If you’ve been hanging out with me for a while, you know that these beams are so much more than a project. But, I can promise you that the work you will put into these picture perfect DIY faux beams are so worth it! DIY takes effort and action. Just like my motto: STOP PINNING. START DOING. DIY is also about community and I am beyond grateful for all the people that helped with this project! I would love to have you as part of my community so make sure you are following along on Instagram and TikTok. Keep your eyes out for the latest DIY projects happening in the newest Angela Rose Home.
Disclosure: I only recommend products I would use myself and all opinions expressed here are my own. This post may contain affiliate links that at no additional cost to you, I may earn a small commission. Read the full privacy policy here.