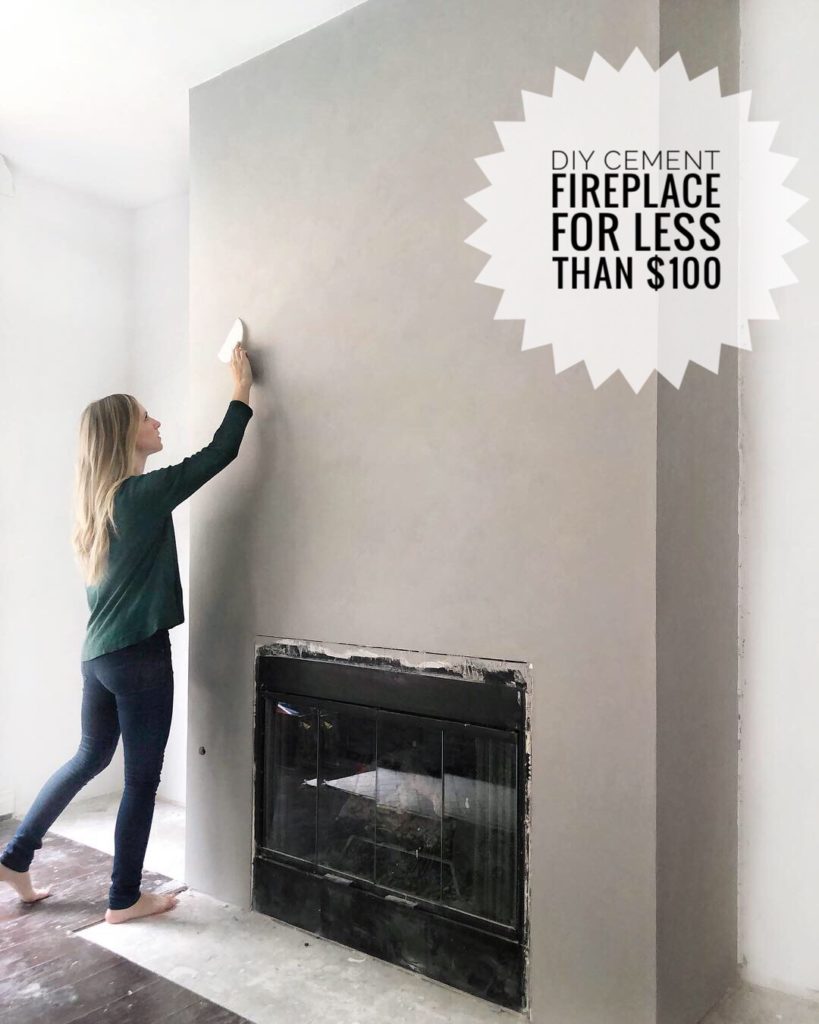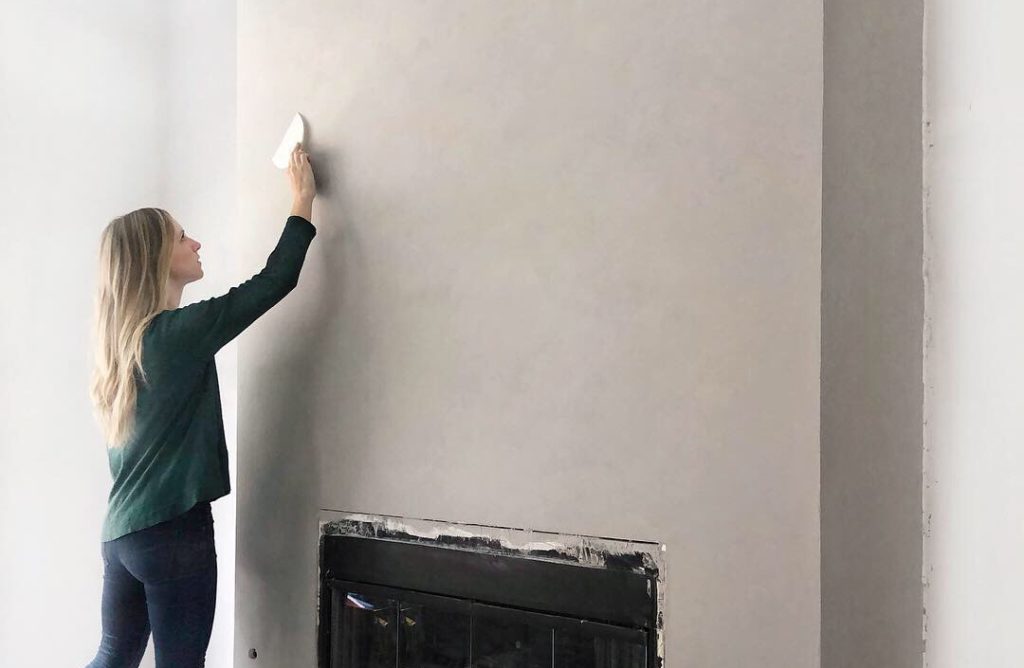
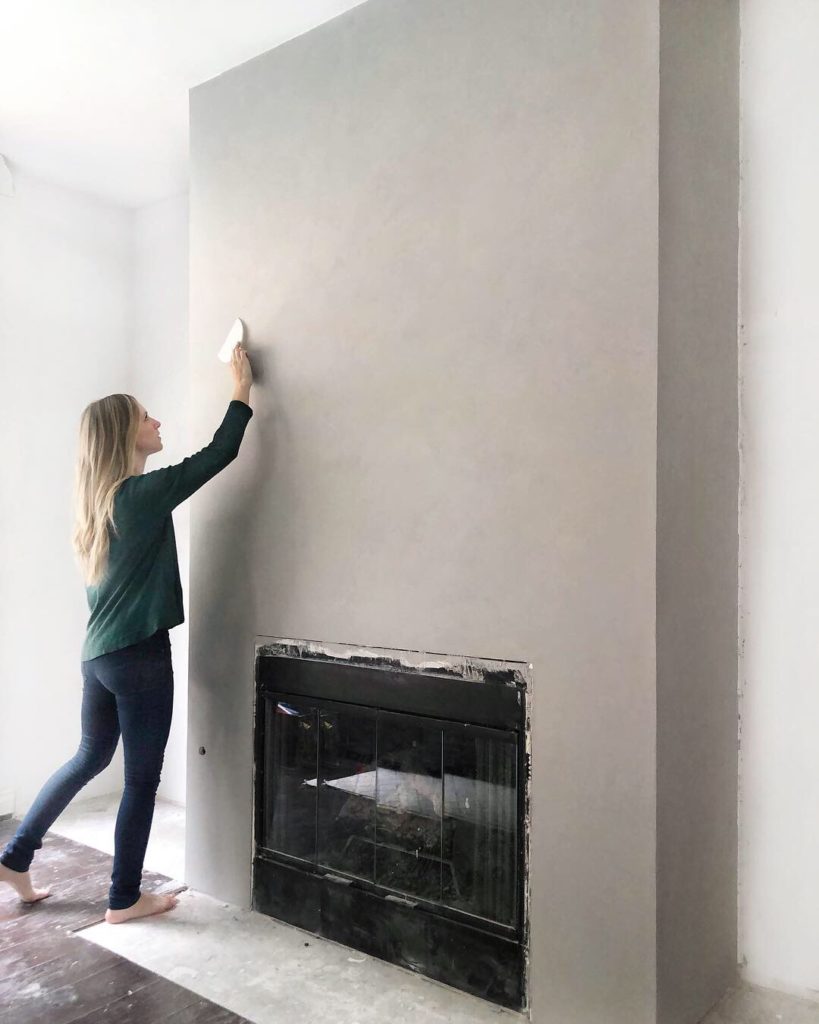
I finally figured it out guys. This is life changing. I figured out a way to DIY a cement look fireplace for less than $100…and it isn’t a faux finish. All contractors quoted me $2,000 to $3,000 for their finishes, and so I am thrilled with the way this turned out. Okay, now let me help YOU achieve this finish also. And follow along with me @angelarosehome (Don’t you just love the One Room Challenge?)

What Product I Used
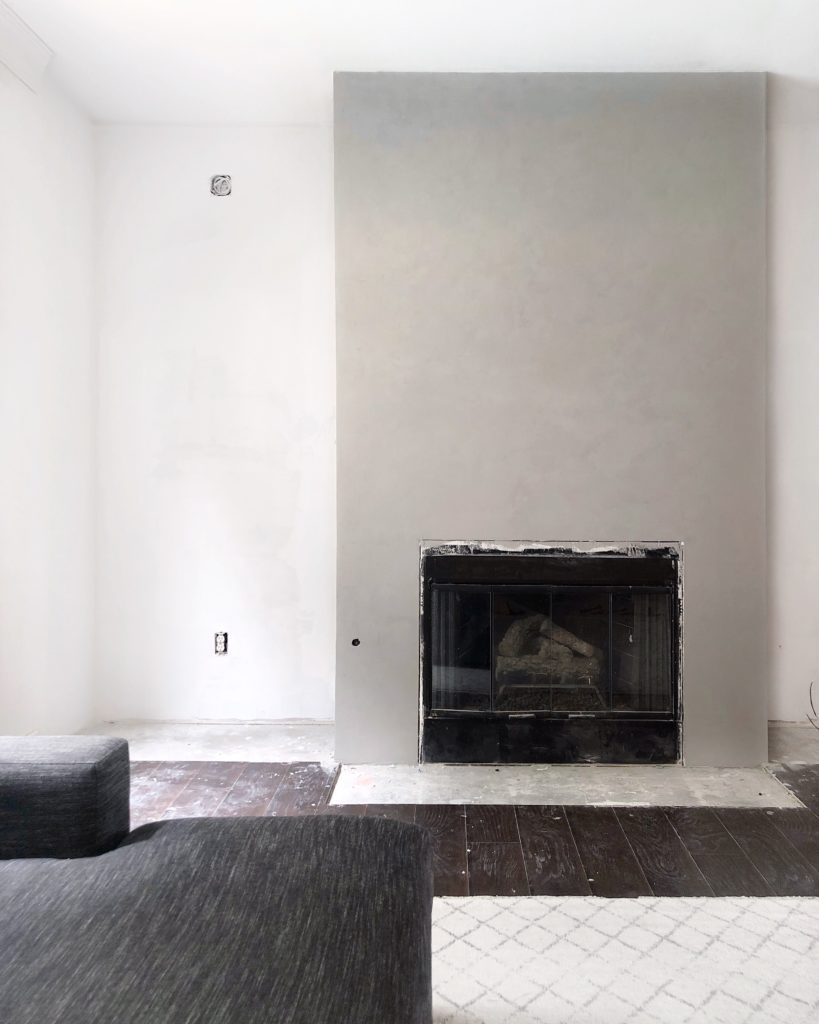
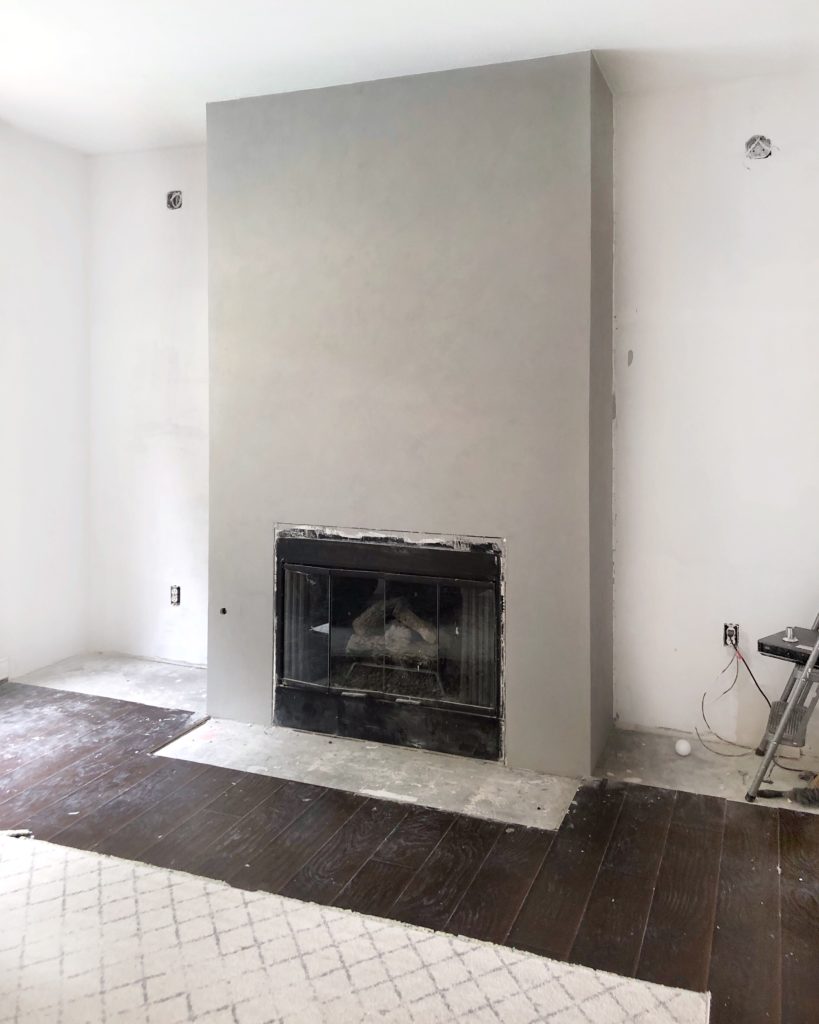
Last week I posted about ripping out and rebuilding my fireplace area. Once it was drywalled, mudded, and primed, I was ready for the cement look. (I actually had 2 failed attempts at this fireplace before I found the product that worked perfectly)… Portola Paints Roman Clay.
About Portola’s Roman Clay
Here is the basic overview of Roman Clay as described on Portola Paints website: “Portola’s Roman Clay is an eco-friendly plaster finish ideal for smooth interior walls. Applied using a putty knife, Roman Clay provides a versatile finish able to achieve a wide range of stone, stucco and marble-like effects, making it a perfect fit in both traditional and contemporary settings.”
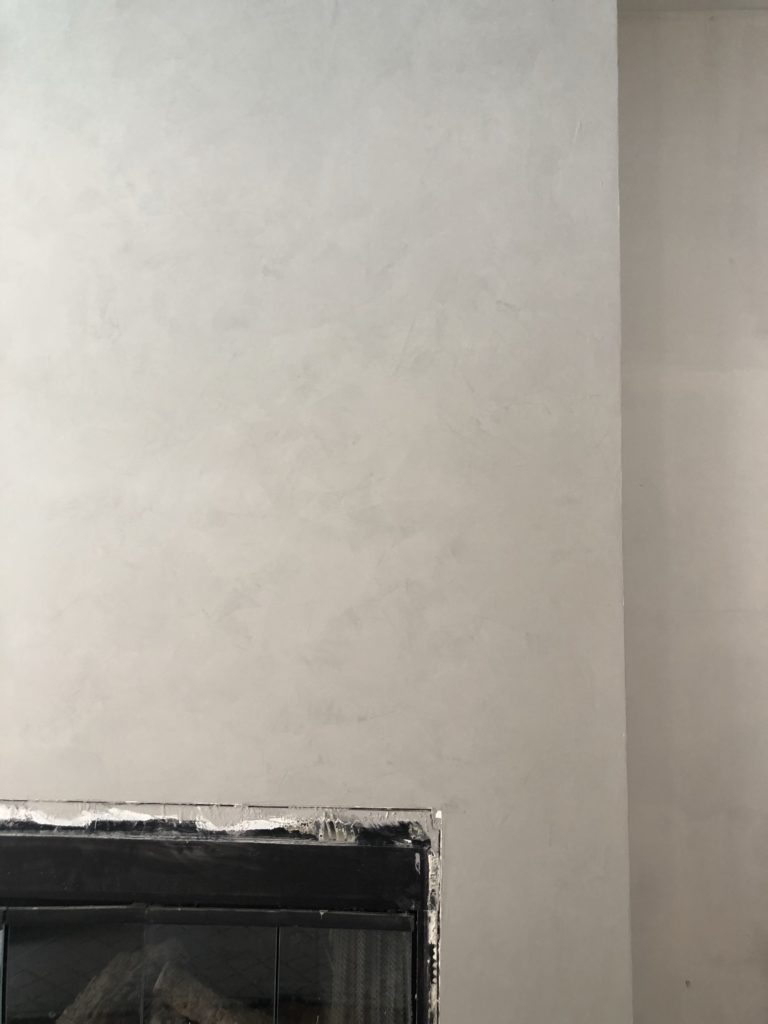
What I love about it, is that it is made of natural ingredients, smooth to the touch, and you can achieve a soft cloudy look. It also comes in a ton of colors.
*Here’s Portola Paints FAQ
Picking Your Color (and finish): Samples
I visited the Portola website and was able to order an entire sample chip pack for $25. This was helpful because I was able to see the difference between their limewash (another specialty finish which didn’t work for me the first 2 attempts…still not sure why) and roman clay (this one worked perfectly)and pick my favorite colors. I then called Portola and they shipped me some of my favorite color samples for $10 each to test out (yes, they ship!).
Achieving the Concrete Finish: BEFORE you start
First, make sure your surface is primed. I used a Kilz premium and it worked great! Ideally, your walls will be smooth, but you can call Portola and talk to them about textured walls because I think it can be done it may just have a different look.
TEST on a separate board or area first. This isn’t the hardest, but a little practice goes a long way.
WATCH THEIR TUTORIAL video. I watched this whole thing and studied it. I also have my own DIY cement look fireplace tutorial video on my Instagram @angelarosehome
My Process
All you need is a 6 in putty knife.
I ended up doing 3 coats. I wanted a pretty even and soft cloudy look. You are able to get different looks with this product according to how you work it.
1st coat: Pretty much this coat is just about getting it on there for coverage…don’t worry too much about looks. Put a small amount of roman clay on your putty knife. Apply to wall and then scrape off putty pushing it around the wall. Cut in with your putty knife as you go. Try to keep edge wet and be systematic with where you are working to move that wet edge across. Hold putty knife with two fingers on top and thumb underneath. Move your putty knife in a soft S as you are scraping off so that lines are soft. You can change the thickness of putty on your surface by changing the angle of you putty knife. You don’t need to leave a lot of product on the wall, but if there is a ridge, you’ll want to disguise it by leaving on thicker putty. (see, I told you you should just watch the video tutorial…easier to SEE than explain)
Sand with high grit sandpaper (300 to 400) to knock off any high parts after drying.
2nd coat (and potentially 3rd): Apply Roman clay in same way, but as you are going, you can work the areas more to get more highlights and lowlights. This can also be done by waiting a little until the putty starts to set and then going over it again. You’ll have to test this out to see what look you like best. I didn’t work over the areas too much after drying since I wanted a softer look.
Finish with a light 400 grit sand if desired.
Leave, or topcoat with one of their options.
*my walls were white, and I could still see wall through after the second coat so I did 3. You can also tint your primer to match the roman clay color if you’d like. The darker the roman clay the more contrast of highs and lows you can get, the lighter the color, the less contrast.
Other questions I have been asked:
Can this be used on countertops? I don’t think so. I think you’d want to use Ardex/Henry Feather Finish for that.
Can this be used outside? No, but their limewash can.
Why did the limewash not work for you 2 times (dried splotchy)? I am not sure! I called Portola and we couldn’t figure it out, I am guessing something with the temperature difference or humidity or moisture?
How long did it take? It took me 1 1/2 hrs per coat…times 3 coats. (but sooooooo many hours of failed attempts first before I used Roman Clay!)
How much did it cost?
sample chips: $25
sample jars: $10
Roman clay: 1 gallon $50ish?
6 inch putty knife: $7
=LESS THAN $100 for a cement look fireplace.
I mean COME ON. Amazing DIY cement look fireplace right? Tag me @angelarosehome so I can see and share your fireplaces!