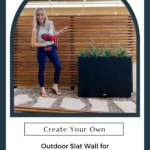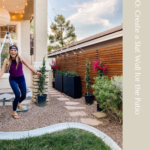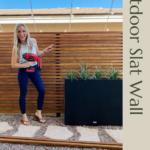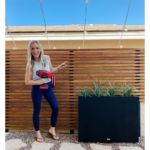
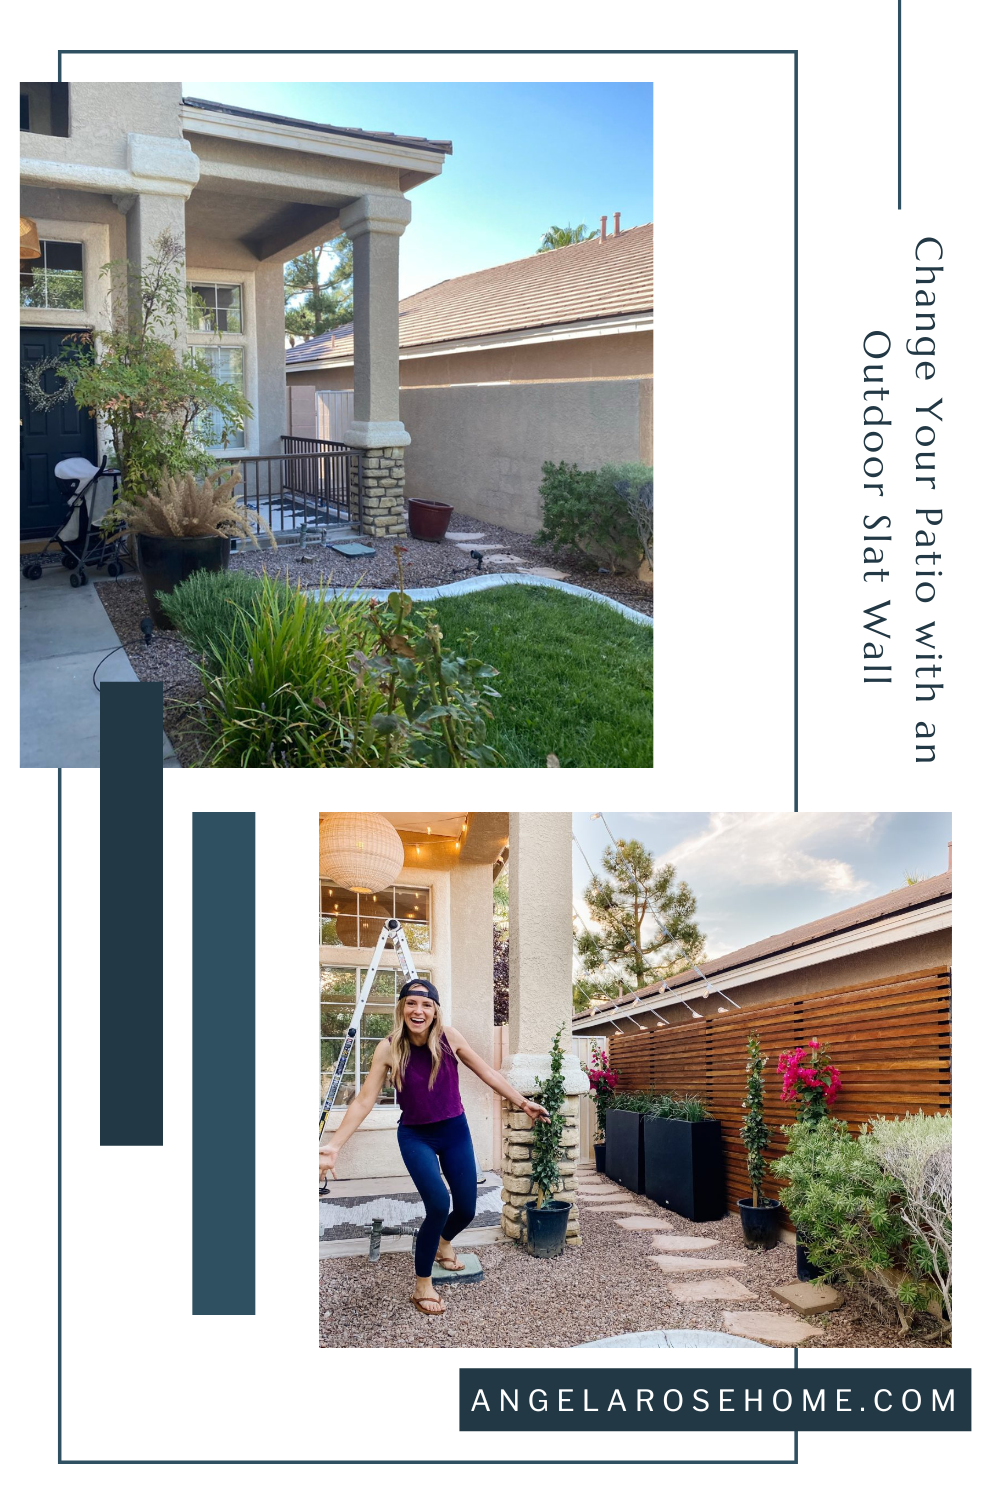
Summertime is all about being outdoors. That means we should enjoy where we are hanging out, right? My patio was nothing special, and if I am being honest, I didn’t enjoy hanging out there. I knew that had to change. So, I got my DIY skills going until I transformed it into a place I love to be. The biggest piece of my patio transformation was an outdoor slat wall. I want you to have a space that you love too, so I am sharing what I learned so you can create your own DIY patio slat wall.
I need to know what you think, slat walls are “just” slat walls…yes or no?
To me, every slat wall has unique qualities that bring each setting to life. So I’m sure you can guess that my answer is “no”. Slats can be installed horizontally or vertically. Different widths of slats create dimension and texture. And don’t forget about color! I’ve seen all sorts of slats walls varying from solid colors to stained slats showing off natural wood. When I was looking to liven up my concrete patio, I knew I wanted to bring natural elements back into the outdoors so I went with naturally stained wood. But, your options are endless!
Here’s What You’ll Need to Create Your Own DIY Patio Slat Wall:
- Redwood boards
- Valspar exterior stain
- Level
- Nail gun
- Hammer drill (if you are going into concrete or stucco)
- Table saw (if you are cutting the wood down yourself)

Skinny or Wide Slats for Your Patio Wall?
When creating your own DIY patio slat wall you have to start with figuring out the width of your slats. You can’t go wrong with any width, it is totally a preference thing. When I was creating the slat wall on my patio, I asked for everyone’s opinion about whether I should go skinny or wide. The responses were split 50/50 so I brought in my husband to break the tie.
The cool thing about deciding the width of your slats is that everything is customizable! Once we (aka my husband) decided that the only answer for our patio was a skinny slat wall, I had to figure out how to make it happen. I decided to purchase 2×6 redwood boards and then ripped them down to 1×1 with my table saw. I didn’t settle with what was available in the store and you don’t have to either. Unless of course, you like the dimensions available at your store. So what team are you on…skinny slats or wide slats?
PRO-TIP: Use REDWOOD (also considered cedar) when creating DIY projects for the outdoors. This type of wood has naturally good outdoor qualities. It is resistant to moisture, rot, and insects.
Create Your Own DIY Patio Slat Wall: PLAN
Speaking of customizable…Part of creating your own plan is choosing the direction of the slats and the color you are going to go with in addition to the width of your slats.
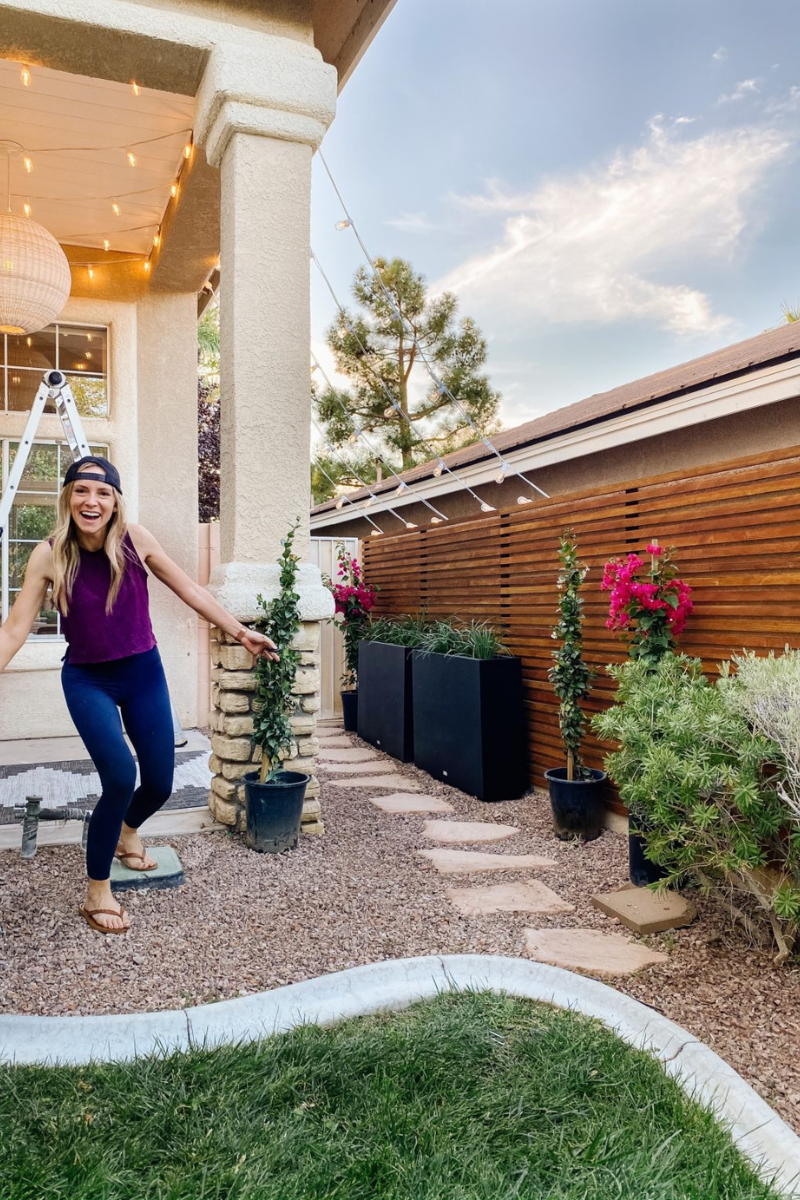
I went with horizontal slats for my patio. The wall I wanted to cover was 16ft long so I decided to have 2 sets of 8ft slats with supports every 4 ft (5 supports total). I also wanted to modernize the space. So, I decided to paint the supports black and highlight the natural wood slats with exterior stain.
I can’t say this enough, customize your patio slat wall to be exactly what you want! Natural wood and black posts worked in my space, but it might not be the right fit for you. Plan your DIY patio slat wall to be uniquely yours.
Create Your Own DIY Patio Slat Wall: PREP
The prep you have to do for this project pretty much comes down to painting and ripping boards to the right size. But if you found a precut board that you love, you saved yourself some time and don’t have to clean up a BIG pile of sawdust.
I started my painting prep by turning my support boards black. I could have used my paint sprayer, but this part of the project was so minimal that I went with spray paint. Remember, you do you! Do what you love for your space.
Next, you will want to stain your slats. There are 3 types of exterior stains: transparent, semi-transparent, and solid. The more solid your color is, the more sun-resistant it is going to be. If you’ve been here a while, you know I am a rule-breaker and have to test out my options. For my patio slat wall, I actually ended up using Valspar’s exterior stain in TRANSPARENT Canyon Brown. Shhh….don’t tell. It’s what I keep saying. Create your own design that works for you.
PRO-TIP: If you paint your supports before staining the slats, you can save some time. Once the supports are dry, you can step away from staining the slats to start building your wall. Keep going back and forth between building and staining to maximize your time (or sunlight to help the drying process).
Create Your Own DIY Patio Slat Wall: BUILD
The first step of building the slat wall on your patio wall is anchoring your support boards to your wall. My patio had stucco walls, which added its own set of challenges. But, you will be able to anchor to whatever you need to. I believe in you!
Place your support post against the wall and make sure it is level. Grab your drill (you will need a hammer drill if going into stucco or concrete) and drill your top hole. The drill will be going through your support board and whatever is behind it. Move your board, place your anchor, and then screw the board into the anchor. Repeat for multiple anchors.
PRO-TIP (for lining up anchors): Make sure the board is level, drill a hole for the bottom board while it is lined up on your wall. Then swing the board to the side (remember the top of the board is already anchored). Then all you have to do is place the bottom anchor and screw it in.
Now your wall is ready for the slats. Keep in mind that the first board is ALWAYS tricky! It just is. Just imagine that I am right there next to you cheering you on and shouting “You can do this!” Repeat after me…“You don’t scare me! “I’m not afraid of you!”
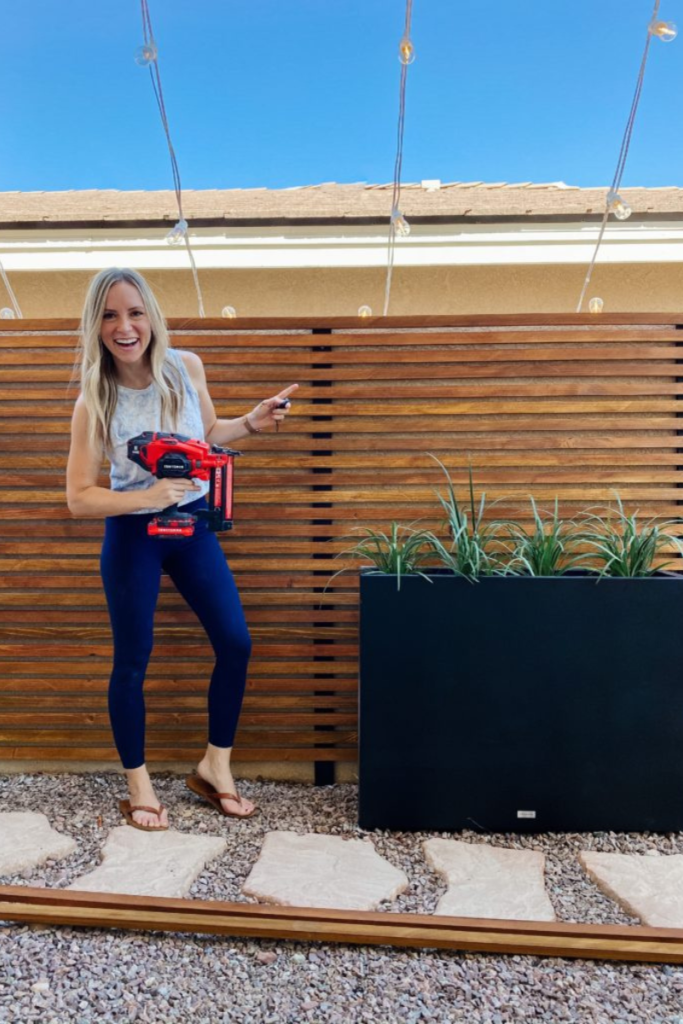
To attach your boards, make sure they are all level then nail the slat to the middle support board with your nail gun. This frees up a hand and helps make the process so much easier. Then attach to the remaining supports. After I placed the first board, I used another board as a spacer to make sure everything matched up. Keep in mind that not all boards are perfectly straight. It’s totally ok. Just push up or down with your hand before nailing the board. Once you attach all of your slats, you can enjoy your outdoor space! Check out what it looked like when I was building my skinny slat wall for my patio.
Here’s a recap on how to create your own DIY patio slat wall:
- Plan
- Paint/stain boards
- Install supports
- Install Slats
- Time to Enjoy!

Create Your Own DIY Patio Slat Wall
I know I shared a lot from my outdoor slat wall. But, honestly, I can’t wait to see how you create your own DIY patio slat wall. I just know it is going to be amazing! Alright, it’s time to stop pinning and start building the patio of your dreams. If you ever need other DIY ideas or want to hang out, follow me on Instagram and Tik Tok. I am always up to something.
*Disclosure: I only recommend products I would use myself and all opinions expressed here are our own. This post may contain affiliate links that at no additional cost to you, I may earn a small commission. Read full privacy policy here.