This post is sponsored by Lowe’s.
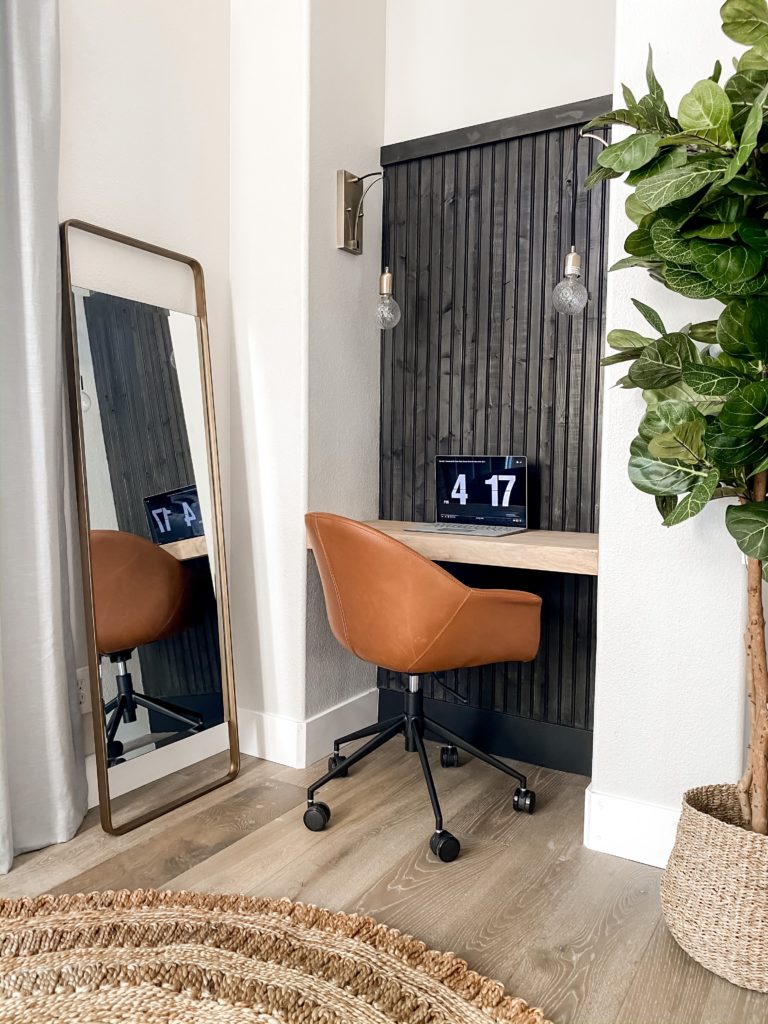
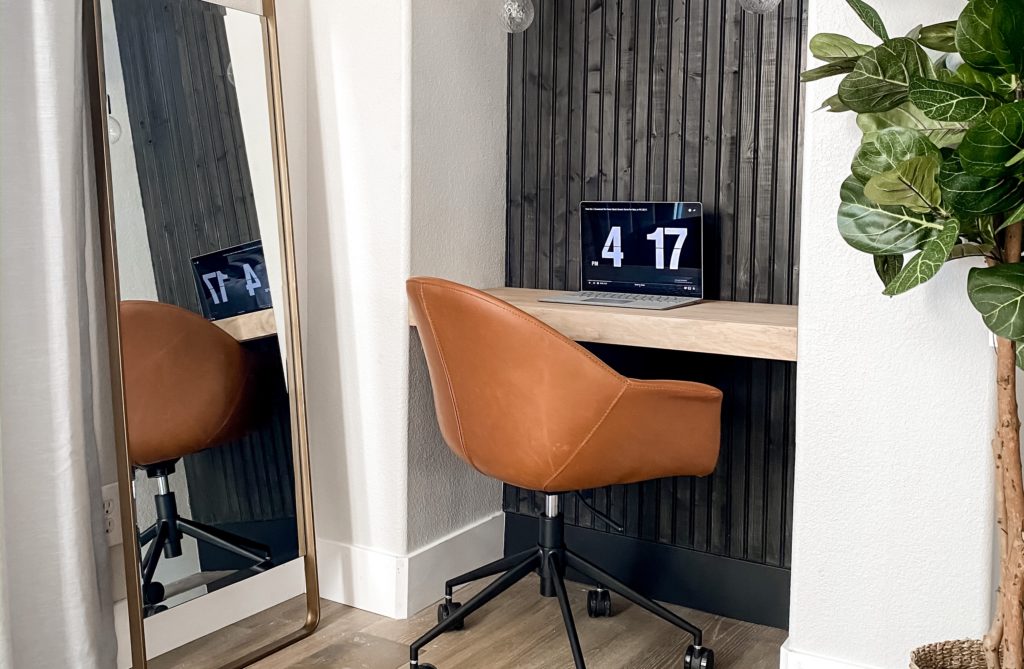
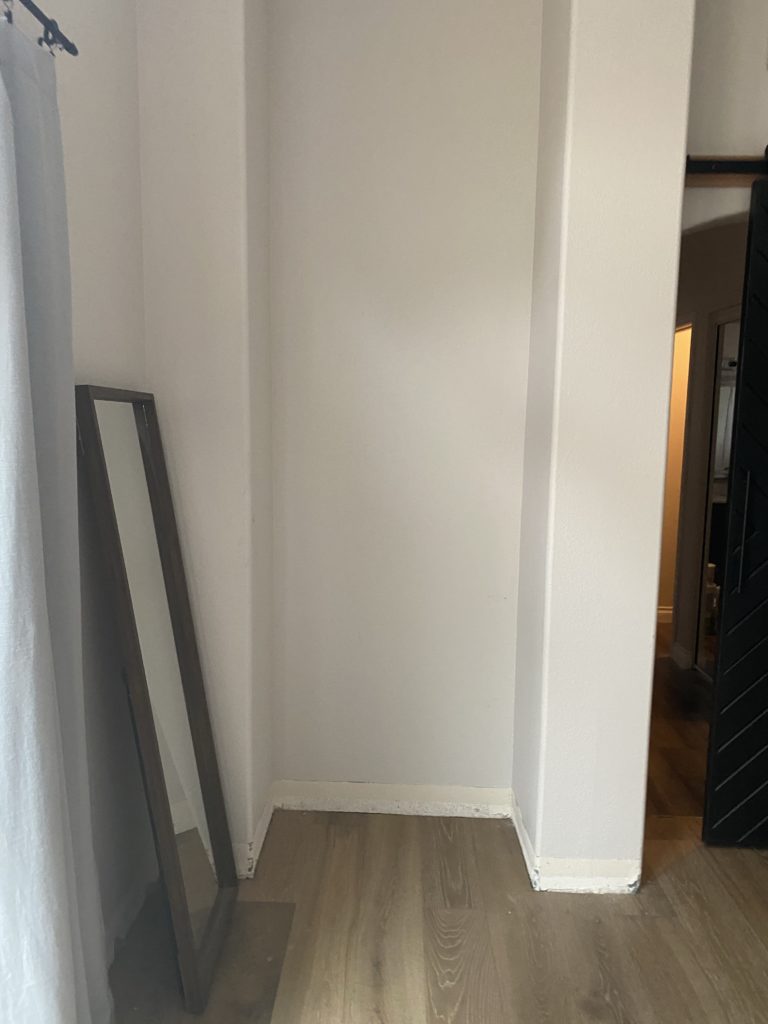
I can’t wait to show you this build-in desk nook area! Let me take you on a trip down memory lane…when this nook was just a sad space used as a dumping ground for junk. It’s amazing what a few days, some power tools, and some hard work can do to a space. I think this new little office for me might just be my favorite space.
BEFORE
AFTER
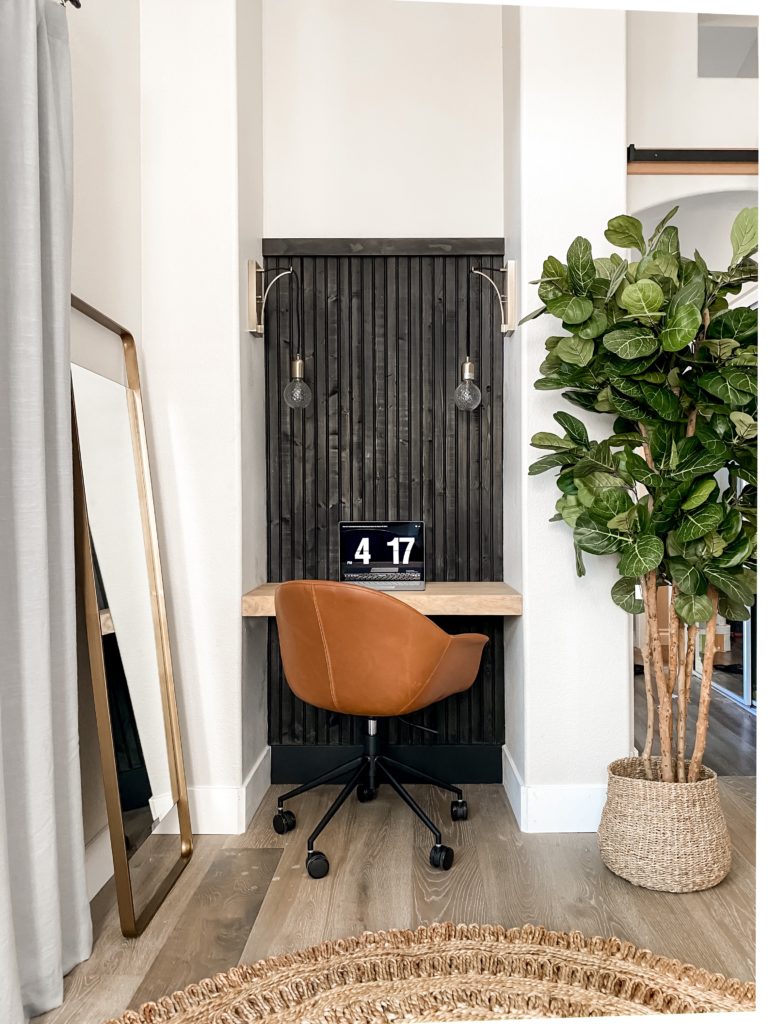
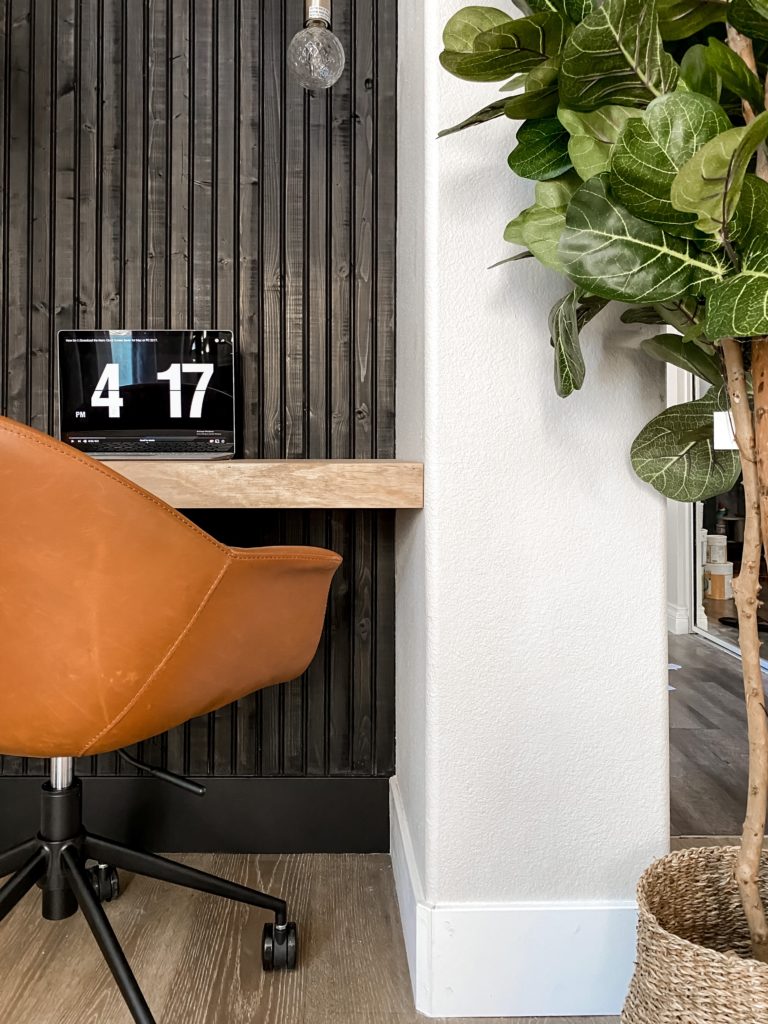
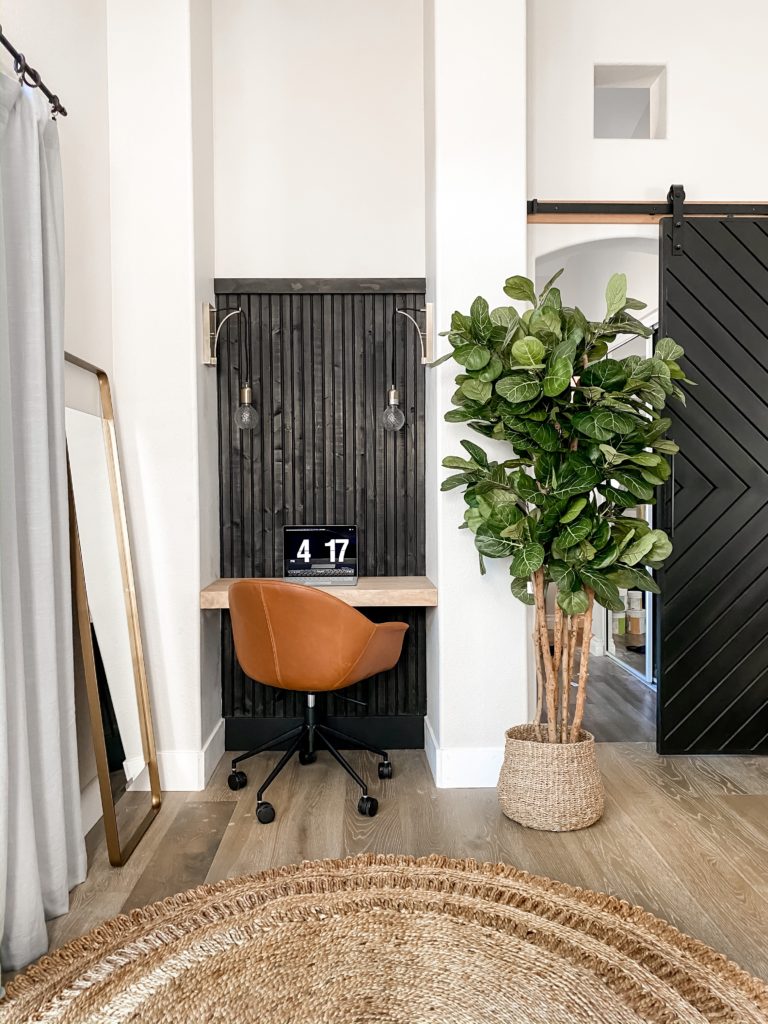
Can you even??? The whole space came together with the layers I added on like lighting, rugs, plants, and decor. Here are the finishes that I added to the space:
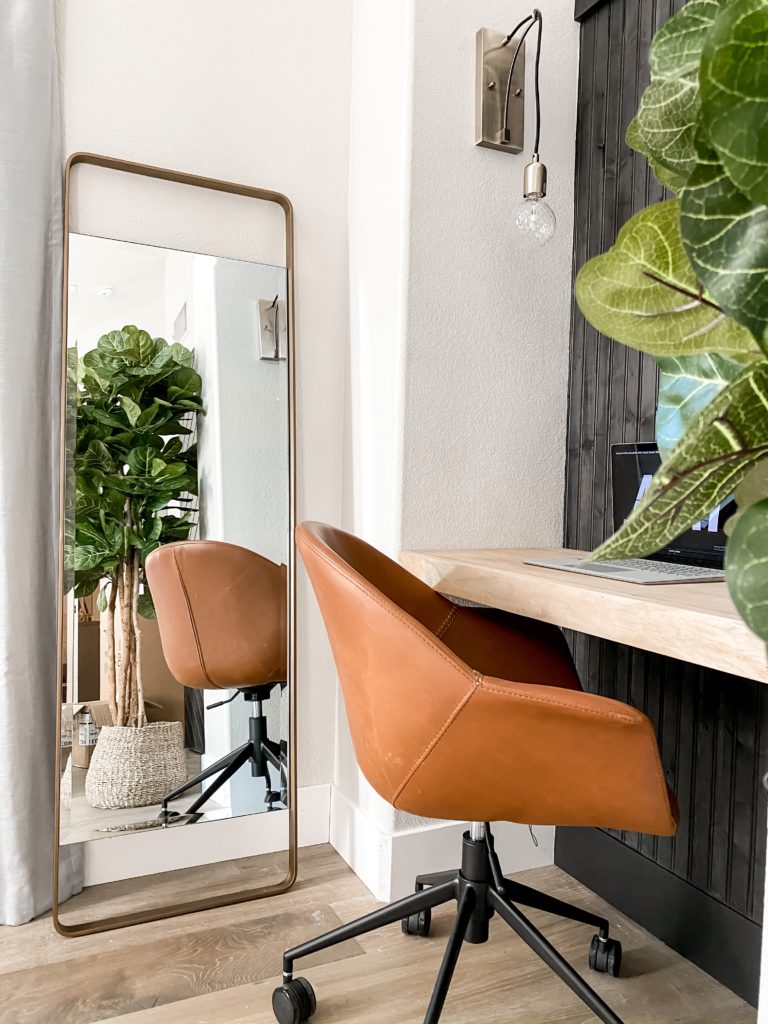
- Office Chair: You know I need some wood tones and leather in EVERY space. I love the instant warmth it brings, and I love that this chair is comfortable while being cute at the same time.
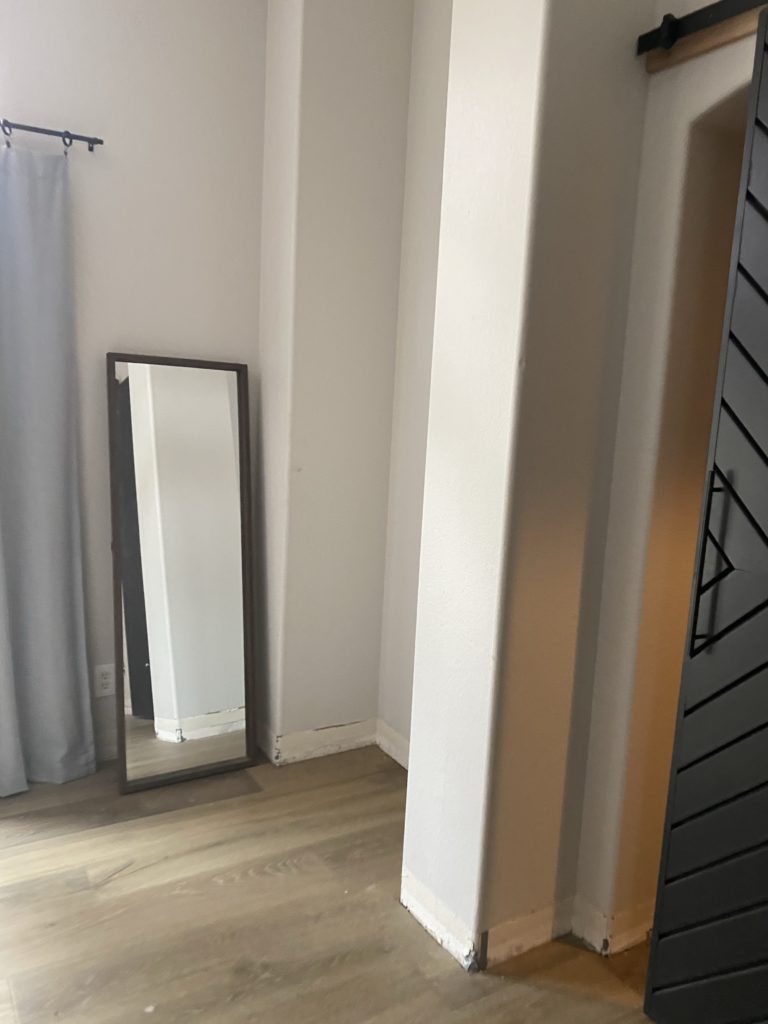
- Mirror: This mirror is honestly so cool with the cut outs at the top and bottom. I especially love the brass and the rounded edges too! Mirrors are functional here since it’s in my bedroom and it also helps add light to the space.
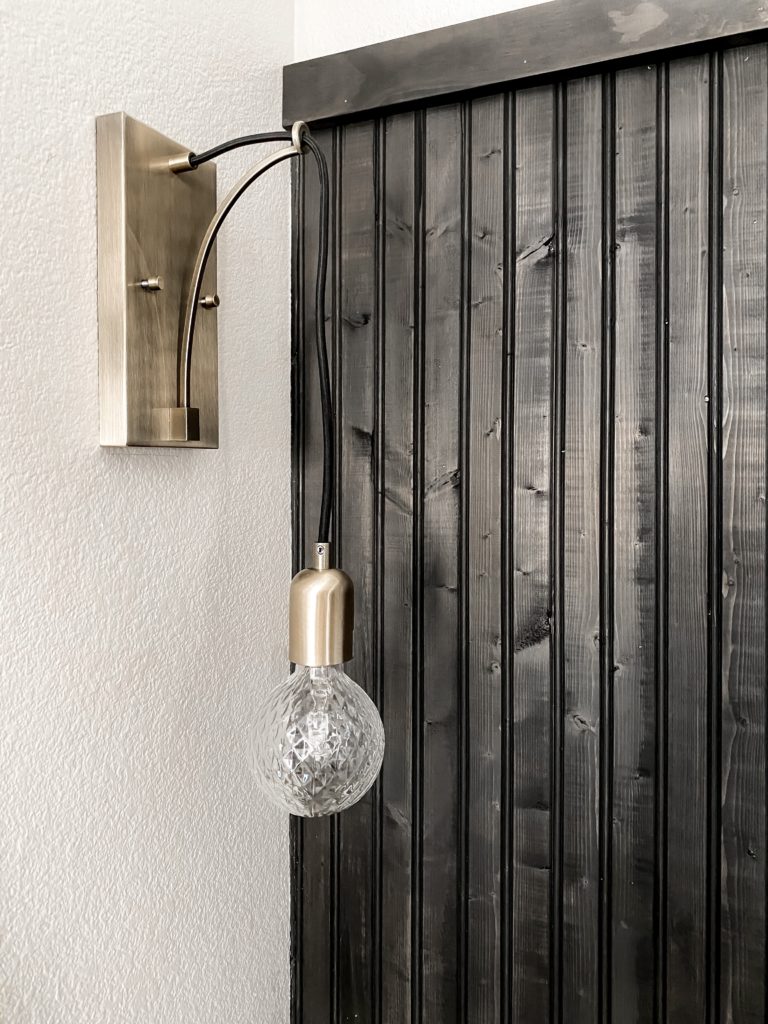
- Sconces: These sconces are kinda the star of the show am I right? I loooooove the added class they give the space, and an added plus is that they came with these cool faceted light bulbs.
- Fiddle Leaf Fig: This tree is the thickest, fullest fiddle leaf fig I have ever seen. I love how greenery instantly breathes life into a space!
- Round Jute Rug: I love a good jute rug, and this one is so fun because it is round. A rug always pulls a space together, and I was surprised at the quality of this rug and how much I loved it.
- Here’s another sconce I was considering, and some more chairs.
For the final step of the desk, I needed to stain it. Here is what I ended up doing:
*For the desk I used 1/2 plywood for the top in a high grade, and then I used a 1×3 board in Select Pine for the front. The desk is supported by 1x2s screwed into the wall. I used my nailer to attach the front board.
Step 1: Sand the wood (here is the sander I have). I always do this to help get the most even stain.
Step 2: Apply wood conditioner. This Minwax water-based wood conditioner is my favorite kind, and also helps give an even stain and prevents blotchiness. I use a rag and wipe it on and let it sit just a minute or two. Then you are ready for stain!
Step 3: I used my favorite Minwax Weathered Oak stain which is a light gray. This takes off a little of the yellow. Again using a rag (or you can use soft bristle brush like this), I wipe it on and then immediately wipe it off. This way it just just a slight gray color since I am not letting it seep deep in.
Step 4: I then layered my favorite Minwax Early American. I apply it and immediately wipe it off to give it the lightest color possible. I love the warmth this stain adds.
Step 6: Finish with a top coat. I love the Polycrylic in Matte finish. I apply using a high quality bristle brush, lightly sand in between coats, and apply 3 coats.
And let’s see that before and after again…
BEFORE
AFTER