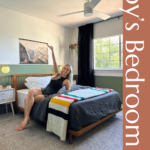
While on vacation, I saw some super rad headboards painted on the wall. They were amazing, and I just knew I wanted to recreate something similar in my own house. So for Colton’s 13th birthday, I gave him a super fun boy’s bedroom makeover. And it provided the perfect opportunity to create a DIY-painted headboard wall that I was dying to make!
I also added a new fan, lighting, fresh curtains, and the easiest DIY picture frame. The finished project had fun, relaxed, and totally cool vibes! Exactly what I wanted.
If you’re redoing a bedroom sometime soon, here are the need-to-know details on how I created this amazing bedroom makeover for my son. Now, I made it with my son in mind BUT it’d also be a great guest room or bedroom for you!
Boy’s Bedroom Makeover
Colton’s bedroom turned out so fun and perfect! Are you feeling inspired to makeover your own kid’s bedroom? If so, here are the details on how I completed this fab boy’s bedroom makeover!
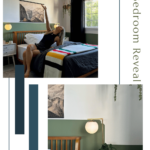
1. Choosing a Paint Color
The first step in this project was choosing the right paint color. After choosing a paint color, everything else will fall into place.
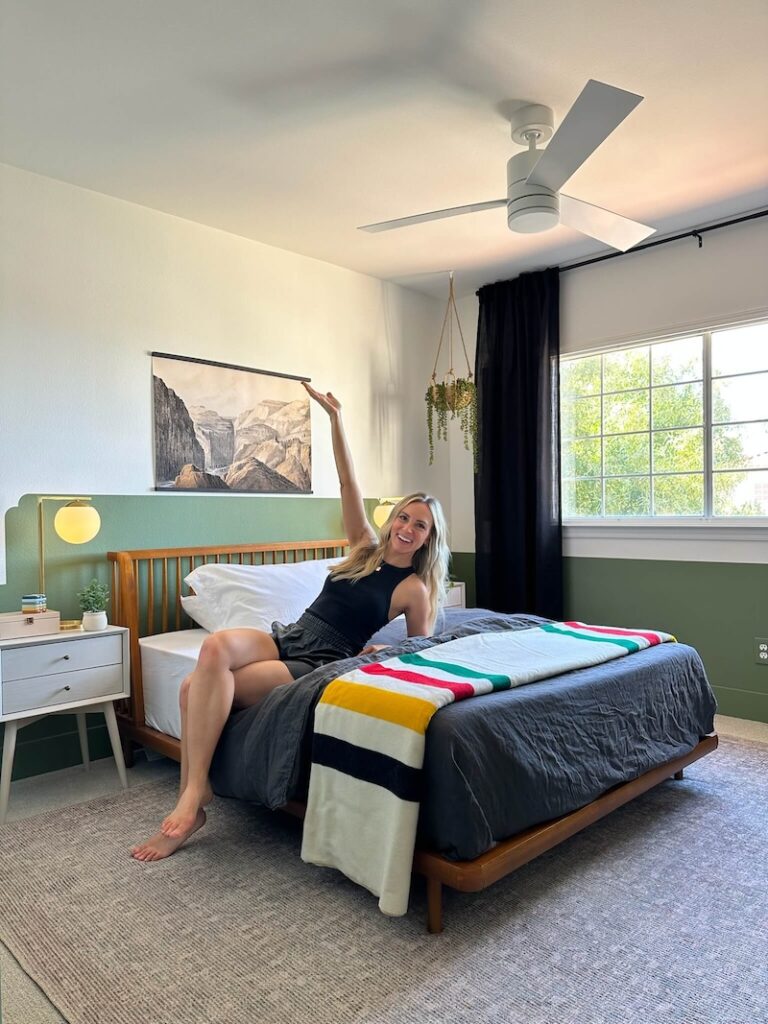
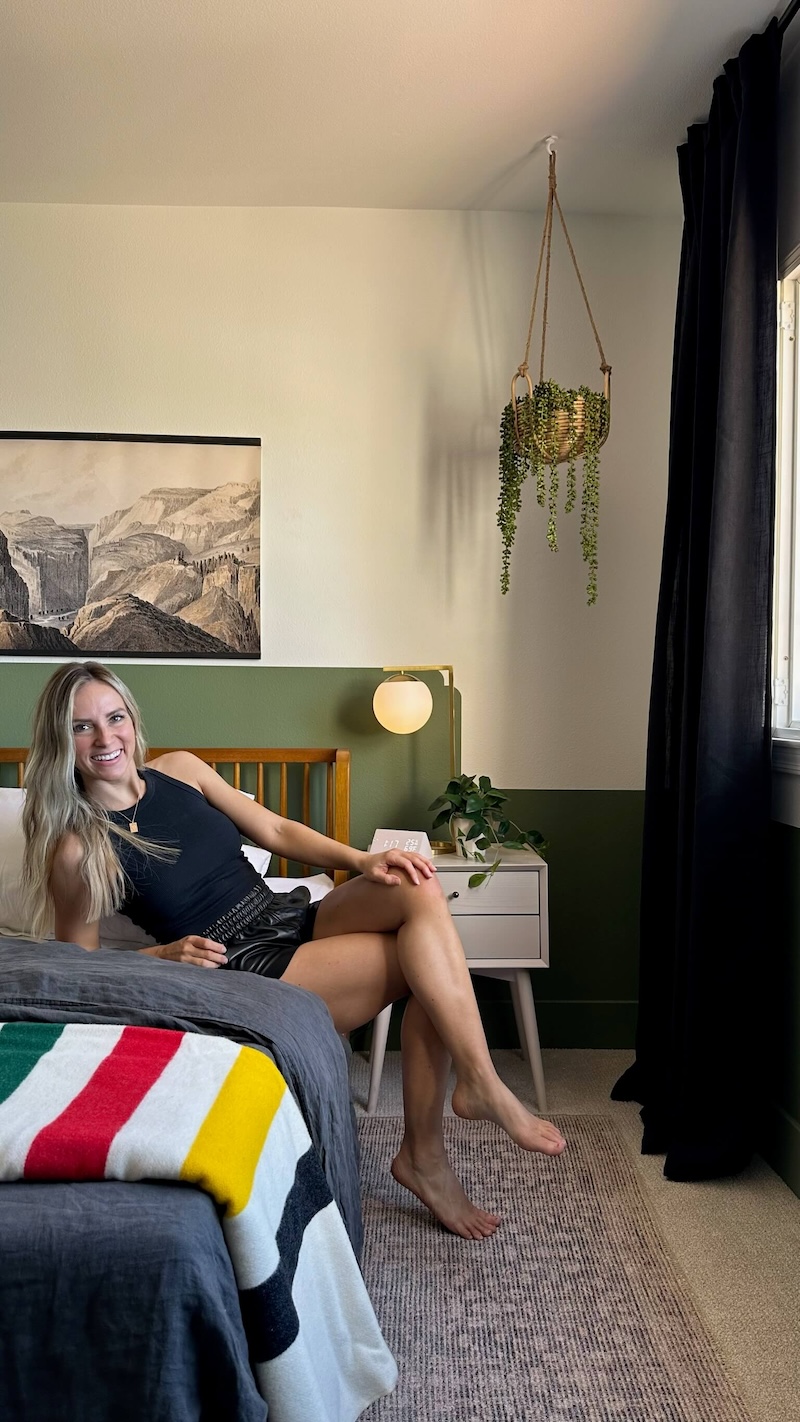
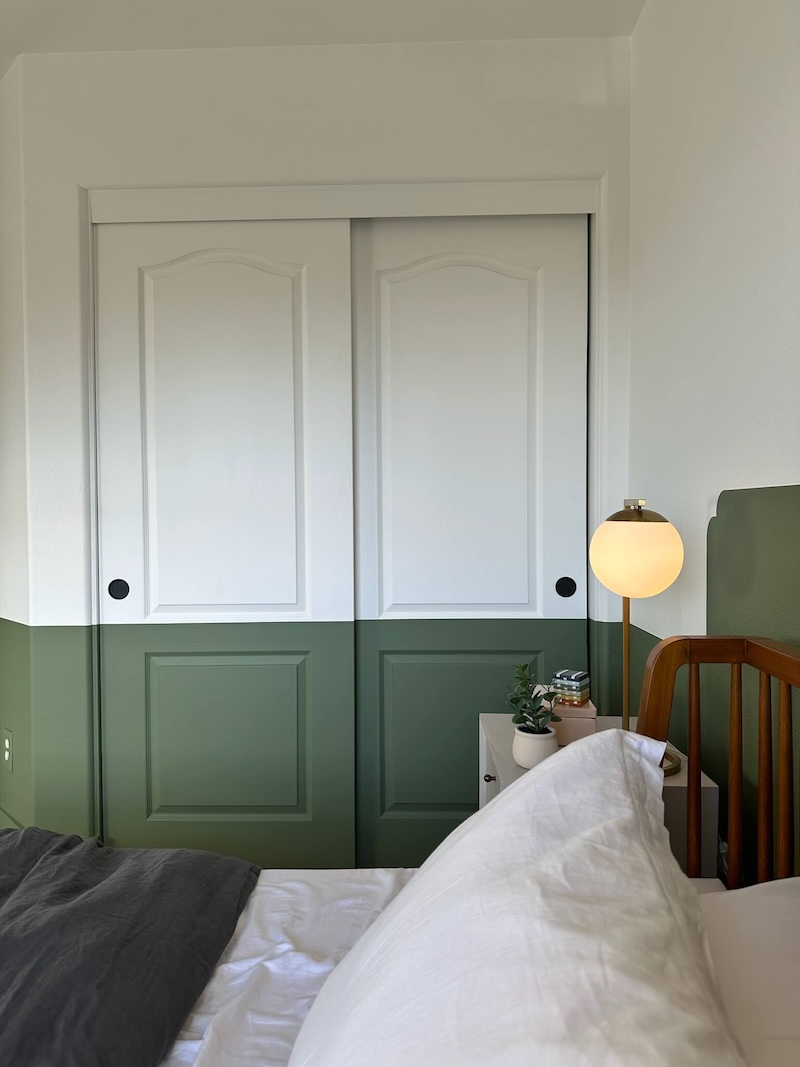
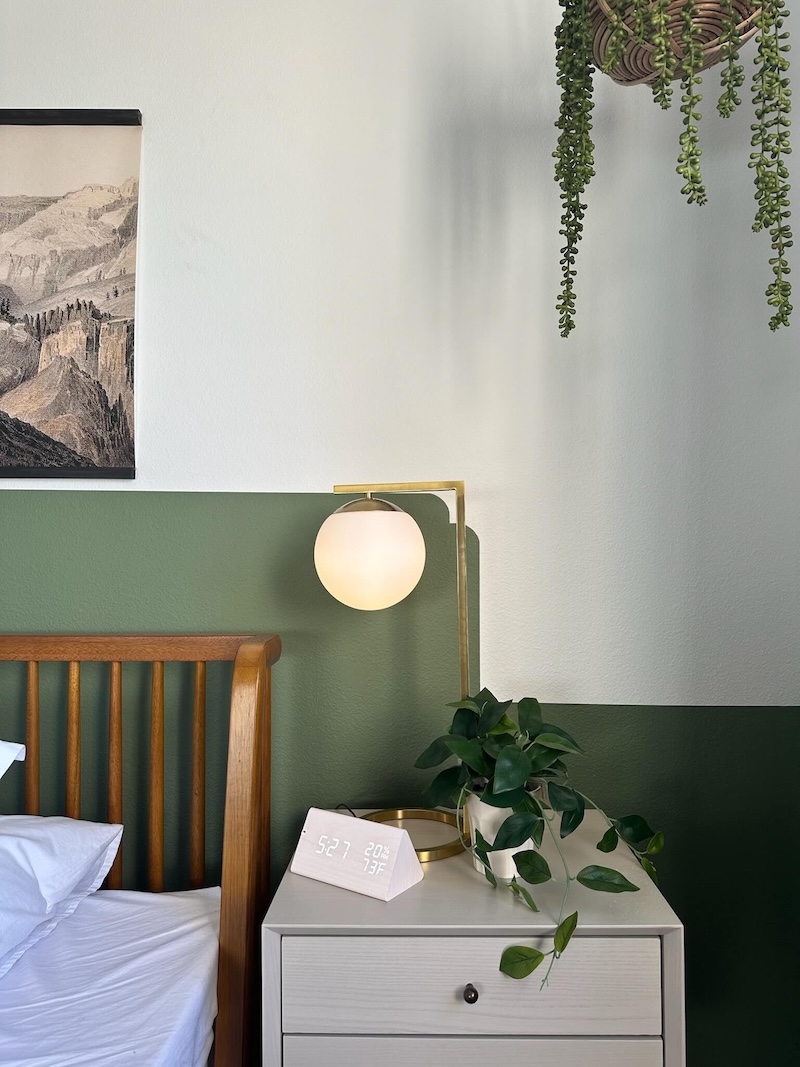
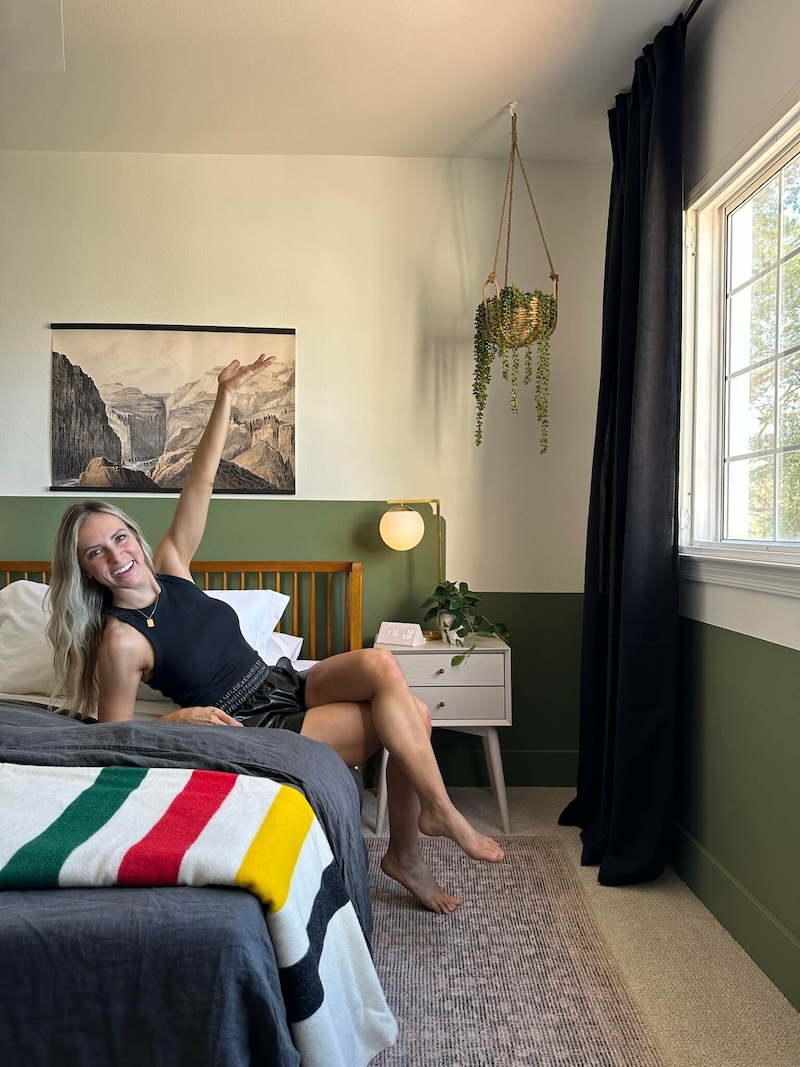
I wanted to choose a super fun color that was also cool and relaxing. After looking at a bunch of options, I chose Sherwin-Williams Artichoke and absolutely LOVED it. It’s a warm green with yellow and gray undertones. The perfect color for a boy’s bedroom, right?
2. Taping Out the Design
After I selected and purchased the paint, I was ready to tape out the design for where this paint would go in the room.
I planned to paint the headboard on one wall where the bed would go, while still having a horizontal half-painted wall on the other three walls.
To ensure my paint lines were straight, I used the coolest tool ever: A laser level! Having a laser level will make you feel confident in your ability to paint a straight line all around a room! (And for this project, a straight paint line is a MUST).
After setting up the laser level, I taped off the entire room (including the headboard). Then (this part is important), before I painted, I sealed the bottom of the painter’s tape.
To seal your paint, smear a bit of caulk on the edge of the tape. You can also paint over the tape edge with the same color paint that is currently on the wall.
Sealing the tape is going to fill in any of the tiny little gaps that inevitably form when your surface isn’t smooth. It’ll prevent bleeding, and you’ll be left with the straightest, cleanest paint lines every time.
Love this easy hack? Check out ALL of my great painting tips to get the best results when painting. Because nothing’s more satisfying than a clean and fresh coat of paint!
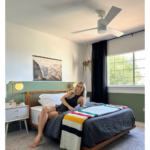
3. Painting the Headboard
Painting the headboard on the wall was so easy! I designed the look that I wanted on a piece of paper, and then I measured and taped it off on the actual wall. I used a pencil to draw the finer details of the headboard (like the rounded corners).
After that, I applied the paint and went around with a small brush to do the touch-ups. After finishing the headboard wall, it was on to the decor!
4. Adding Decor
I love DIY projects, but sometimes it makes more sense to buy instead of build. Adding decor is a great and easy way to express your style. For this room, I wanted to add some new lighting and cozy touches to make it feel complete.
Let’s start with details about the new lighting for Colton’s bedroom:
Lighting for the Bedroom Makeover
I wanted to get rid of the existing ceiling fan and replace it with something more modern. I loved this Tulsi ceiling fan in white from Wayfair. It’s super sleek with LED lights.
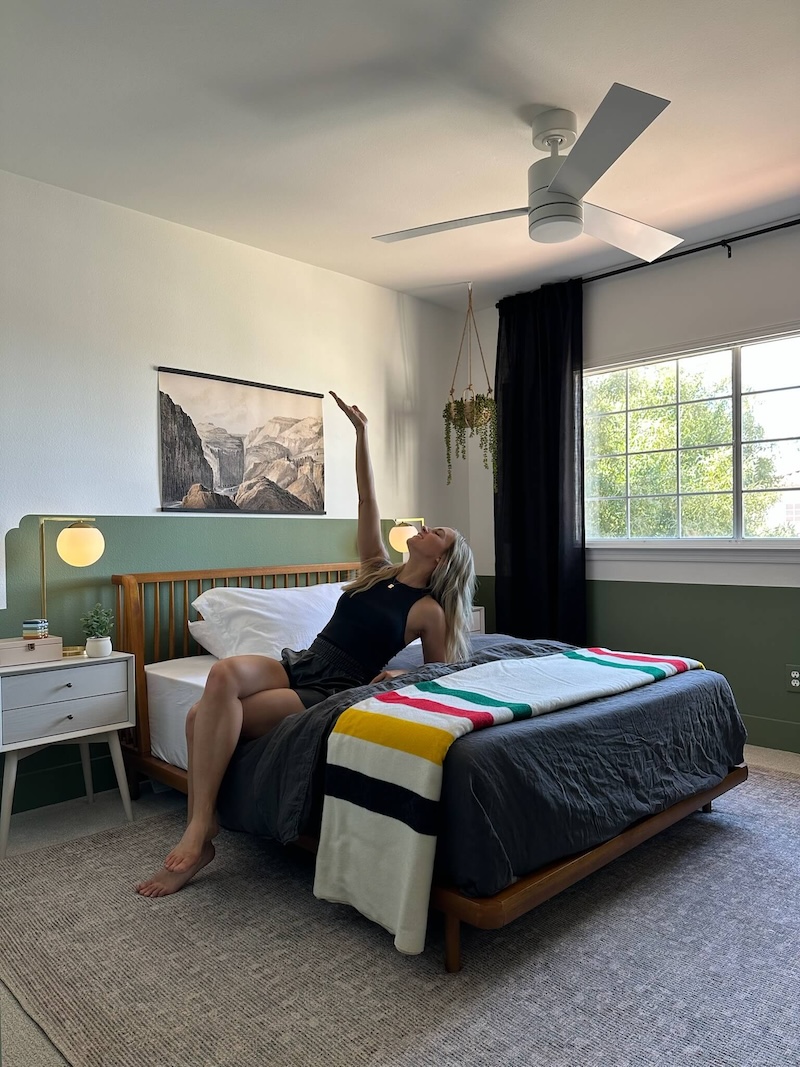
Then, I wanted to add some dimmable side table lights to help with the overall calming vibe. We used these amazing Globe lights from Target, but they’re not always available. But don’t panic, I also have a great selection of desk lamps put together that would look great in their place!
Besides just adding light as decor, I wanted to highlight the natural light too! To do this, I added new curtains to help the window feel larger.
Adding New Curtains and a Rug
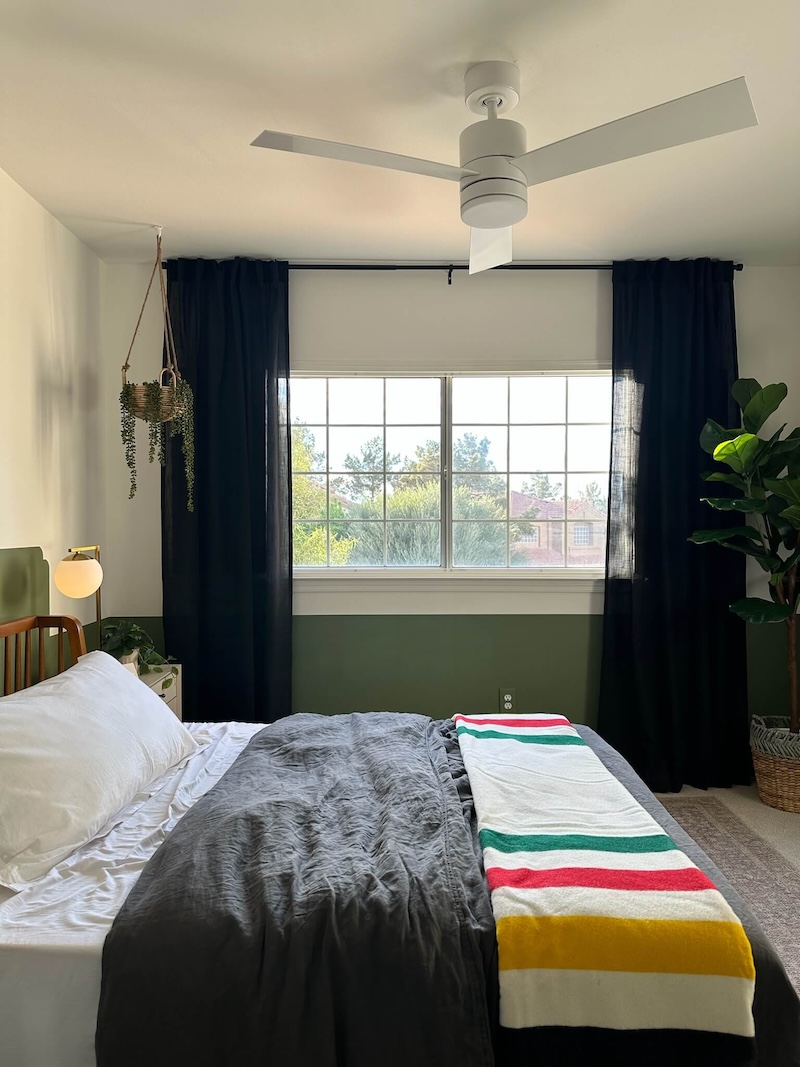
We added these long black curtains to really open up the space and make the window look huge.
Curtains are a great way to lengthen a room and help the ceilings feel taller than they actually are. I love to hang curtains at the top of a bedroom or living area because it makes the room feel so much more spacious. The perfect illusion.
We also added a rug! The Angela Rose x Loloi Ember Rug tied the entire room together. Everyone knows how much I love a good rug. It unifies a space while adding a unique art piece to the room at the same time!
Having a hard time choosing the perfect rug for you? Don’t skip my Rugs 101 post. It includes everything you need to know about selecting and styling rugs. After adding the new curtains and rug, it was time to add the staple pieces!
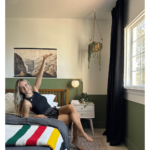
New Bedroom Furniture
Even though we painted a headboard wall, I still chose this bed frame with a headboard attached. The headboard is a slatted style, which accentuated, instead of detracted, from our painted headboard. The perfect duo!
This bed style comes in twin or full, so you can get the best size for your space. And of course, I got this striped, colorful high-quality wool blanket and this Calista pillow to go with! I really love how the blanket gave the room a much-needed pop of color, and the pillow was really cohesive with the rug!
I also went with this Mid-Century West Elm nightstand (one for each side of the bed).
Pro tip: when you’re picking out a nightstand for any room, you want to have your nightstands within 4 inches of the same height as your bed.
After adding all the decor, including this beautiful hanging planter, it was time to add the final touches that took this project to the next level.
Kid’s Bedroom Makeover Finishing Touches
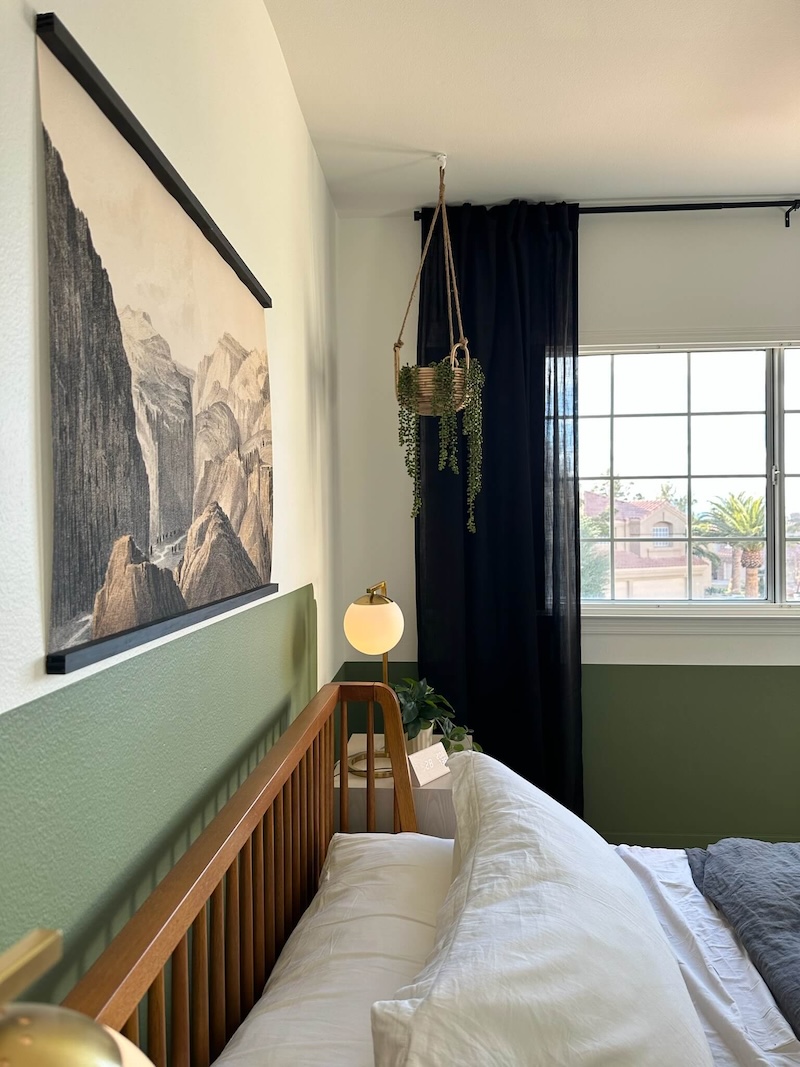
I also added a gorgeous art print from Juniper Print Shop with my own DIY frame. Frames can be so expensive, that’s why I love to make DIY frames. If you haven’t made your own frame before, it’s easier than you think! Try out these 4 easy DIY frames when you do your next DIY makeover.
The final thing I did to this room to make it complete was paint all the outlet covers. This is something that people forget about, but it makes a HUGE difference in the overall final product. It doesn’t take very long, and you’ll be super happy with how it turns out!
And that’s it! If you want more inspiration for your next kids’ bedroom makeover, you’ll love these room decor and inspo ideas!
Boy’s Bedroom Makeover
I loved doing this project and bringing that painted headboard to life! It was such a quick project that was also super fun to complete.
For more fun bedroom makeover ideas, here are some of my favorites I’ve done over the last few years:
- Best DIY Projects for Any Bedroom
- The Secrets to My Complete Master Bedroom DIY
- DIY Cloud-Inspired Boy’s Bedroom Makeover
- Brooke’s Bedroom Makeover
And of course, you can find many other bedroom ideas over on my blog and Instagram.
Follow me on Instagram and TikTok so that you can see all my latest DIY projects and building tips. Whether you’re a beginner or a more advanced DIY-er, I’d love for you to follow along!
Disclosure: I only recommend products I would use myself and all opinions expressed here are my own. This post may contain affiliate links that at no additional cost to you, I may earn a small commission. Read the full privacy policy here.