I think every teenager deserves a space of their own. They need to be able to have a nice space where they can hang out and just be, away from school, activities, and everything they have going on. One of the first places if DIY’ed in our home was my oldest son’s room. I’ve been feeling like we needed to do an update on my teenage room refresh to show you an easy DIY that anyone can do.

Teenage Room Refresh: An Easy DIY Anyone Can Do
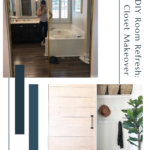
One of my favorite parts of updating my teenager’s boy room was the closet doors. The room previously had gold mirrored closet doors. They were in serious need of a refresh so I came up with a plan. Updating the closet doors turned out to be the perfect DIY project. It was an affordable and easy transformation that could be done to any type of closet door.

To update the closet door, I got a 4×8 sheet of the thinnest plywood at Home Depot and had it cut into strips.
Pro-Tip: If you don’t have tools to cut down a large sheet of plywood, or even 2×4’s, Home Depot will help cut the wood down to the size you need. Having it cut into smaller pieces also helps when you’re trying to pack it all home in your car.
Now back to the closet doors. I only needed one tool to wrap everything together, Gorilla glue. Sounds too simple to be true? It was really that simple. All I had to do was put glue on the back of each board, press them onto the mirror, and everything stuck together! And after the boards dried, I even ended up gluing on a barn door handle. Everything is very solid, sturdy, and has held up well.

As I glued each board to the mirror, I used a permanent marker to cover up any parts of the mirror that would show in between each board. If you are looking for an easy DIY, this would be a great place to start. The whole transformation was super simple and it only cost $15! To finish, I placed the door back on its track. But, you could also hang your closet door on some sliding barn door track hardware for a cool finish. Cool is what we aim for with teenage boys, right? I’ve used sliding barn door hardware on other projects and have loved it.
Adding Green for My Teenage Guy
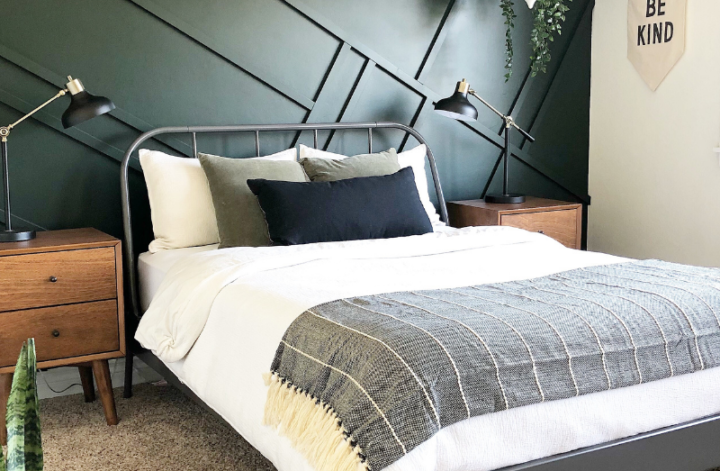
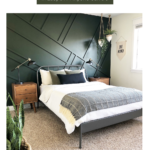
I lovingly call Colton’s room the “green room” because of the green accent wall that is the main focal point. This wall is a beauty! It is actually one of the first projects I did that went viral and is still getting attention.

I started this DIY project by drawing out plans for the accent wall on some graph paper. Then, I adjusted things as I went. I have done a ton of different accent walls, from board and batten, wallpaper, slat walls, to beadboard. The green accent wall I created for my guest room makeover was actually way easier than installing board and batten. Can you believe it?
What makes this accent wall special is that I decided to use 60° and 30° angles. Typically most DIY projects use 45° angles because it is a lot easier, but I like making things complicated. I can’t help it. I just had to have steeper angles. And to me, it was totally worth a few extra steps. What do you think? Click HERE if you want to see my whole process.
Before painting the wall I had to choose a color. If you have been hanging out with me for a while, you know I am OBSESSED with green. There is something about the most perfectly place green that just modernizes a home. After a few attempts during the guest room makeover, I ended up deciding to go with Essex Green by Sherwin Williams.

During this project, I found the coolest painting supplies! Have you ever seen the painting tape that has plastic attached? I prepped with Scotch Blue Pre-taped painter’s plastic. Then to paint, I loaded up my favorite paint sprayer with Essex Green and went for it. This paint sprayer makes any paint go on smooth.
Other Places for Accents
If you are wanting to try an accent wall this would be a great project. I promise, it really is one of the easiest projects. Plus, you are going to get some major compliments for how amazing it is! My teenager’s room also doubles as our guest bedroom. When family and friends come to visit and people cannot stop talking about it. So, if your looking for a guest bedroom design this is it.
Tying the Teenager’s Room Together
The perfect ending to a teenage boy room update is decorating with all your favorite furniture and decor. I have found the best items at Target, McGee&Co., Serena and Lily, Crate and Barrel, Wayfair, Amazon, and CB2. The home decor and furniture are trendy, affordable, and make a statement. To see what I used to finish off my guest room makeover click HERE or shop my post.
Teenage Room Refresh: An Easy DIY Project to Try
I hope my teenage room refresh is an inspiration for you to try your own DIY projects in your home. Remember that magic happens when you stop pinning and start doing. If you are looking for inspiration during your DIY journey, check out my Instagram where I save all my how-to stories to my story highlights! I’d also love to hang out with you on Tik Tok. I always have something going on and it is a lot more fun to do projects together!

