This post is sponsored by Rust-Oleum
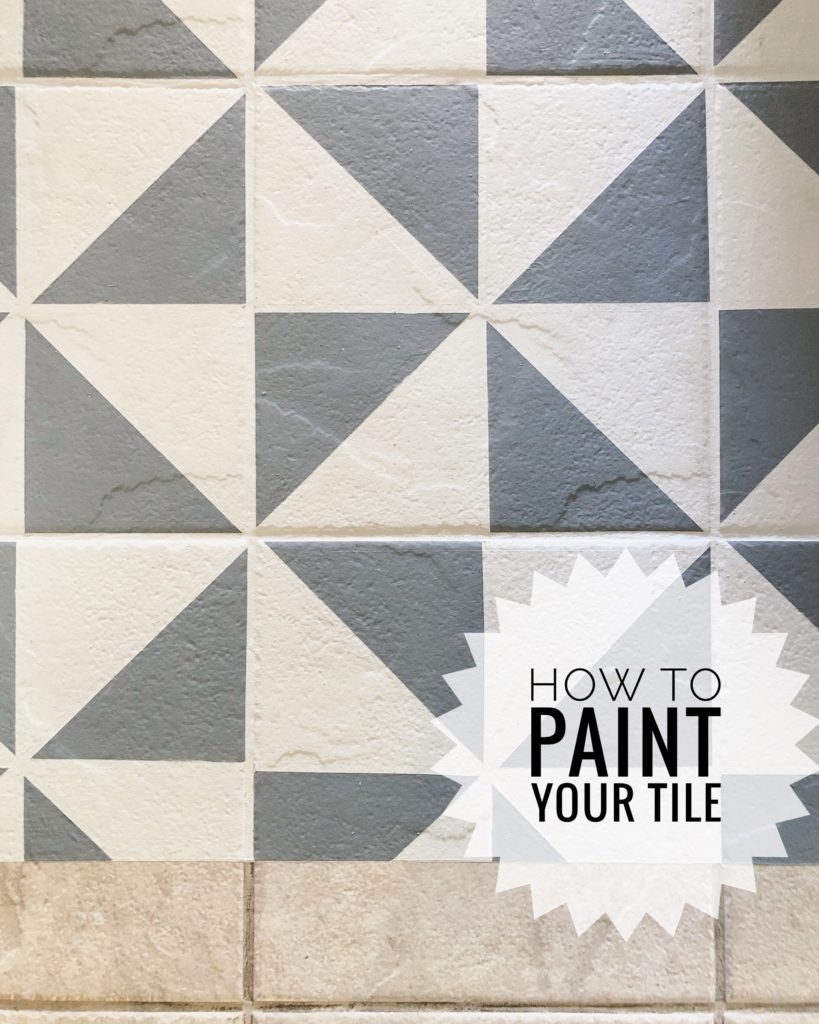
Are you ready to see the craziest floor transformation…and just with paint? Everyone has boring beige tile somewhere in their house, or maybe just some linoleum or vinyl that isn’t your favorite? It’s time to change that with my all time favorite DIY tool…paint! Check out this before and after and tutorial so you can learn how to paint your tile (or any floor really) with paint too.
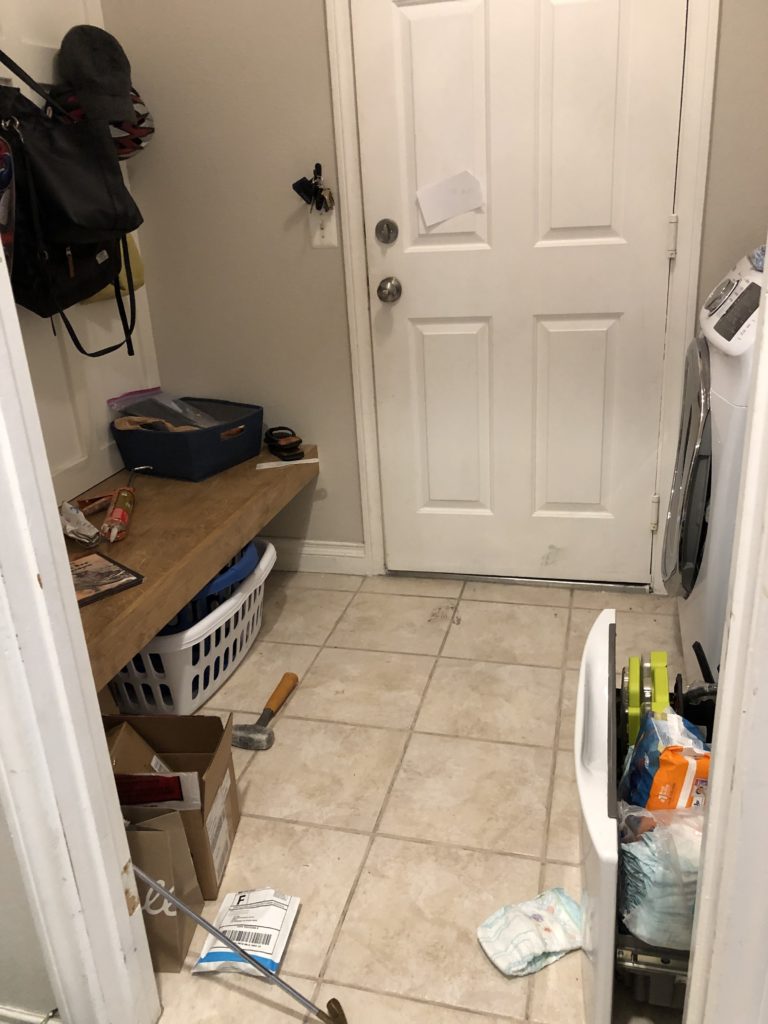
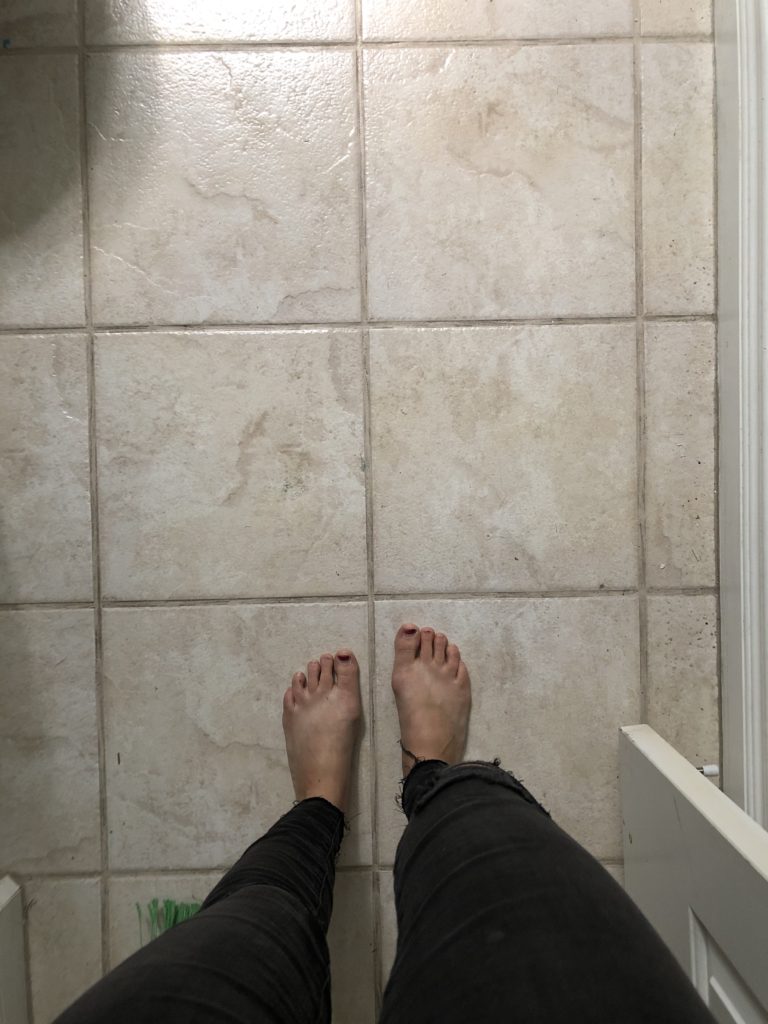
Here is the BEFORE:
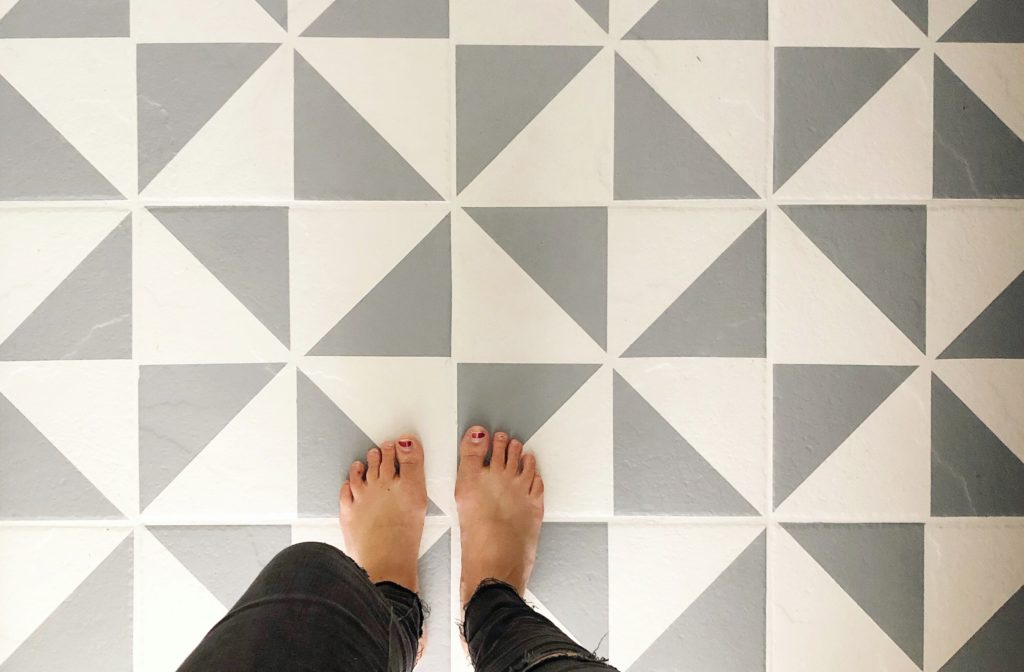
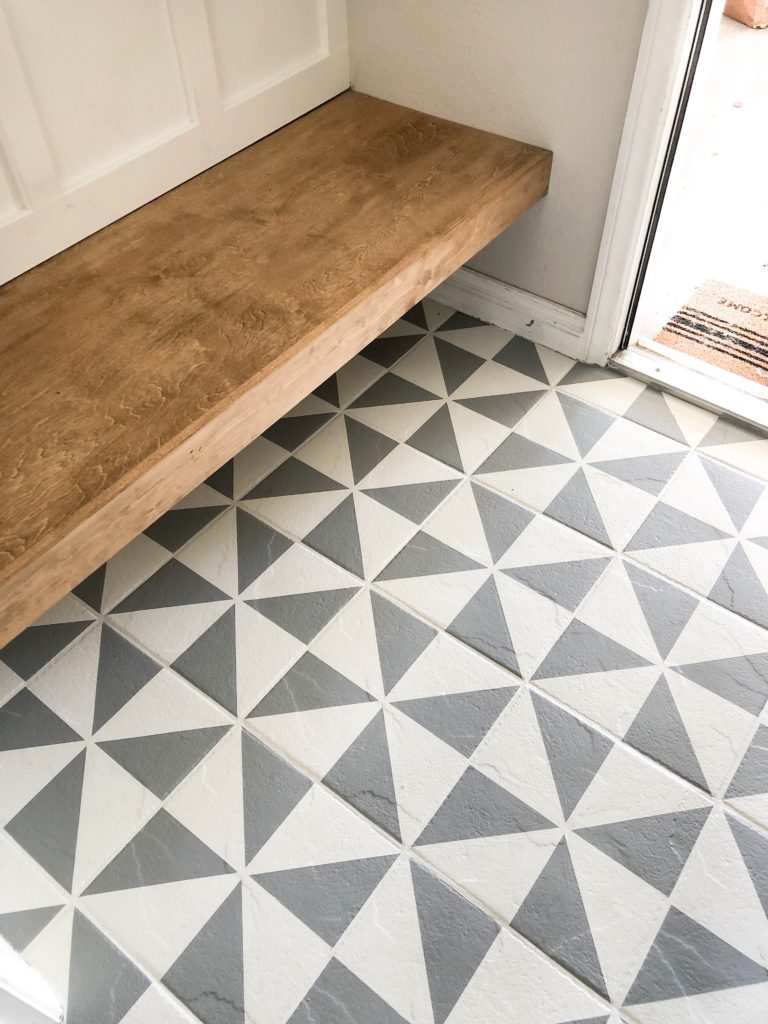
And here is the AFTER:
…and because I can’t get enough…let’s do another
BEFORE:
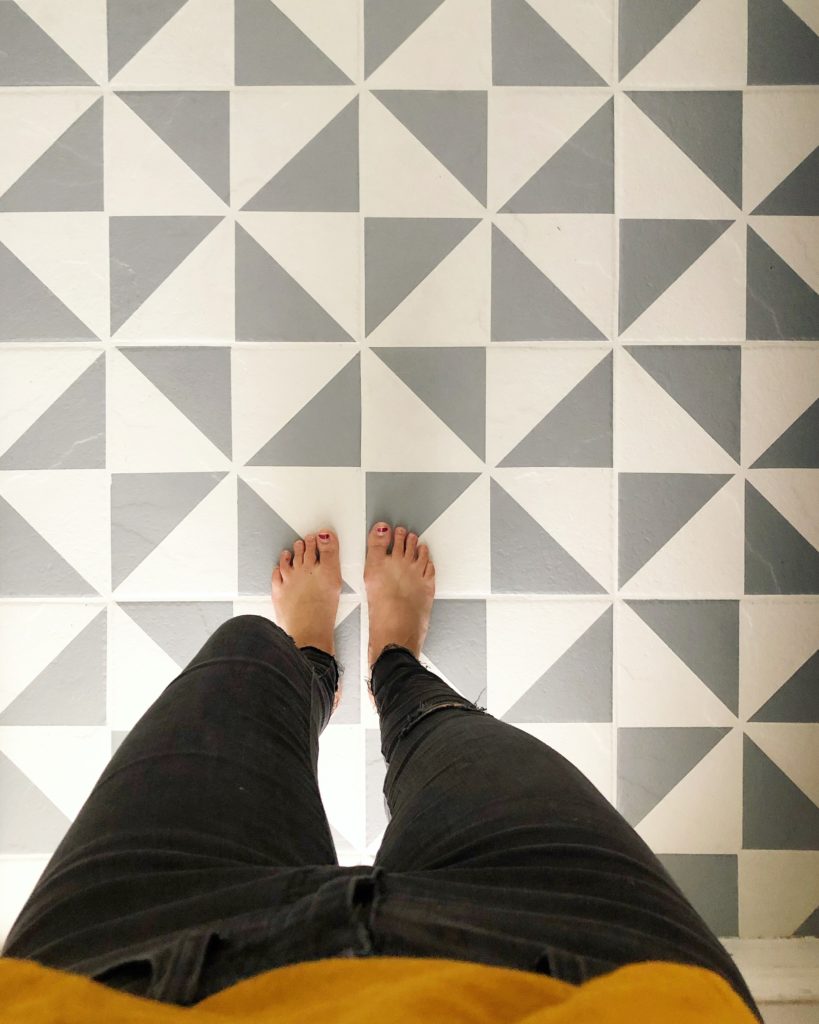
And AFTER:
Here’s what you’re going to need:
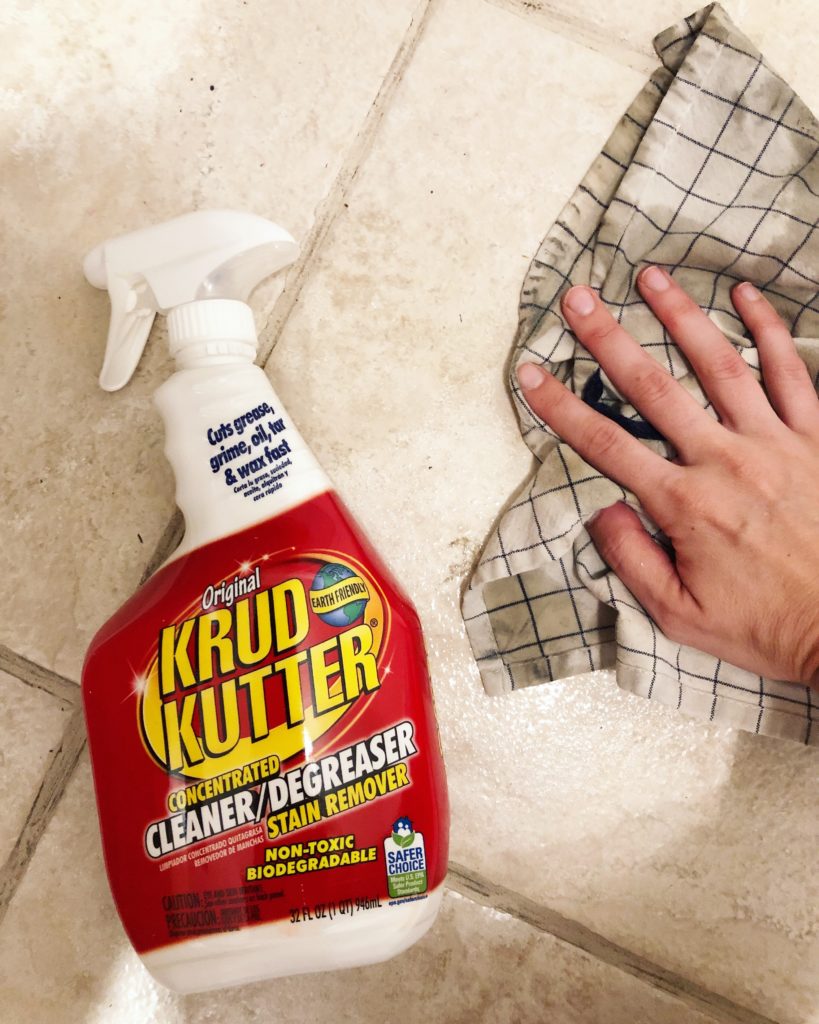
- Krud Kutter
- Painter’s Tape (I used 1/4 in painter’s tape)
- 3/8 in nap roller for base coat, 1/4 in nap roller for top coat
- Paint Brush
- Rust-Oleum HOME Floor Coating
- (I also used this Tint Base in French Gray)
- *If you’re interested in the Tint Base, you’ll need to purchase in-store or order over the phone and pick-up in store and have it tinted at the paint desk. You can’t buy a tint base online.
- Rust-Oleum HOME Floor Coating Top Coat
- The RockSolid Home products are meant to be able to go on cermanic tile, porcelain tile, laminate, hardwood, concrete and vinyl.
Step 1: Prep your floors
Before you do anything, you need to make sure your floors are clean. I sprayed mine down with Krud Kutter to get off all the grease and grime. Wipe off your floors really well, because anything left will get stuck in your paint!
TIP: Sometimes I like to use a blow dryer to blow all the debris off of my painting surface.
Once your floor is clean, tape off the walls and edges with painter’s tape to keep your lines clean. (This Rust-Oleum RockSolid HOME product most often does not require sanding or priming. Check adhesion on your own floor and read the back of the label carefully.)
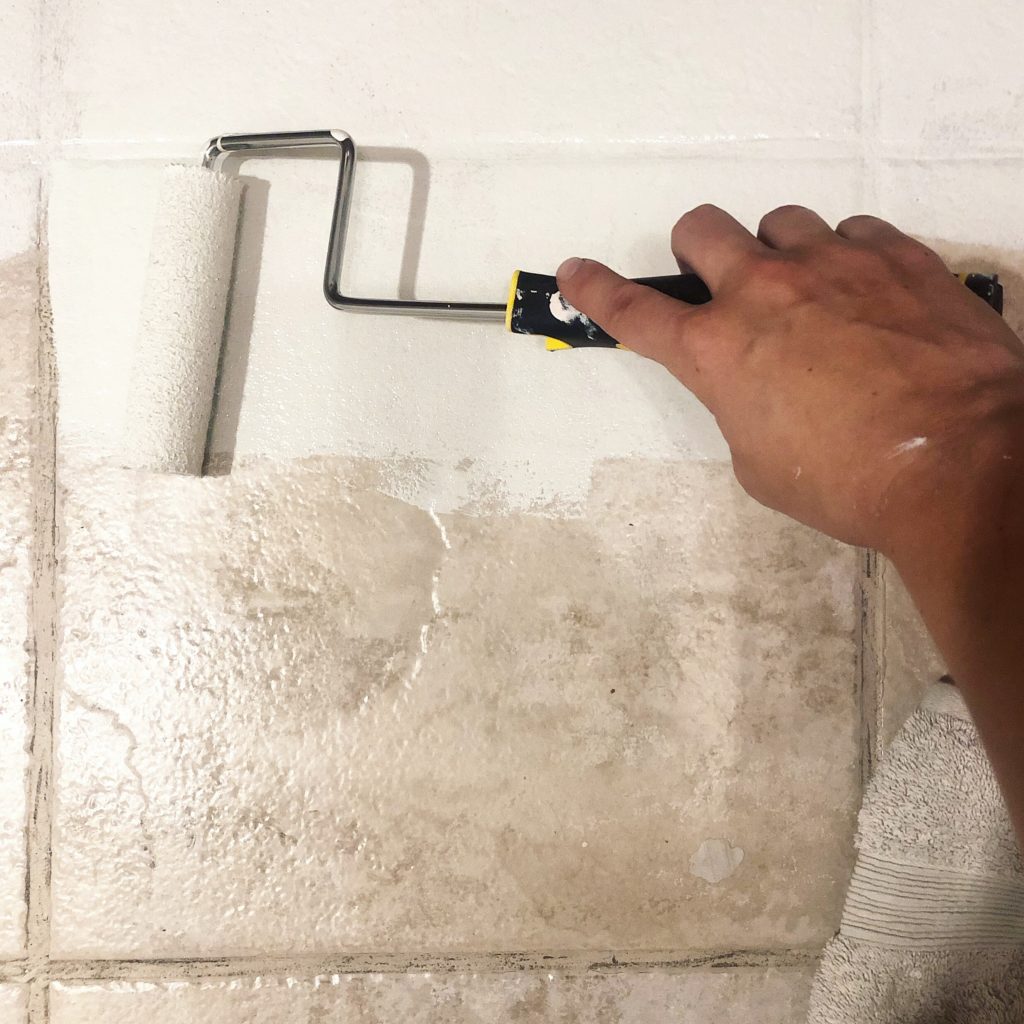
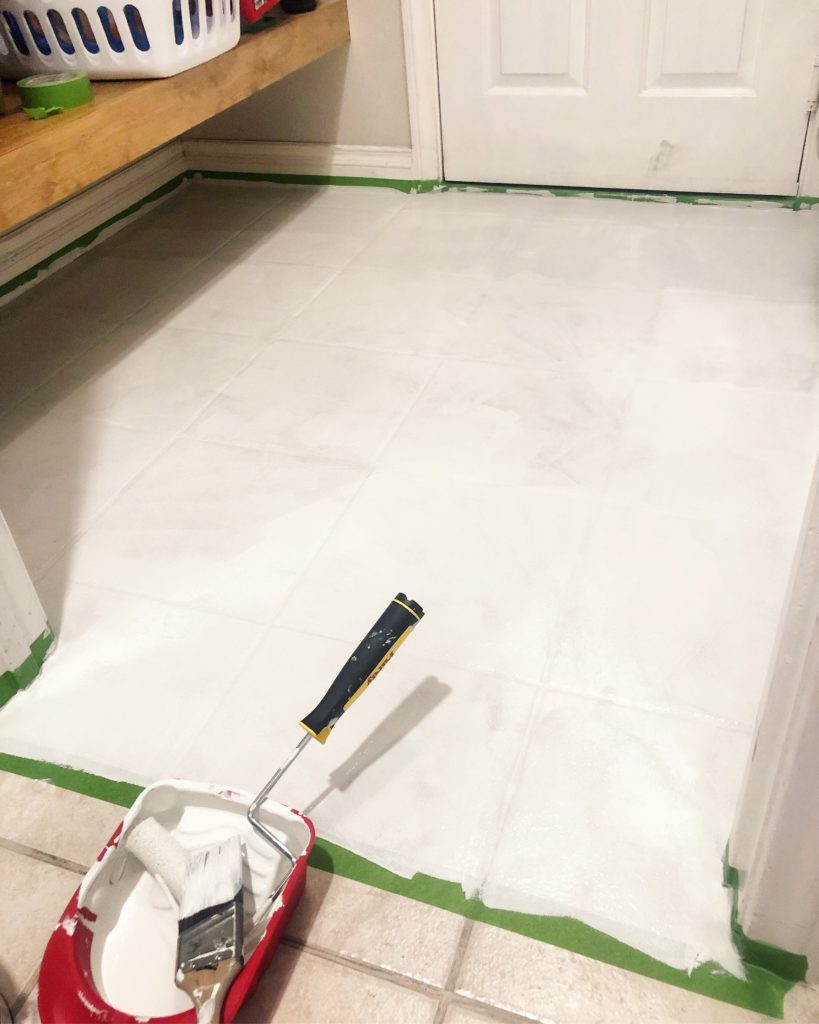
Step 2: Paint your Base Coat
Using a 3/8 roller, I rolled on my base coat in the color Steam Gray which is a soft white.
IMPORTANT: This coat is the most important. Let this dry for 6 hours before doing anything else.
After your paint your base coat, you may need one more coat, or you may decide you want to stencil (I get mine custom sized from here) or paint a pattern.
TIP: The floor will feel a little tacky until the Top Coat is applied. I wore white socks so that my footprints didn’t stick to the floor.
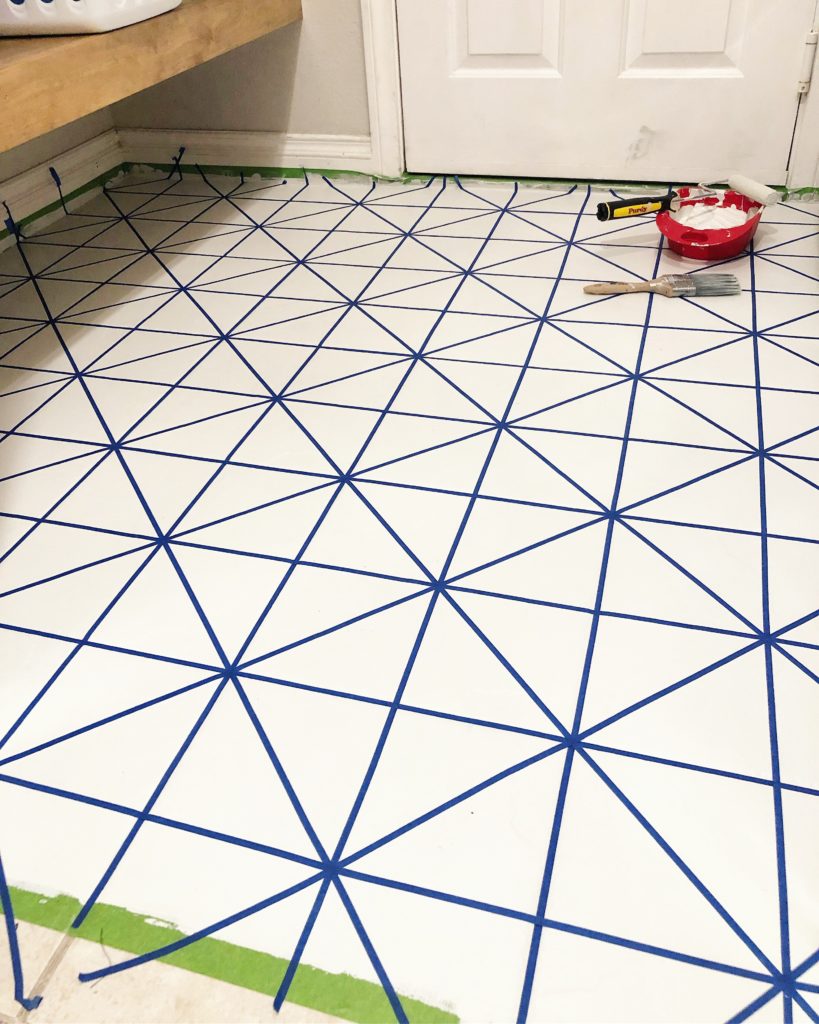
Step 3: Tape Off Your Pattern
Since my floors are not smooth, I knew a stencil would be a mess and bleed through. However, I still wanted a cute pattern. So I decided to try painter’s tape with a few tricks to get straight lines. Tape off your pattern. Here is the pattern I taped off, but there are tons of options with this…vertical lines, plaid etc. I used 1/4 in painter’s tape and did vertical, horizontal and diagonal lines.
TIP: To get my lines crisp, I painted over my painter’s tape with my BASE COLOR. This seals all the edges so none of the new colors gets underneath.
Step 4: Apply Second Color (if doing a stencil or pattern)
It’s time to paint your second color! Use a paint brush or roller depending on your pattern. I waited 1 to 2 hours between coats and I needed two coats for full coverage. (tape is still on in the below photo)

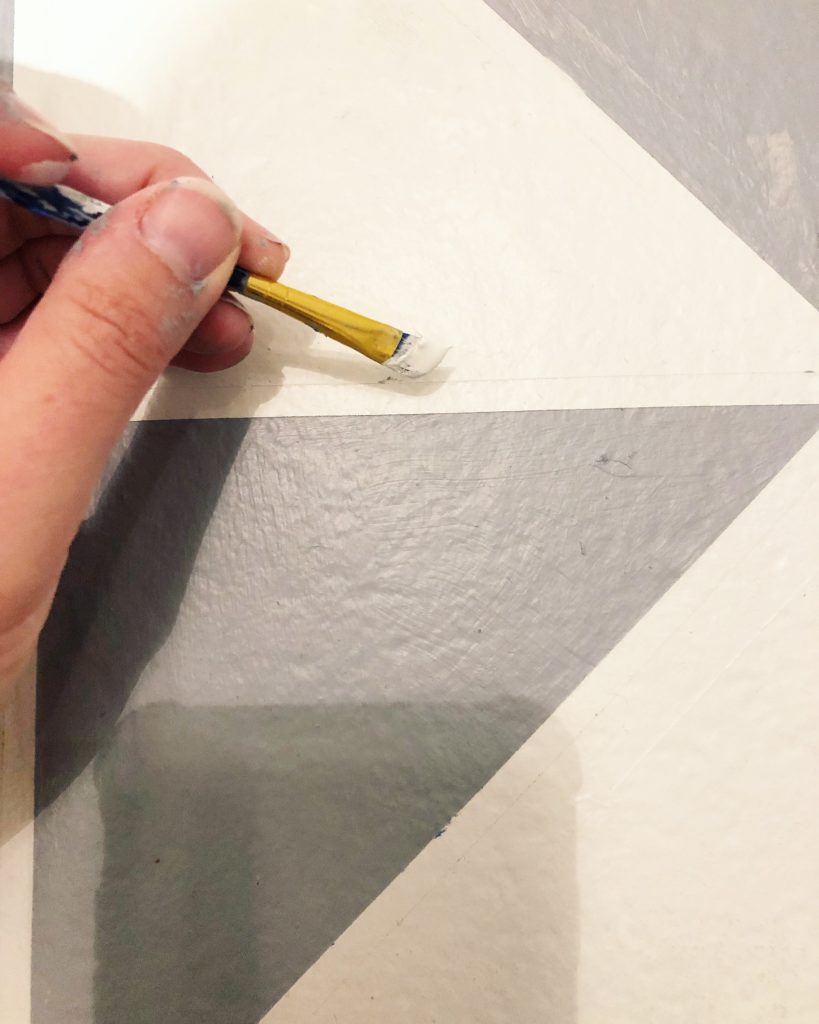
Once you are done, it’s my favorite time! Time to remove your tape!
TIP: Go around with a tiny paint brush and touch up any little mistakes. This step is what really helps make your floor look professional.
Step 5: Apply Your Top Coat
I applied my Top Coat with a 1/4 nap roller and paint brush for the edges. The product only recommends 1 coat, but I did 2 just because it is a mudroom that will get a ton of use.
Wait 24 hours for light foot traffic and 7 days for a full cure (furniture can gently be placed on floor after a few days).
For more details and tutorials, you can find how-to videos and FAQs here.
But most importantly, enjoy your new awesome updated tile floors and all with paint! For more projects, follow me @angelarosehome