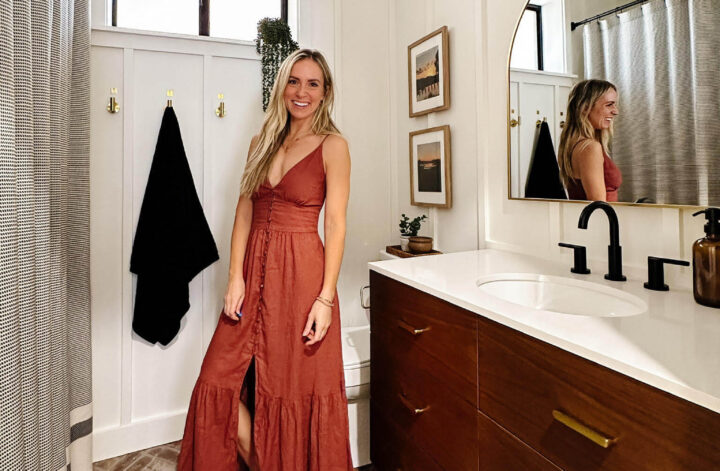
My friend Kellie asked me to help give her guest bathroom a makeover and I was immediately all in. I met Kellie for the first time in November 2023 when we made over her dining room for my DIY Together YouTube series. Now we’ve become real-life best friends. I was so excited to take on this guest bathroom makeover with her!
Before designing a space for someone besides myself, I always ask them to send me a bunch of inspo images. From these images, I’ll look for patterns and themes to design the space. We went through this process with Kellie’s bathroom and came up with a gorgeous bathroom design that felt cozy and sophisticated.
The before and after of this bathroom makeover is wild. If you are a DIYer looking to remodel your bathroom, this post should give you some hope that it’s doable – because it totally is!
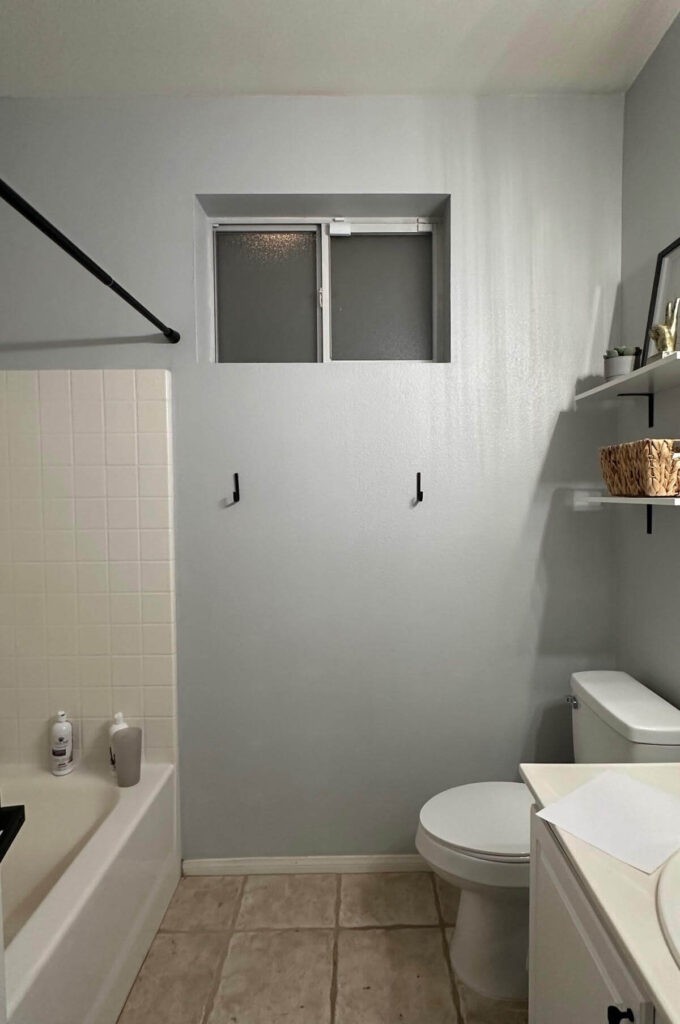
Before:
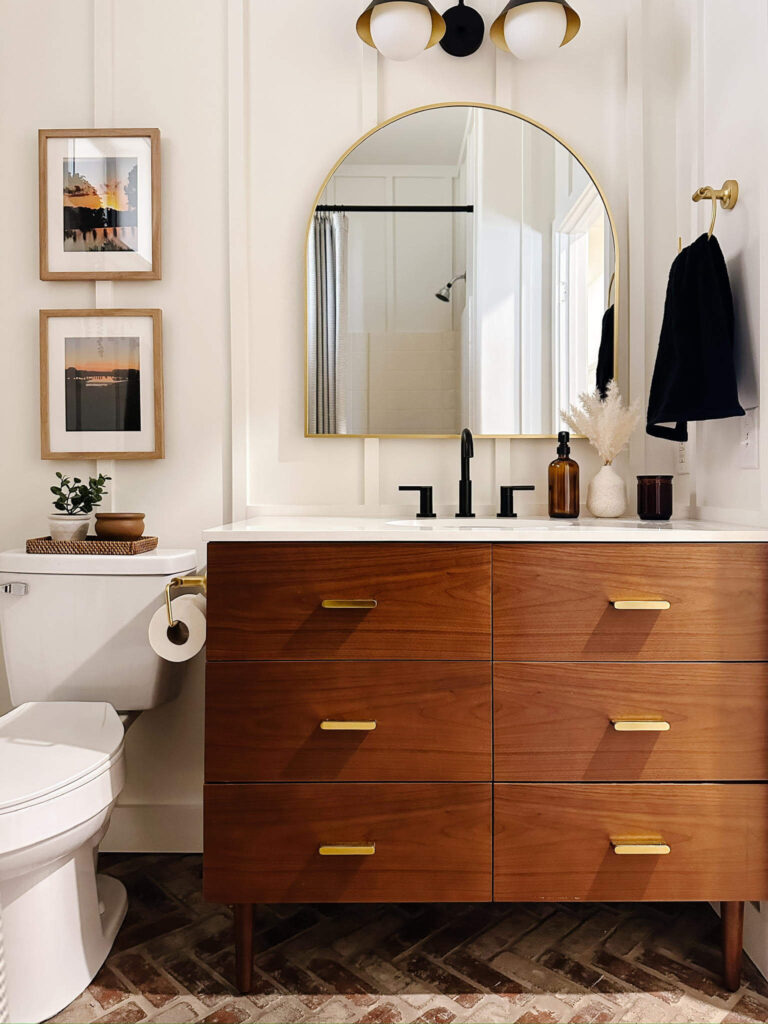
After:
Guest Bathroom Makeover
This bathroom makeover was so much fun to complete, and the end result was better than I ever imagined! If you’re feeling inspired by this makeover, here’s the process on how we gave Kellie a gorgeous and functional bathroom remodel!
1. Clearing Out the Space
First up in our remodel was to take everything out so we had a clean slate to work with!
We first removed all the decor, toilet paper, shampoo & conditioner, etc. from the bathroom. Then we moved on to the shower curtain and rod, shelving, light fixtures, and mirror. When I say clear it all out, I mean ALL of it. We are starting completely fresh so it’s important to get everything out at the start of the project!
Our first goal was to remove the builder-grade mirror without it shattering. It was a little shaky at the start, but we did it! It took a little bit of the wall/paint with it, but that was okay because we were planning to redo the walls anyway!
Pro Tip: To help keep a mirror from shattering you can cover it with painter’s tape. Every inch does not have to be covered, but if you place some rows of tape across the entire mirror it helps prevent cracking a lot! You can check out my Instagram story HERE for reference.
2. Adding a Wall Treatment
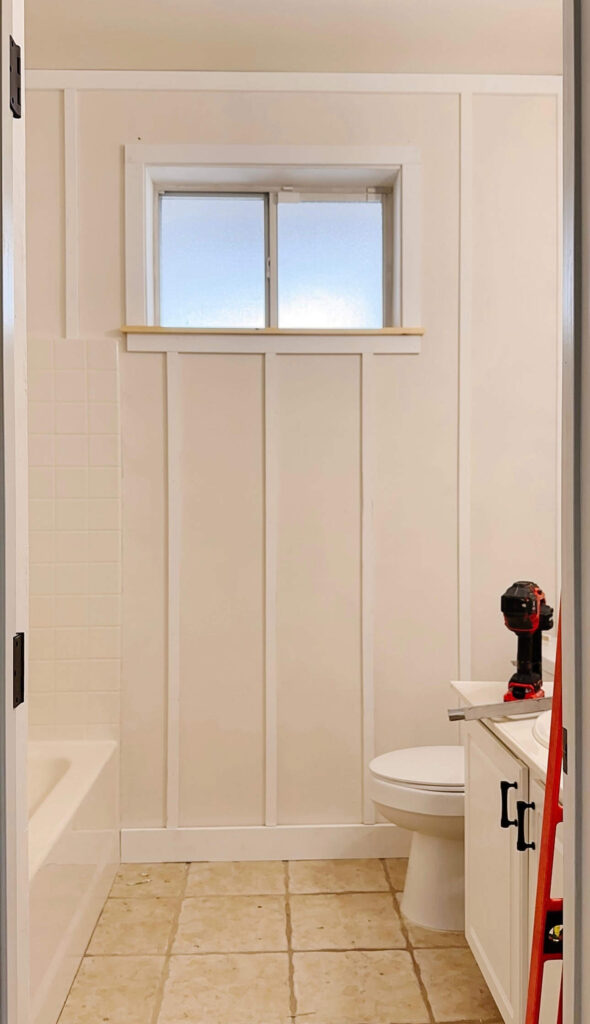
The bathroom started with plain white walls with a cute little window at the top of one of the walls. We decided to give the window its own moment. We added a windowsill and trim around it and then spray-painted it black. Just those small changes made a huge difference!
When using painter’s tape for a paint project, seal the edge of the tape that will be touching your new paint job with caulk. This will give you nice crisp lines. But don’t let the caulk dry! Quickly remove the tape once you are done spray painting. This is what we did for the window and it worked perfectly!
Following Kellie’s inspo images, we added wood slats on each wall from floor to ceiling to create a board and batten look. We couldn’t decide if we should have the wood slats run from the vanity up to the ceiling or if we should remove the vanity and add the slats all the way down to the floor.
Since the vanity is floating we decided to rip it out and add the slats all the way down to meet the baseboard! We found quite the surprise when we took out the vanity. I won’t go into details here, but if you’re curious about this crazy surprise, you can check out my Insta story HERE. Despite this, we got the vanity out to allow us to finish the wall treatment!
It is amazing how much this wall treatment alone transformed the space. If I knew we were going to be ripping out the flooring we would have done the wall treatment after so the baseboards were flush with the new floor height, but we made it work!
This is a reminder that with just $100 in wood and paint you can create an upgraded space you love. We got the wood slats (primed pine 1×2) from 84 Lumber. It was a quick and easy process, so I definitely recommend going to them for your lumber projects!
3. Installing the Floors
Kellie and I debated on if we should do whole new floors or keep the original tile and use stencil to paint it. I’ve done this stenciling before on previous projects and it turned out beautifully. However, when I came over the next day to continue our remodel, Kellie already decided to rip up some of the flooring! Haha, so we went with it!
Ripping up this floor was a hot mess, but we made it work. It would’ve helped if we had the right tools! We went with what we had, but if you are planning to remove your tile I recommend using a hammer drill with the correct paddle.
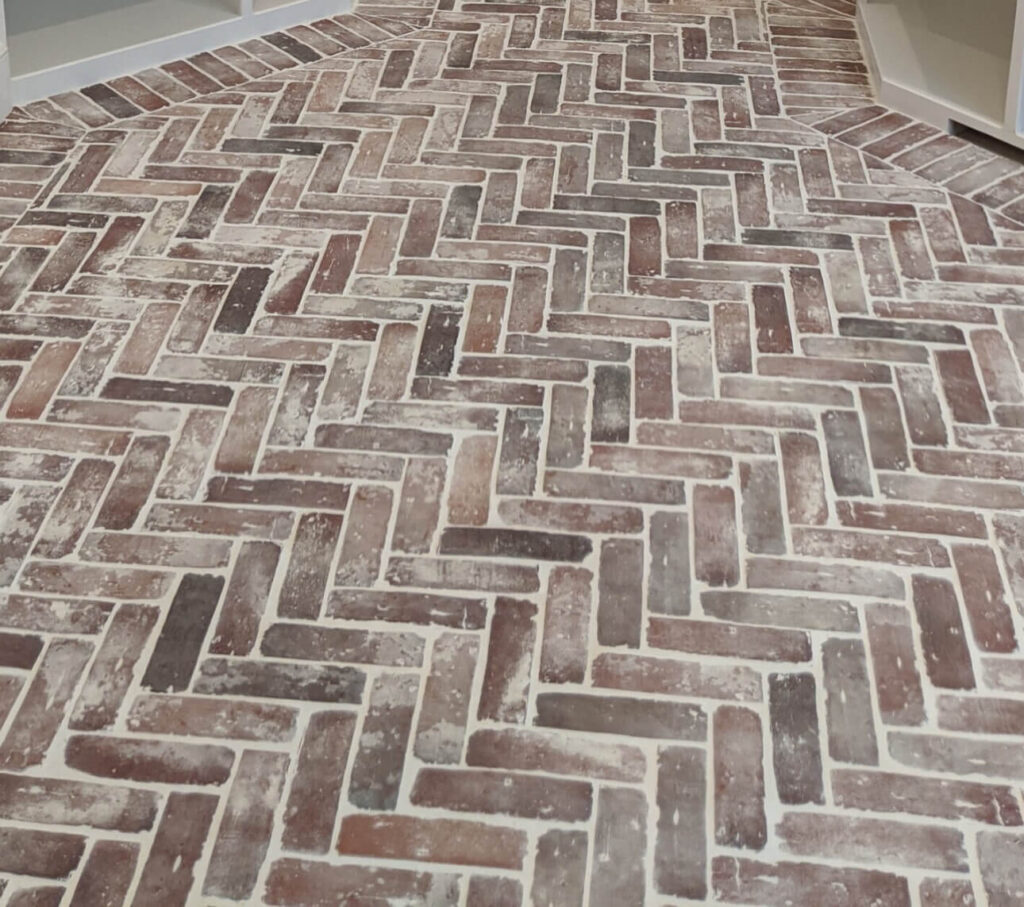
Once the old flooring was removed, we selected a thin brick for the flooring and placed it in a herringbone pattern. This was actually my first time installing a brick floor so I had to do a lot of research and YouTubing along the way. We measured what we needed, cut the brick accordingly, and then placed it on the floor until we had the whole thing covered!
Once the brick was all placed, it was time to add the grout to seal it all together. When applying the grout, I floated it and then wiped it down a few times once it set a bit. We settled on “driftwood” for the shade which gave the overall space a more earthy feel. Plus, it added some really cool texture so it was a win-win.
View this post on Instagram
4. Installing Baseboards and Painting the Walls
I’ll be honest, I had a lot of doubts about the brick floor as I was laying it out and adding the grout. I wasn’t sure if I was going to love it or hate it. But it turned out so amazing. Adding the baseboards back on immediately made the space look 10x more finished!
The next debate Kellie and I had to settle on was the color of the walls. My vote was for dark walls, but Kellie wanted light. It’s Kellie’s house, after all, so we went with the perfect light white paint! The official paint color we chose was Alabaster from Sherwin-Williams, and it was gorgeous!
5. Adding the Toilet and Vanity
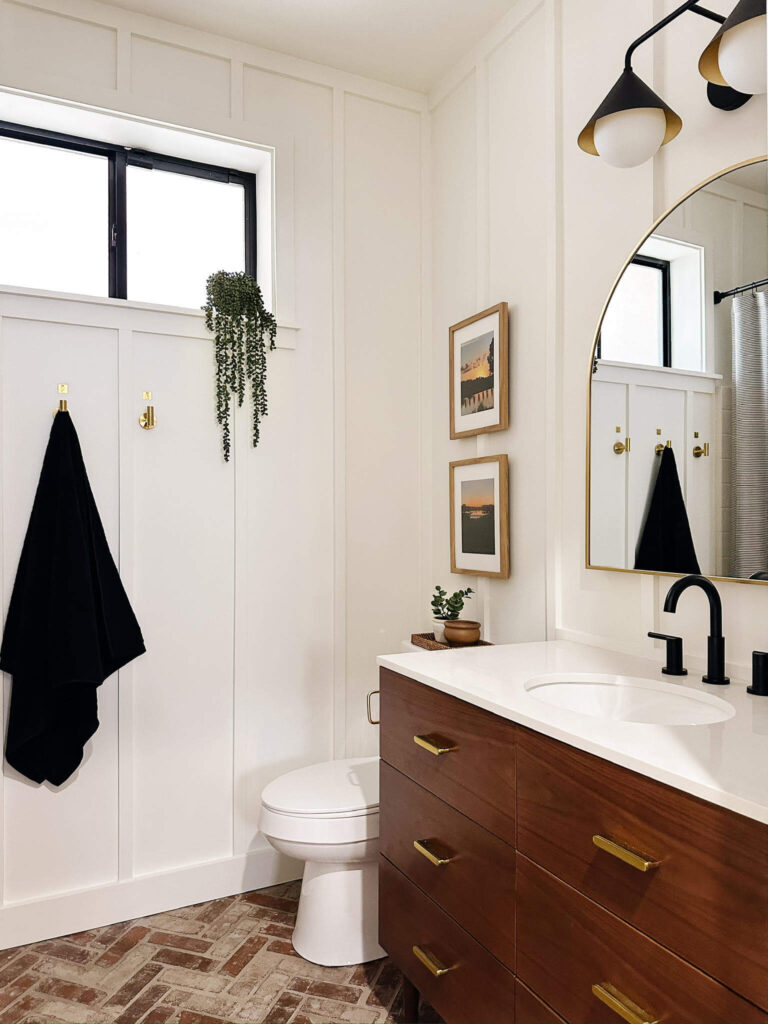
Once we had the wall treatment done, the flooring installed, and everything painted, we were able to install the toilet and the new vanity. We ordered a vanity with gold hardware that we are obsessed with. The vanity was beautiful and worked in this space perfectly!
I did have to install some more 1x2s on top of the vanity to cover the gap that came from installing the wall treatment on the entire wall behind the vanity. But this ended up working out great and looked very intentional! (No project comes without its little surprises, right?)
6. Finishing Touches
After we installed the baseboards and painted the walls, we were so close to completing this bathroom remodel! The last things to add were finishing touches to really make this room pop!
We added gold hooks to hang towels with tiny gold plates numbered 1, 2, and 3 (to keep people from confusing their towel with someone else’s), and a few other elements to tie it all together.
A while ago Kellie sent me some photos of her grandparents’ property that she grew up going to in Illinois. I framed them and surprised her with them hung on her bathroom wall. Lastly, we added the new light fixture, a gorgeous arched mirror, and shower curtain. It all came together so nicely!
For a list of all the products we used in Kellie’s bathroom remodel, check out this link!
Guest Bathroom Makeover
This DIY bathroom makeover was a huge success! I am so proud and myself and Kellie for taking on this project together and finishing it despite all the mishaps we ran into. That’s something you can always plan on with DIY remodels! There will always be something that doesn’t go as planned. The most important thing is to not let it stop you and to keep going until you’ve created the new space of your dreams!
If you’re wanting some more inspo on DIYing your bathroom makeover, here are some more posts you’ll love:
- The Star Bathroom Reveal
- Unique Light Fixtures to Fit Any DIY Refresh
- DIY Home Project Tips for Beginners
Follow me on Instagram and TikTok to see all my latest DIY projects and building tips. Whether you’re a beginner or a more advanced DIYer, I’d love for you to follow along!
Disclosure: I only recommend products I would use myself and all opinions expressed here are my own. This post may contain affiliate links that at no additional cost to you, I may earn a small commission. Read the full privacy policy here.

