
Is there anything better in the world than magical stars? How about a million hanging magical stars ha! Well, not a milion, but still. This is a project I had been dreaming up in my head for forever and I am thrilled with how it turned out. As always follow along @angelarosehome for more projects.

HE MATERIALS
Minwax – Water-Based Solid Stain
Are you ready? Lets go!

Step One
Paint the stars with the Minwax Solid Stain using a brush and smooth it with a synthetic pad. This is a solid water based stain, so it acts like paint, but you want to still wipe it like you would a stain. You can also use paint, I just wanted to see the wood texture so I used this product.

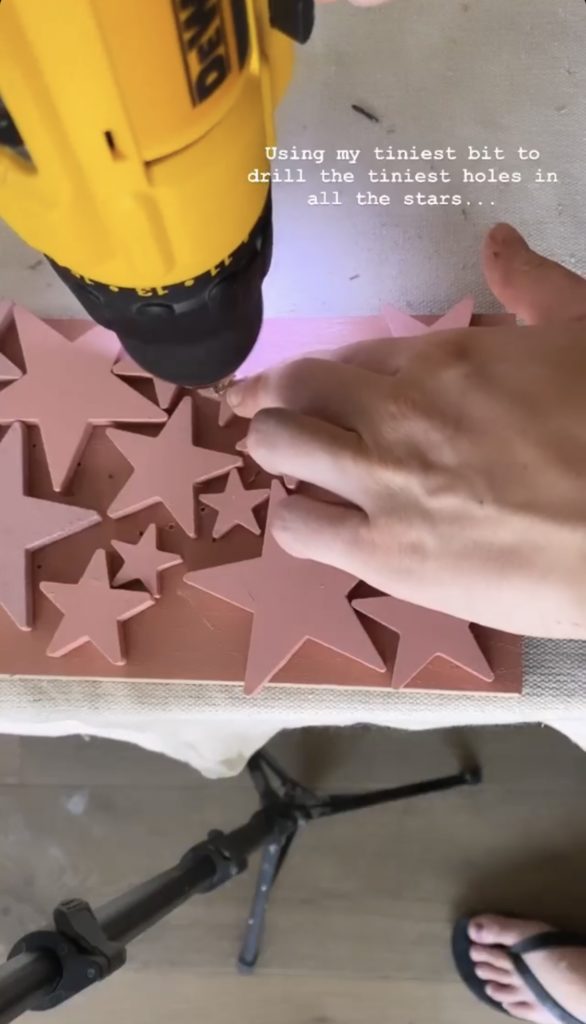
Step Two
Drill holes into each star with your smallest drill bit.
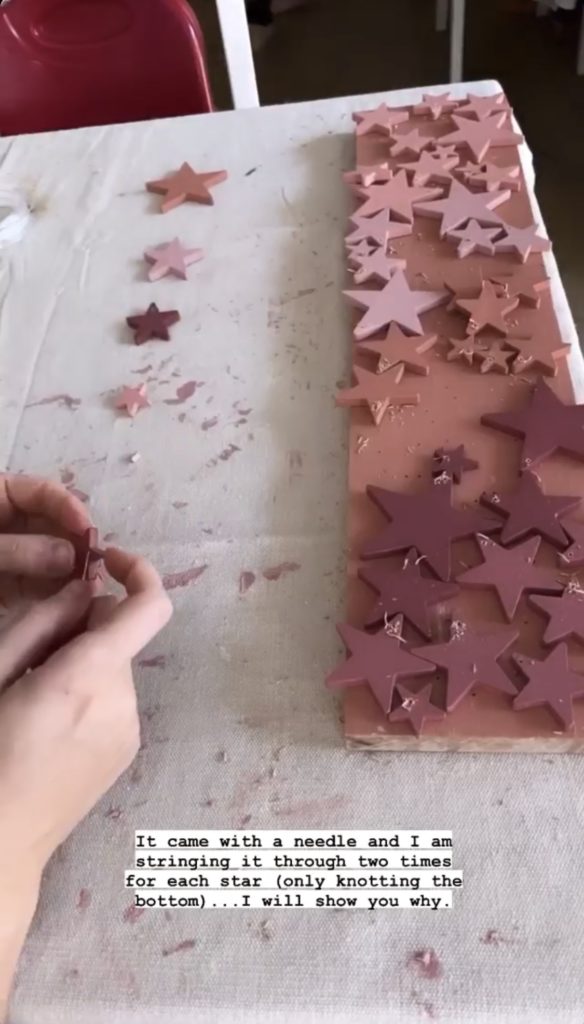
Step Three
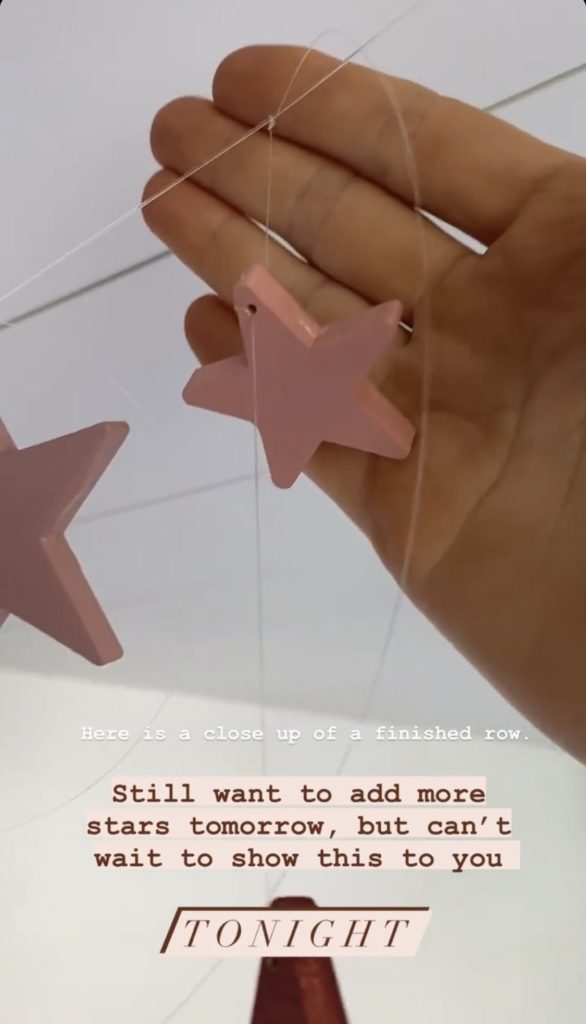
Use a needle and the Nylon String to thread through the holes in each of the stars. For each star you will loop the needle through two times but not tie a knot (this way you can slide the stars up and down a little). You will however, tie a knot in the very last star.

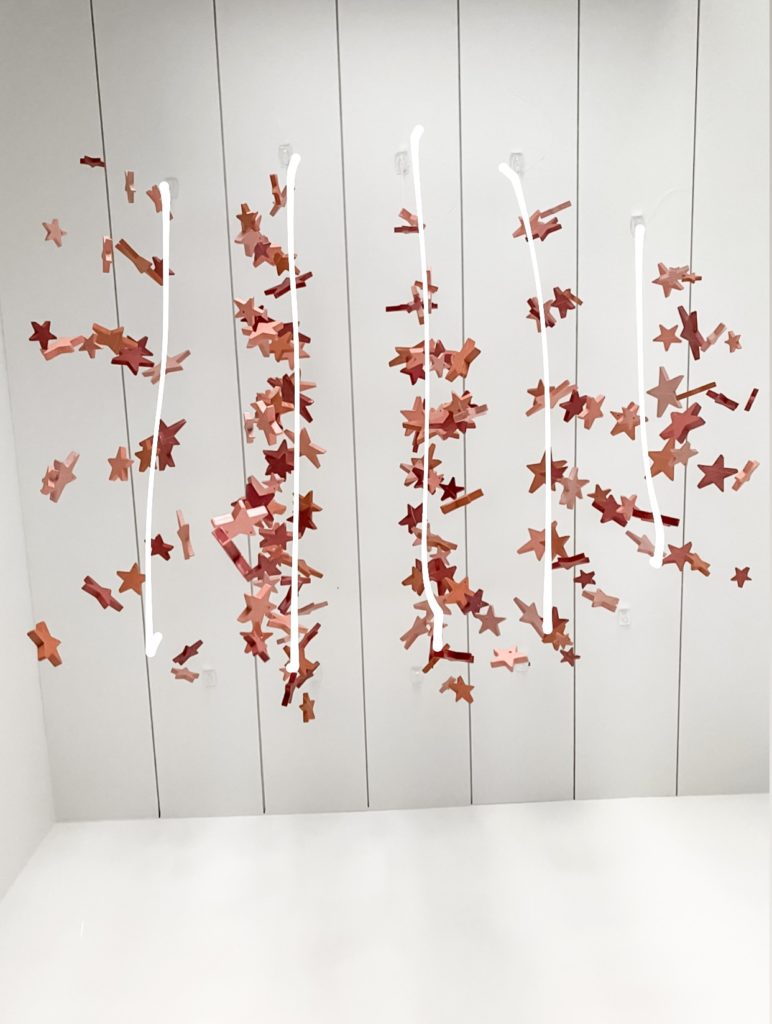
Step Four
Use the command strips and Nylon String to create rows on the ceiling so you can attach each string of stars to the rows. I did 5 rows and hung around 6 to 8 strands per row. See picture below~

That’s it! May all your magical star dreams come true! Show me your projects and follow me @angelarosehome. Stop pinning start doing!
For links to everything else in the room, see full room HERE or below.


