Let’s play a little game. What takes a sheet of plywood, one XL twin mattress pad, and a pair of curtain panels? THIS headboard! I’ve been wanting a headboard for a while now, and finally decided it was time to take matters into my own hands and stop waiting until I could save up for a dream one $$$. And I love how this turned out. Here is the whole tutorial so you can build one too (and it’s NO SEW)!
What you’ll need:
1 Sheet of plywood 3/4 in thick (get it cut at Home Depot/Lowes)
1 XL twin mattress pad (I got THIS one on amazon. They are also at Walmart for cheap)
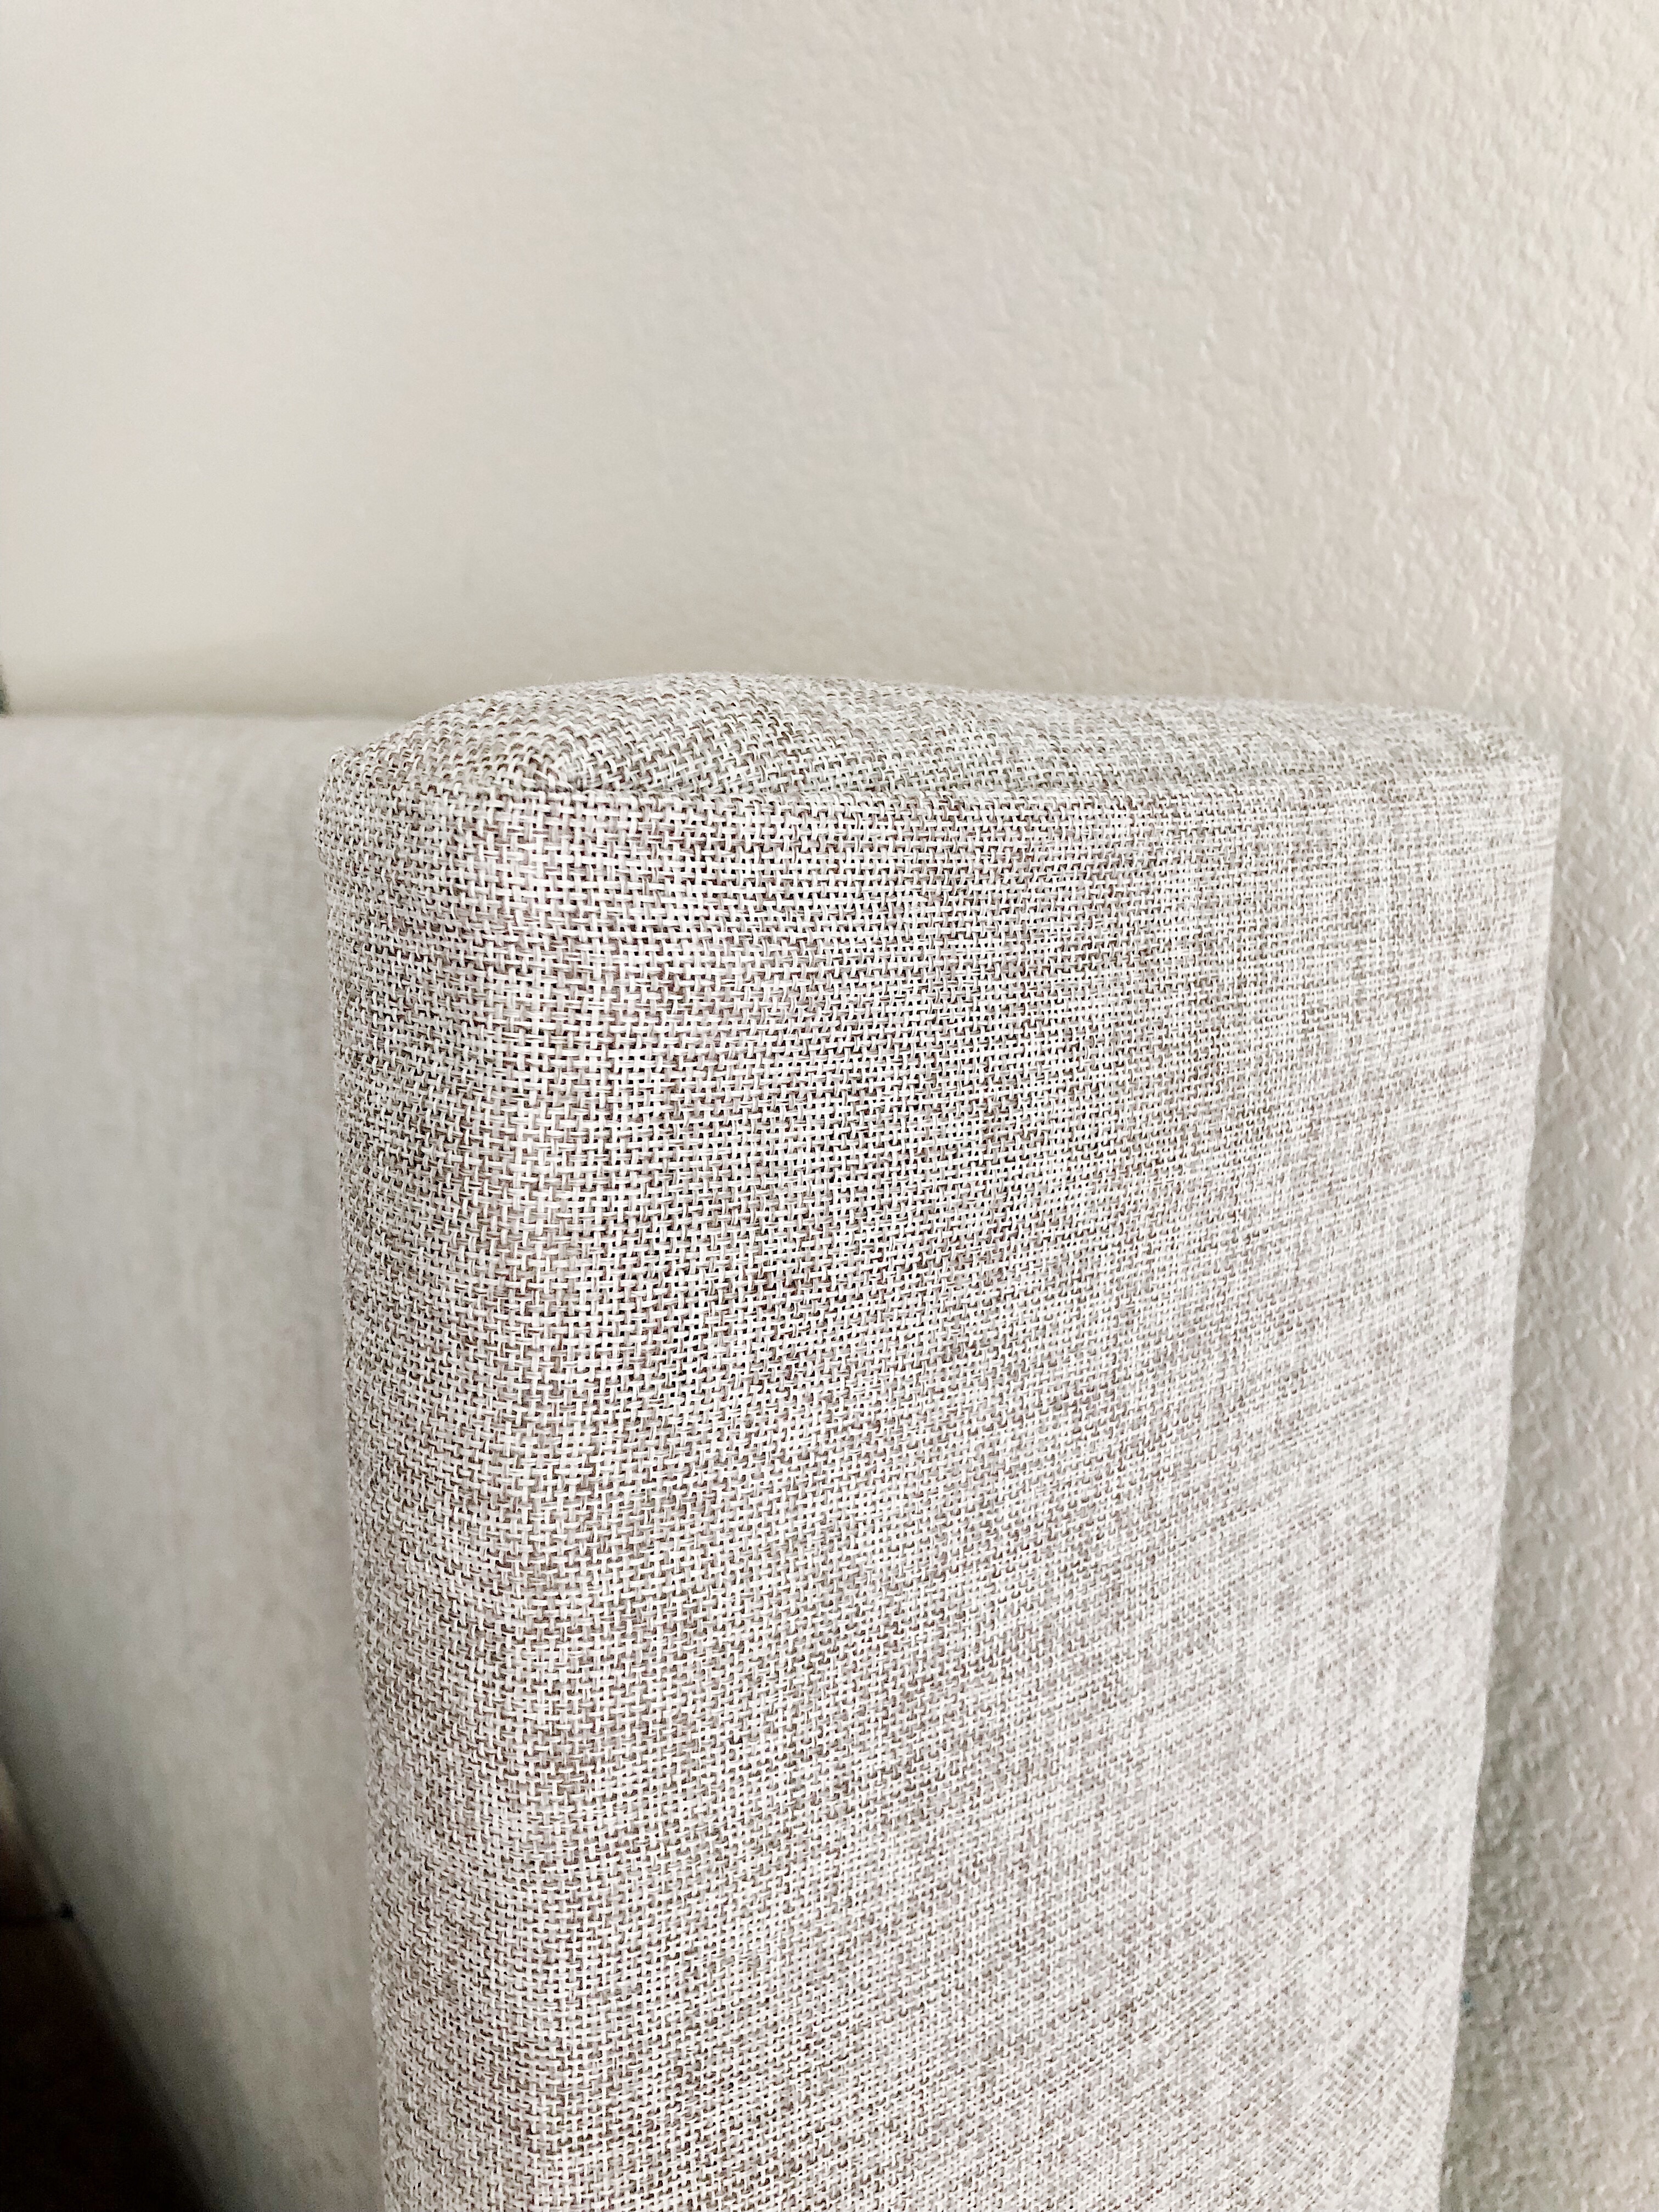
2 Curtain panels (width 40 in minimum, length 84 minimum) Or you can get 4 or 5 yards of fabric *I found mine at Home Goods for $22, but you could buy some at Target or Amazon like this one
Batting (4 or 5 yards) I got mine from Joann’s but here is one on amazon
2 1×4 common pine boards cut at 55 in long (have them cut at Home Depot)
1 1×4 common pine cut at 73 in
Screws
*video overview below as well as step by step written instructions
Step 1: Get Your Supplies
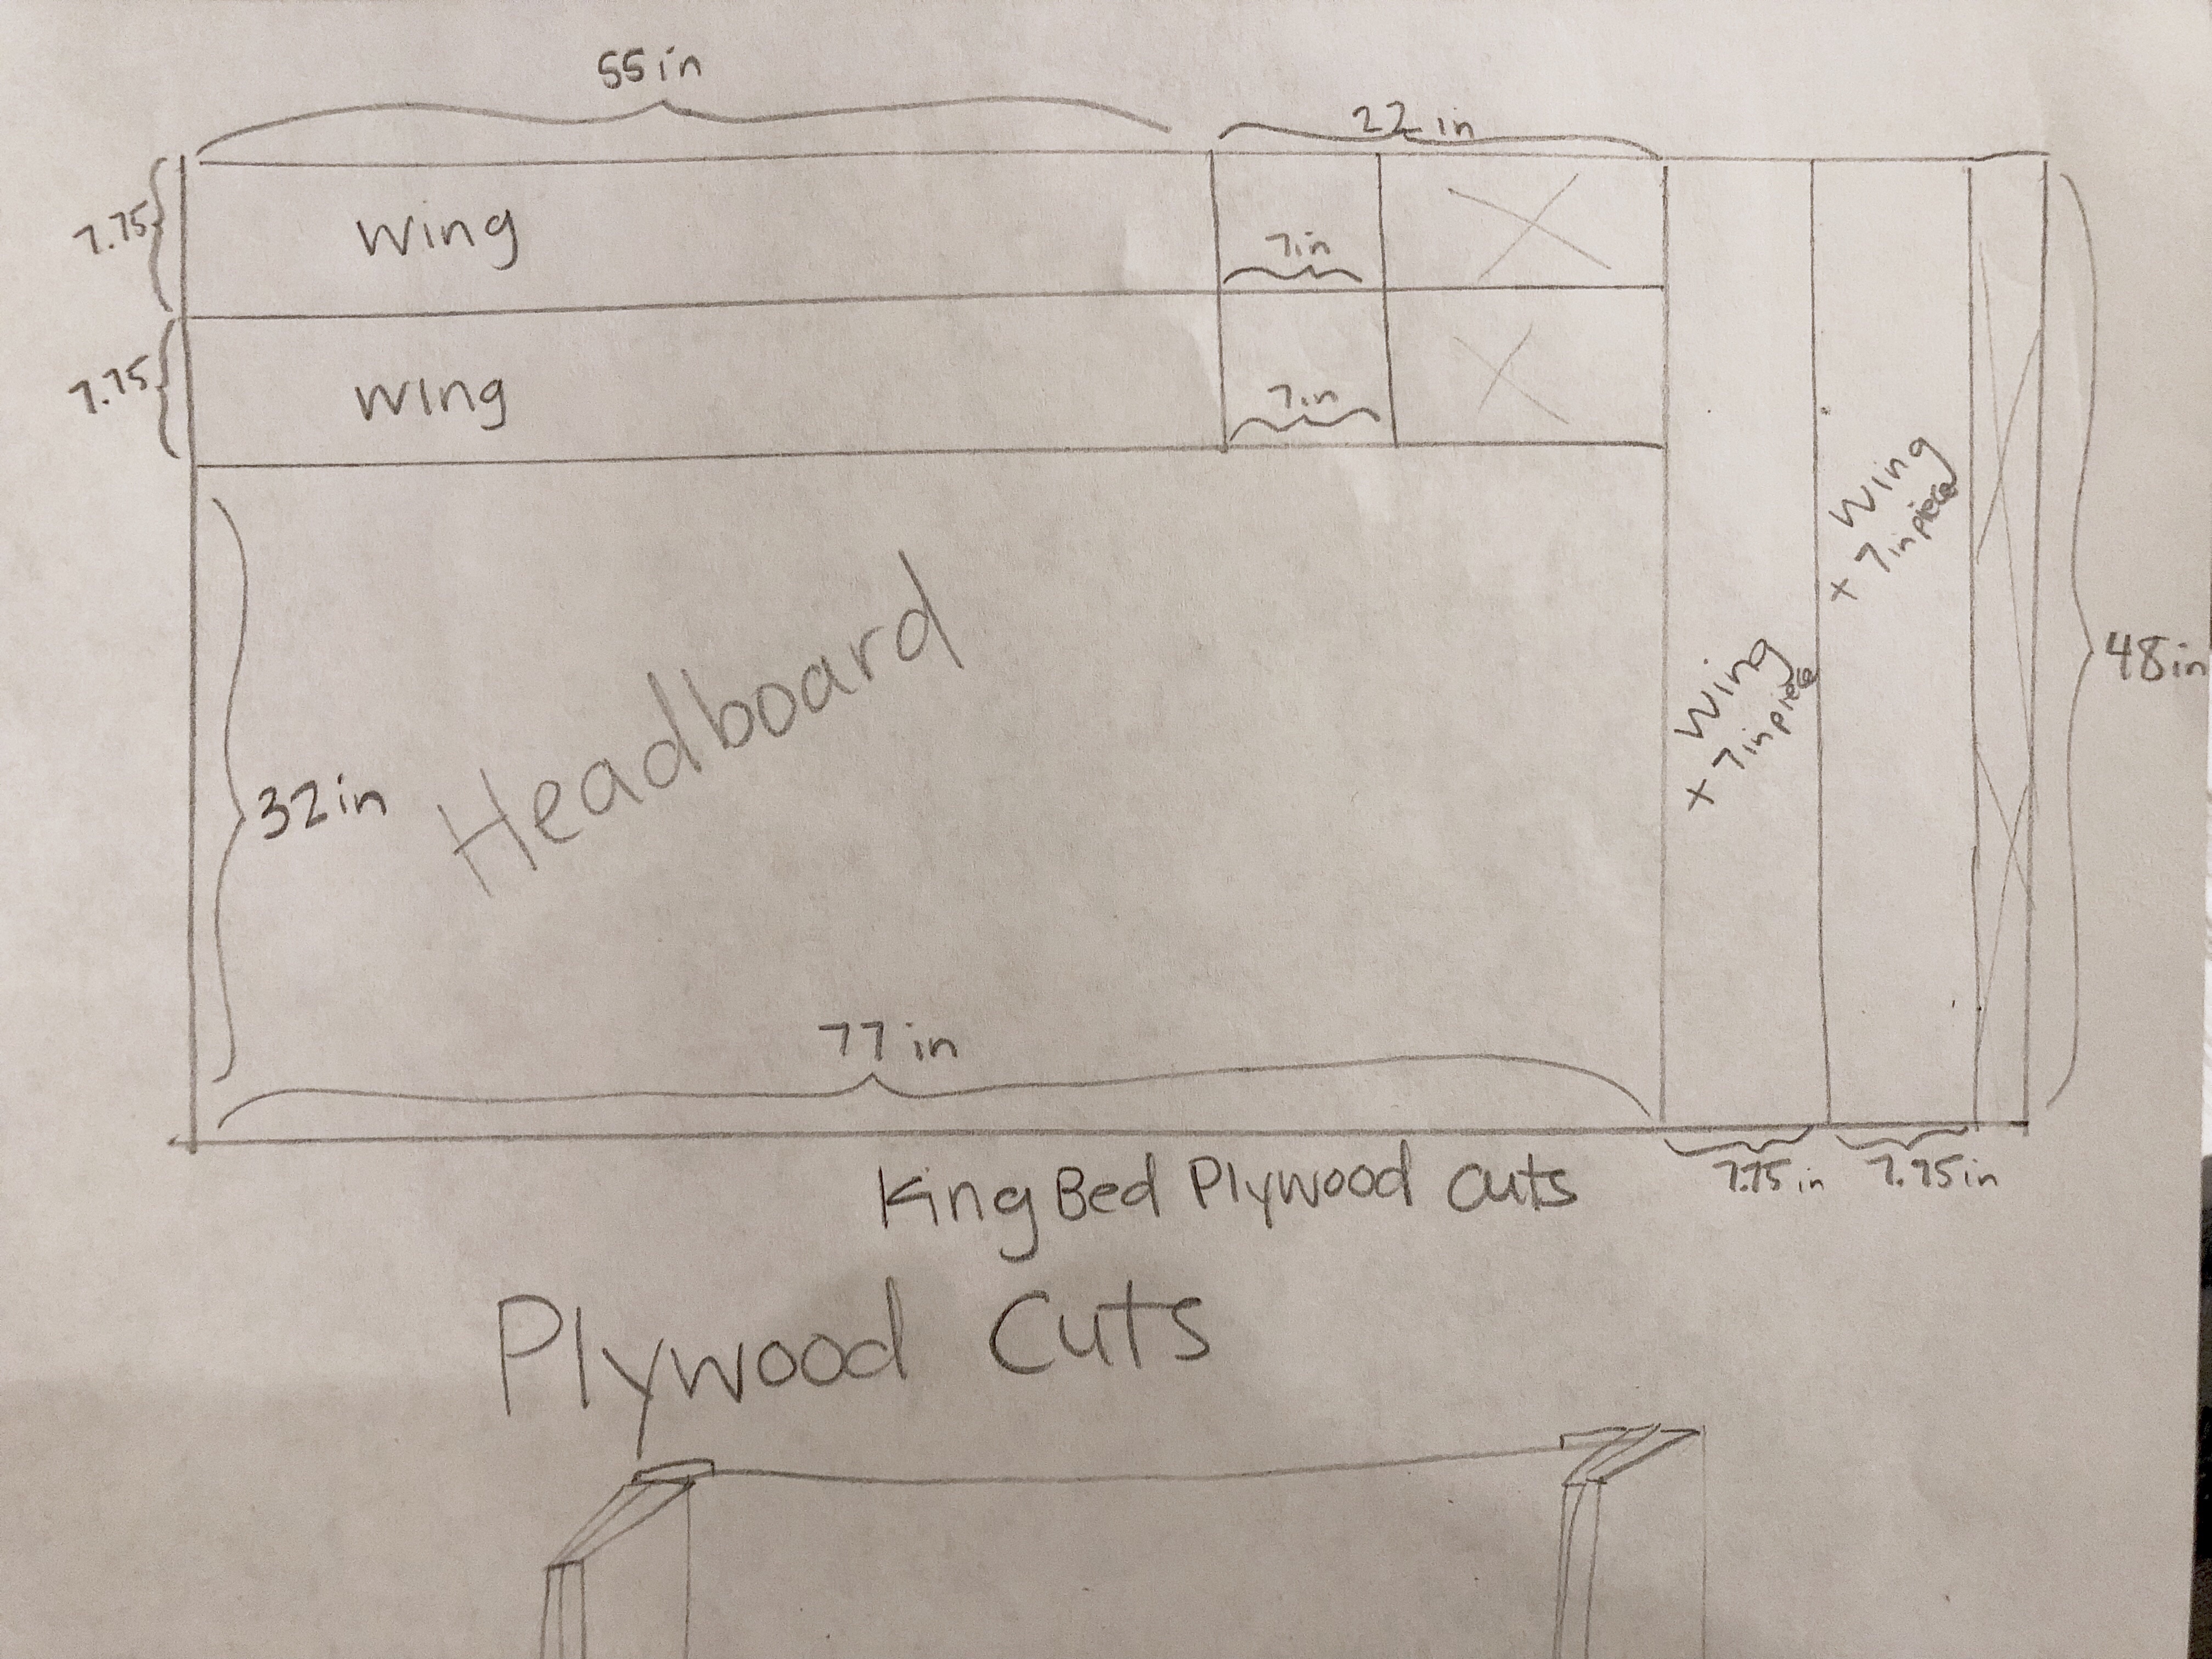
For this project you don’t even need a saw, you can have everything cut at Home Depot! Below is a drawing of how to have Home Depot cut your plywood . You can also get your 1x4s cut there too!
*This is for a king-sized headboard. For other sized beds, just change the headboard width to be the width of your bed (ex. for a queen, have headboard be 60 in wide)
Step 2: Build the Wings
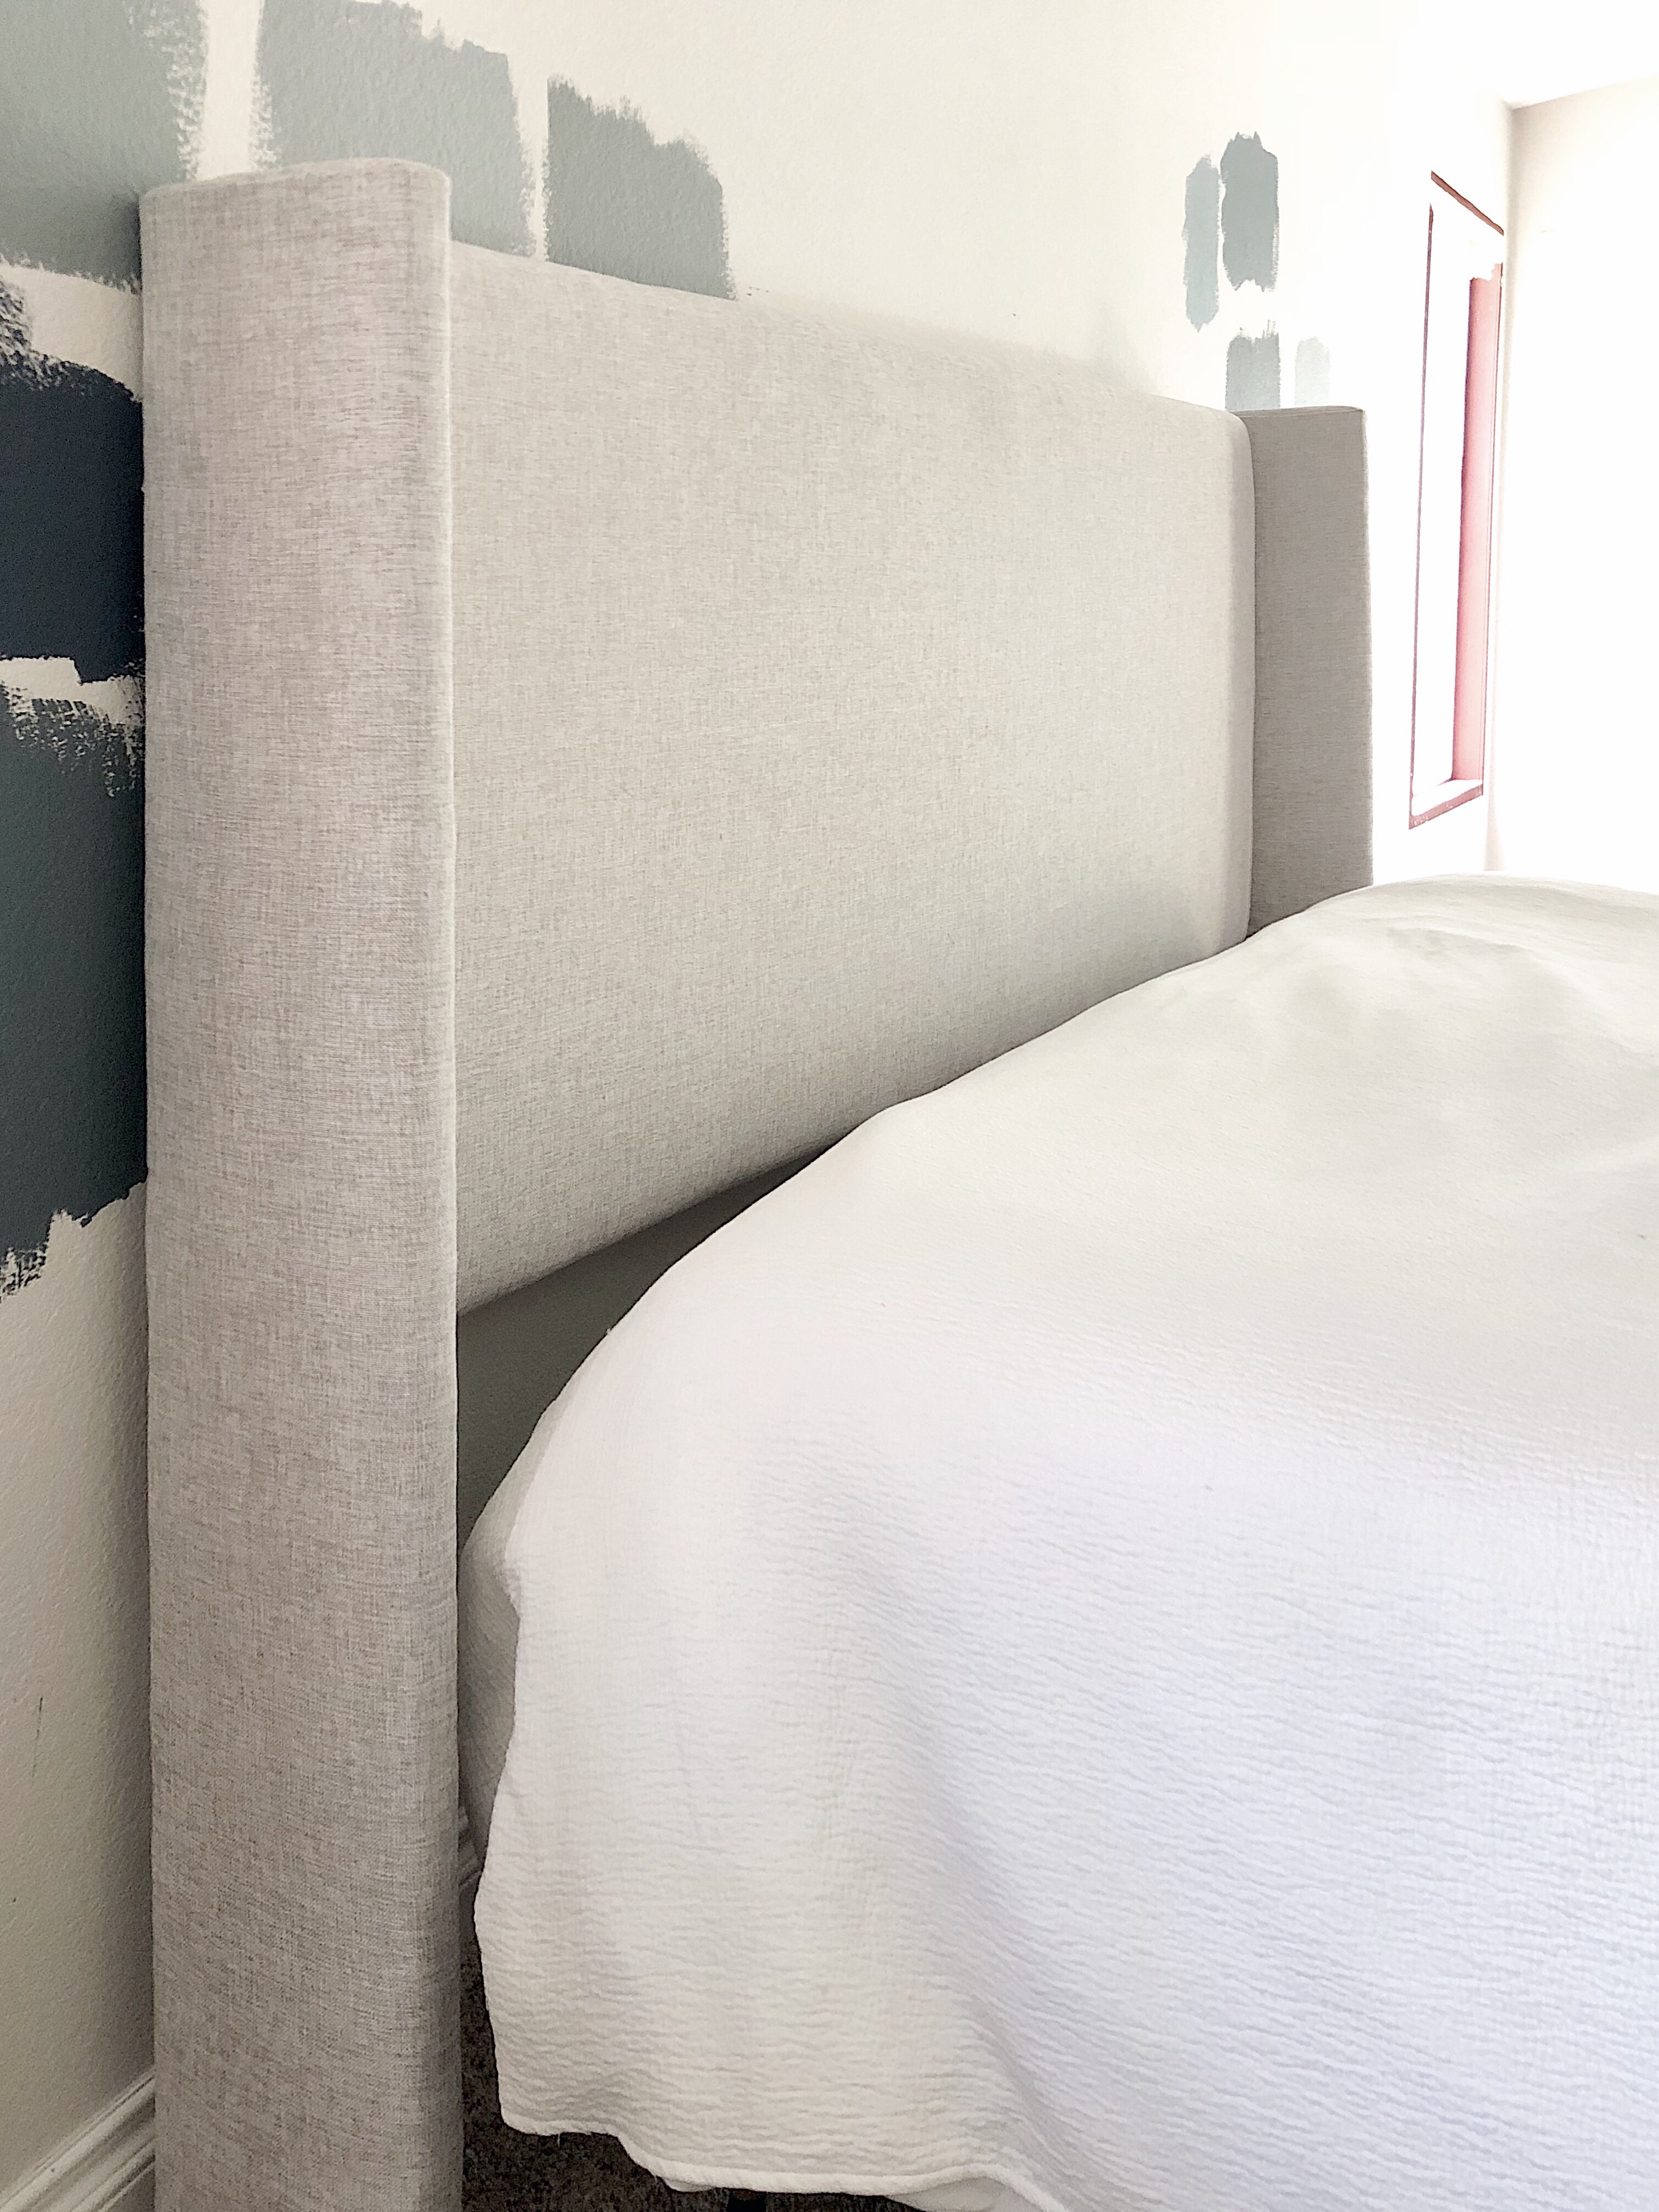
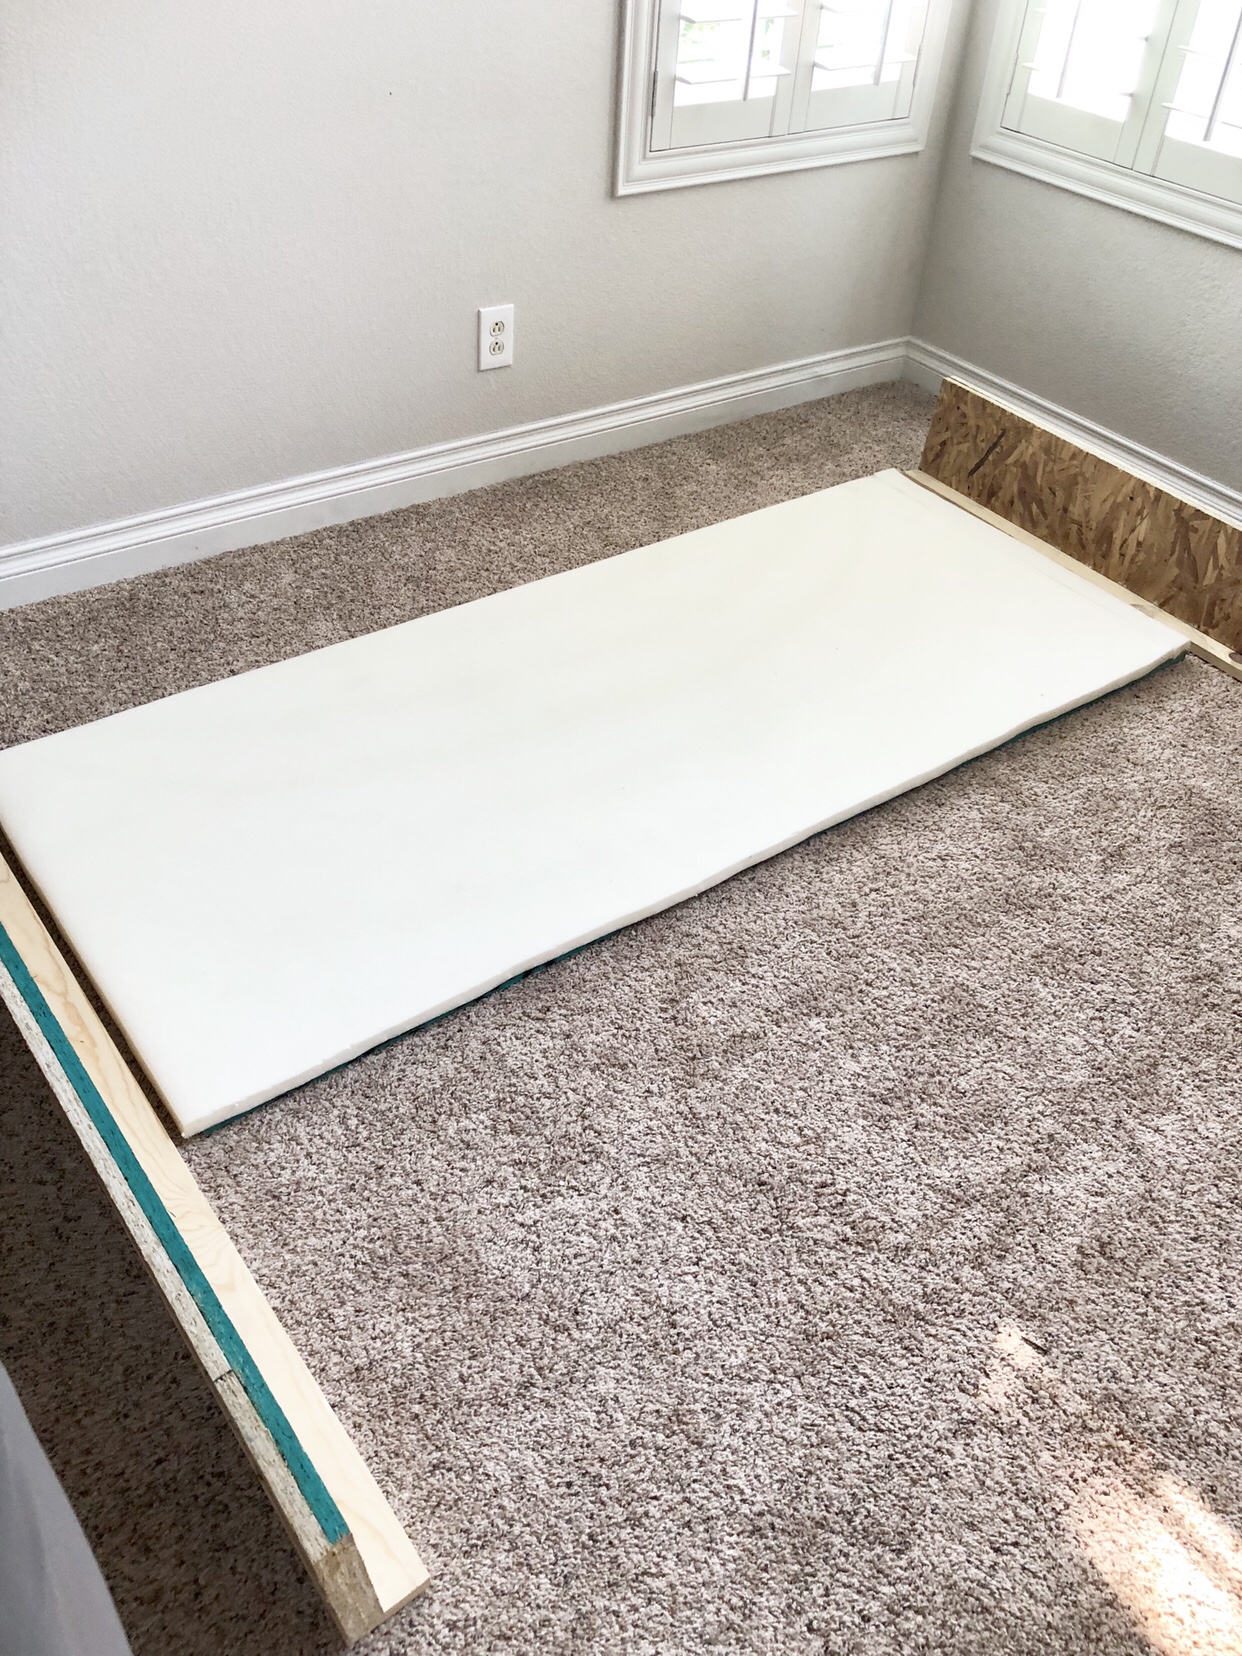
Take the plywood strips for the wings. Double up the plywood and screw them together. This will make it so the wings are a little thicker. Pieces should be 55 inches long x 7.75 wide. See picture to see how to piece it together.
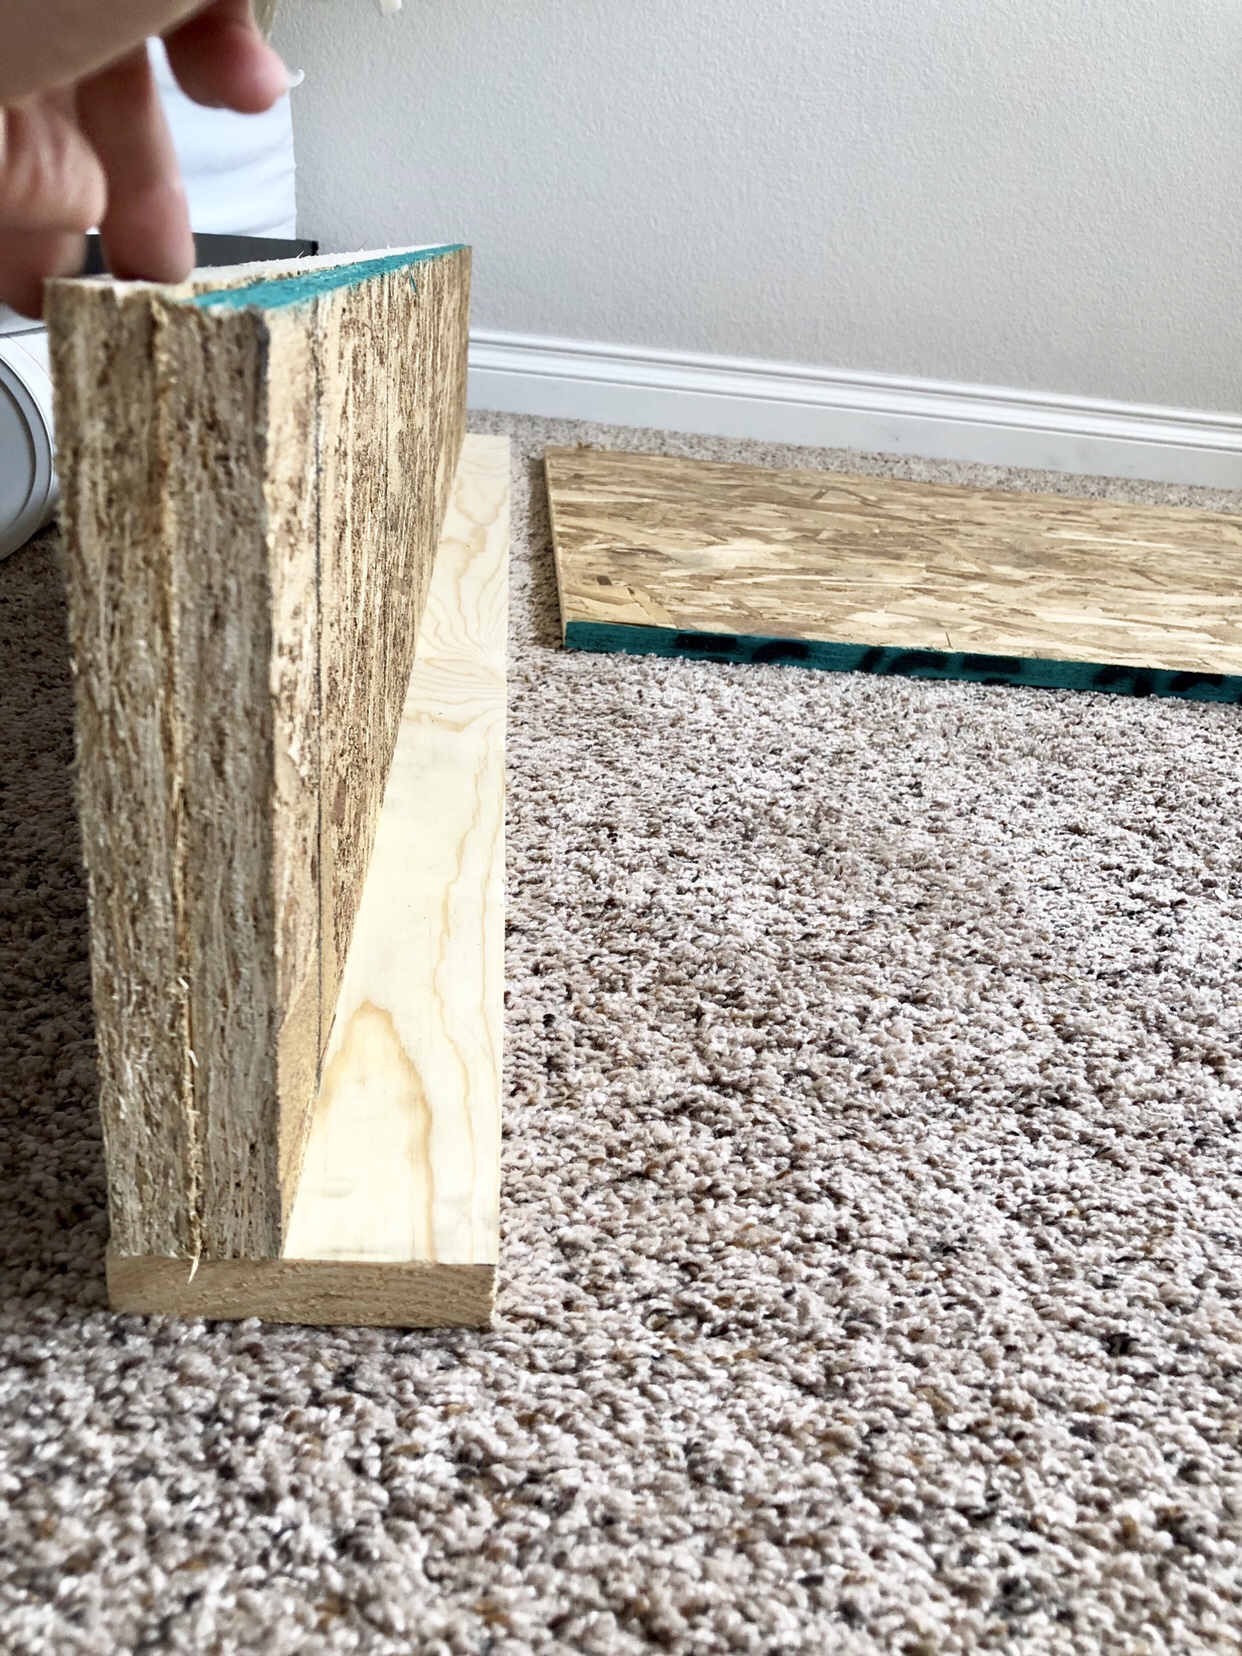
Screw the 1×4 to the plywood wings. Attach it like the below picture. These 1x4s are how you will attach your wing to your headboard at the end.
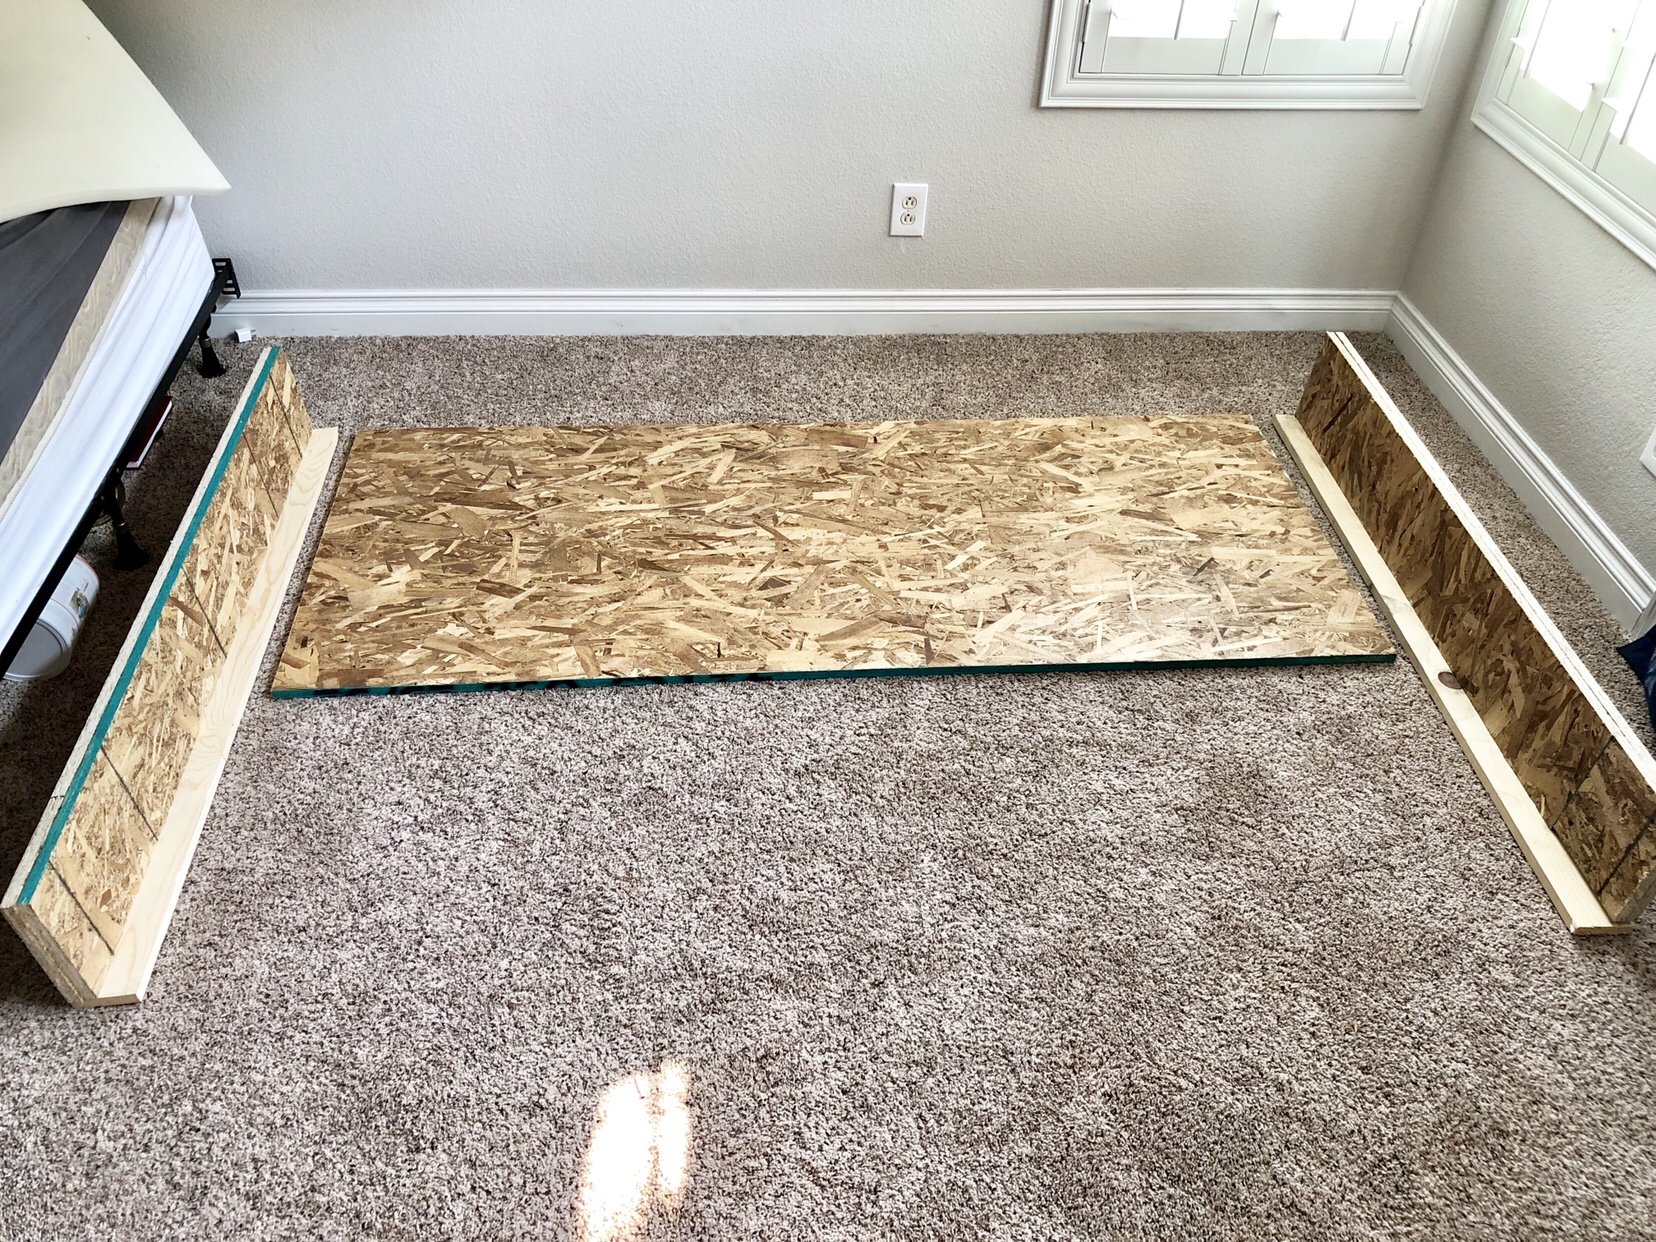
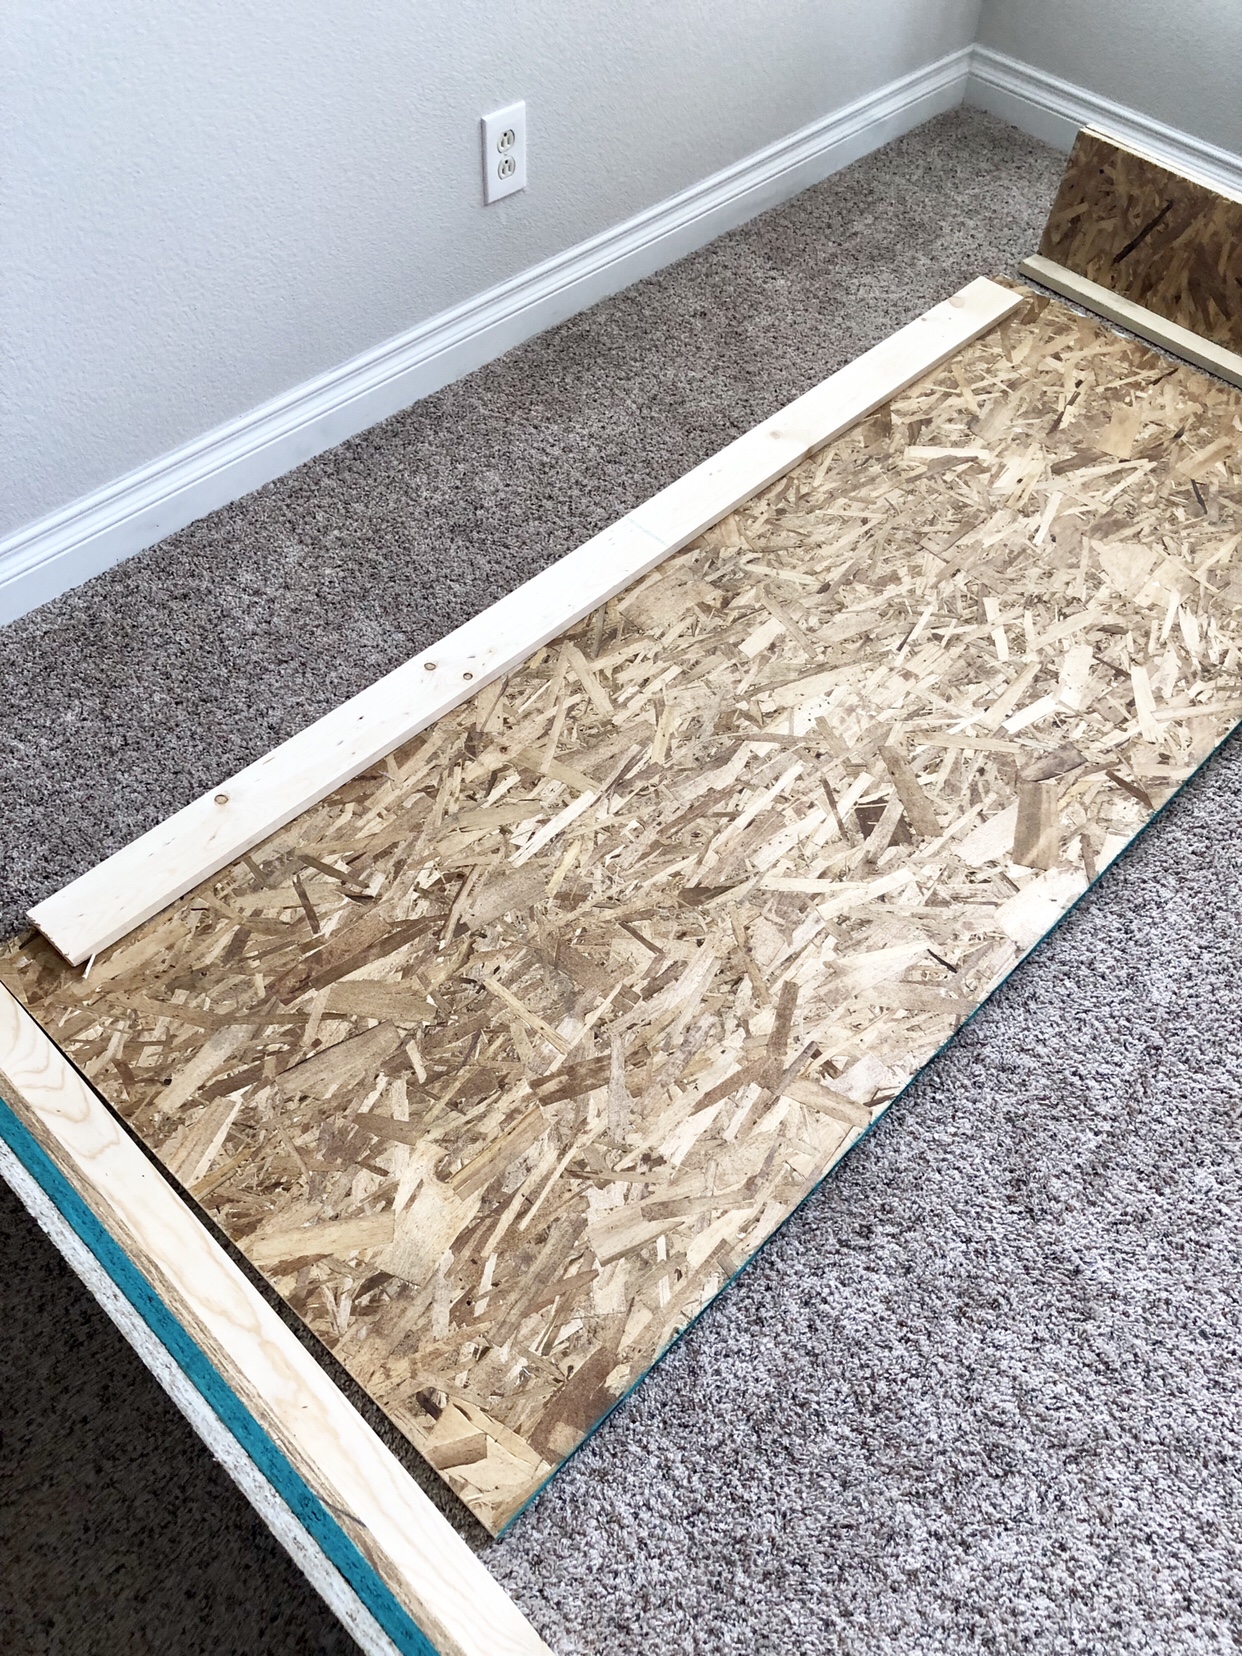
Screw the 73 in long 1×4 to the top of the headboard and center it. This will help make the headboard look thicker. (This will be the back of the headboard)
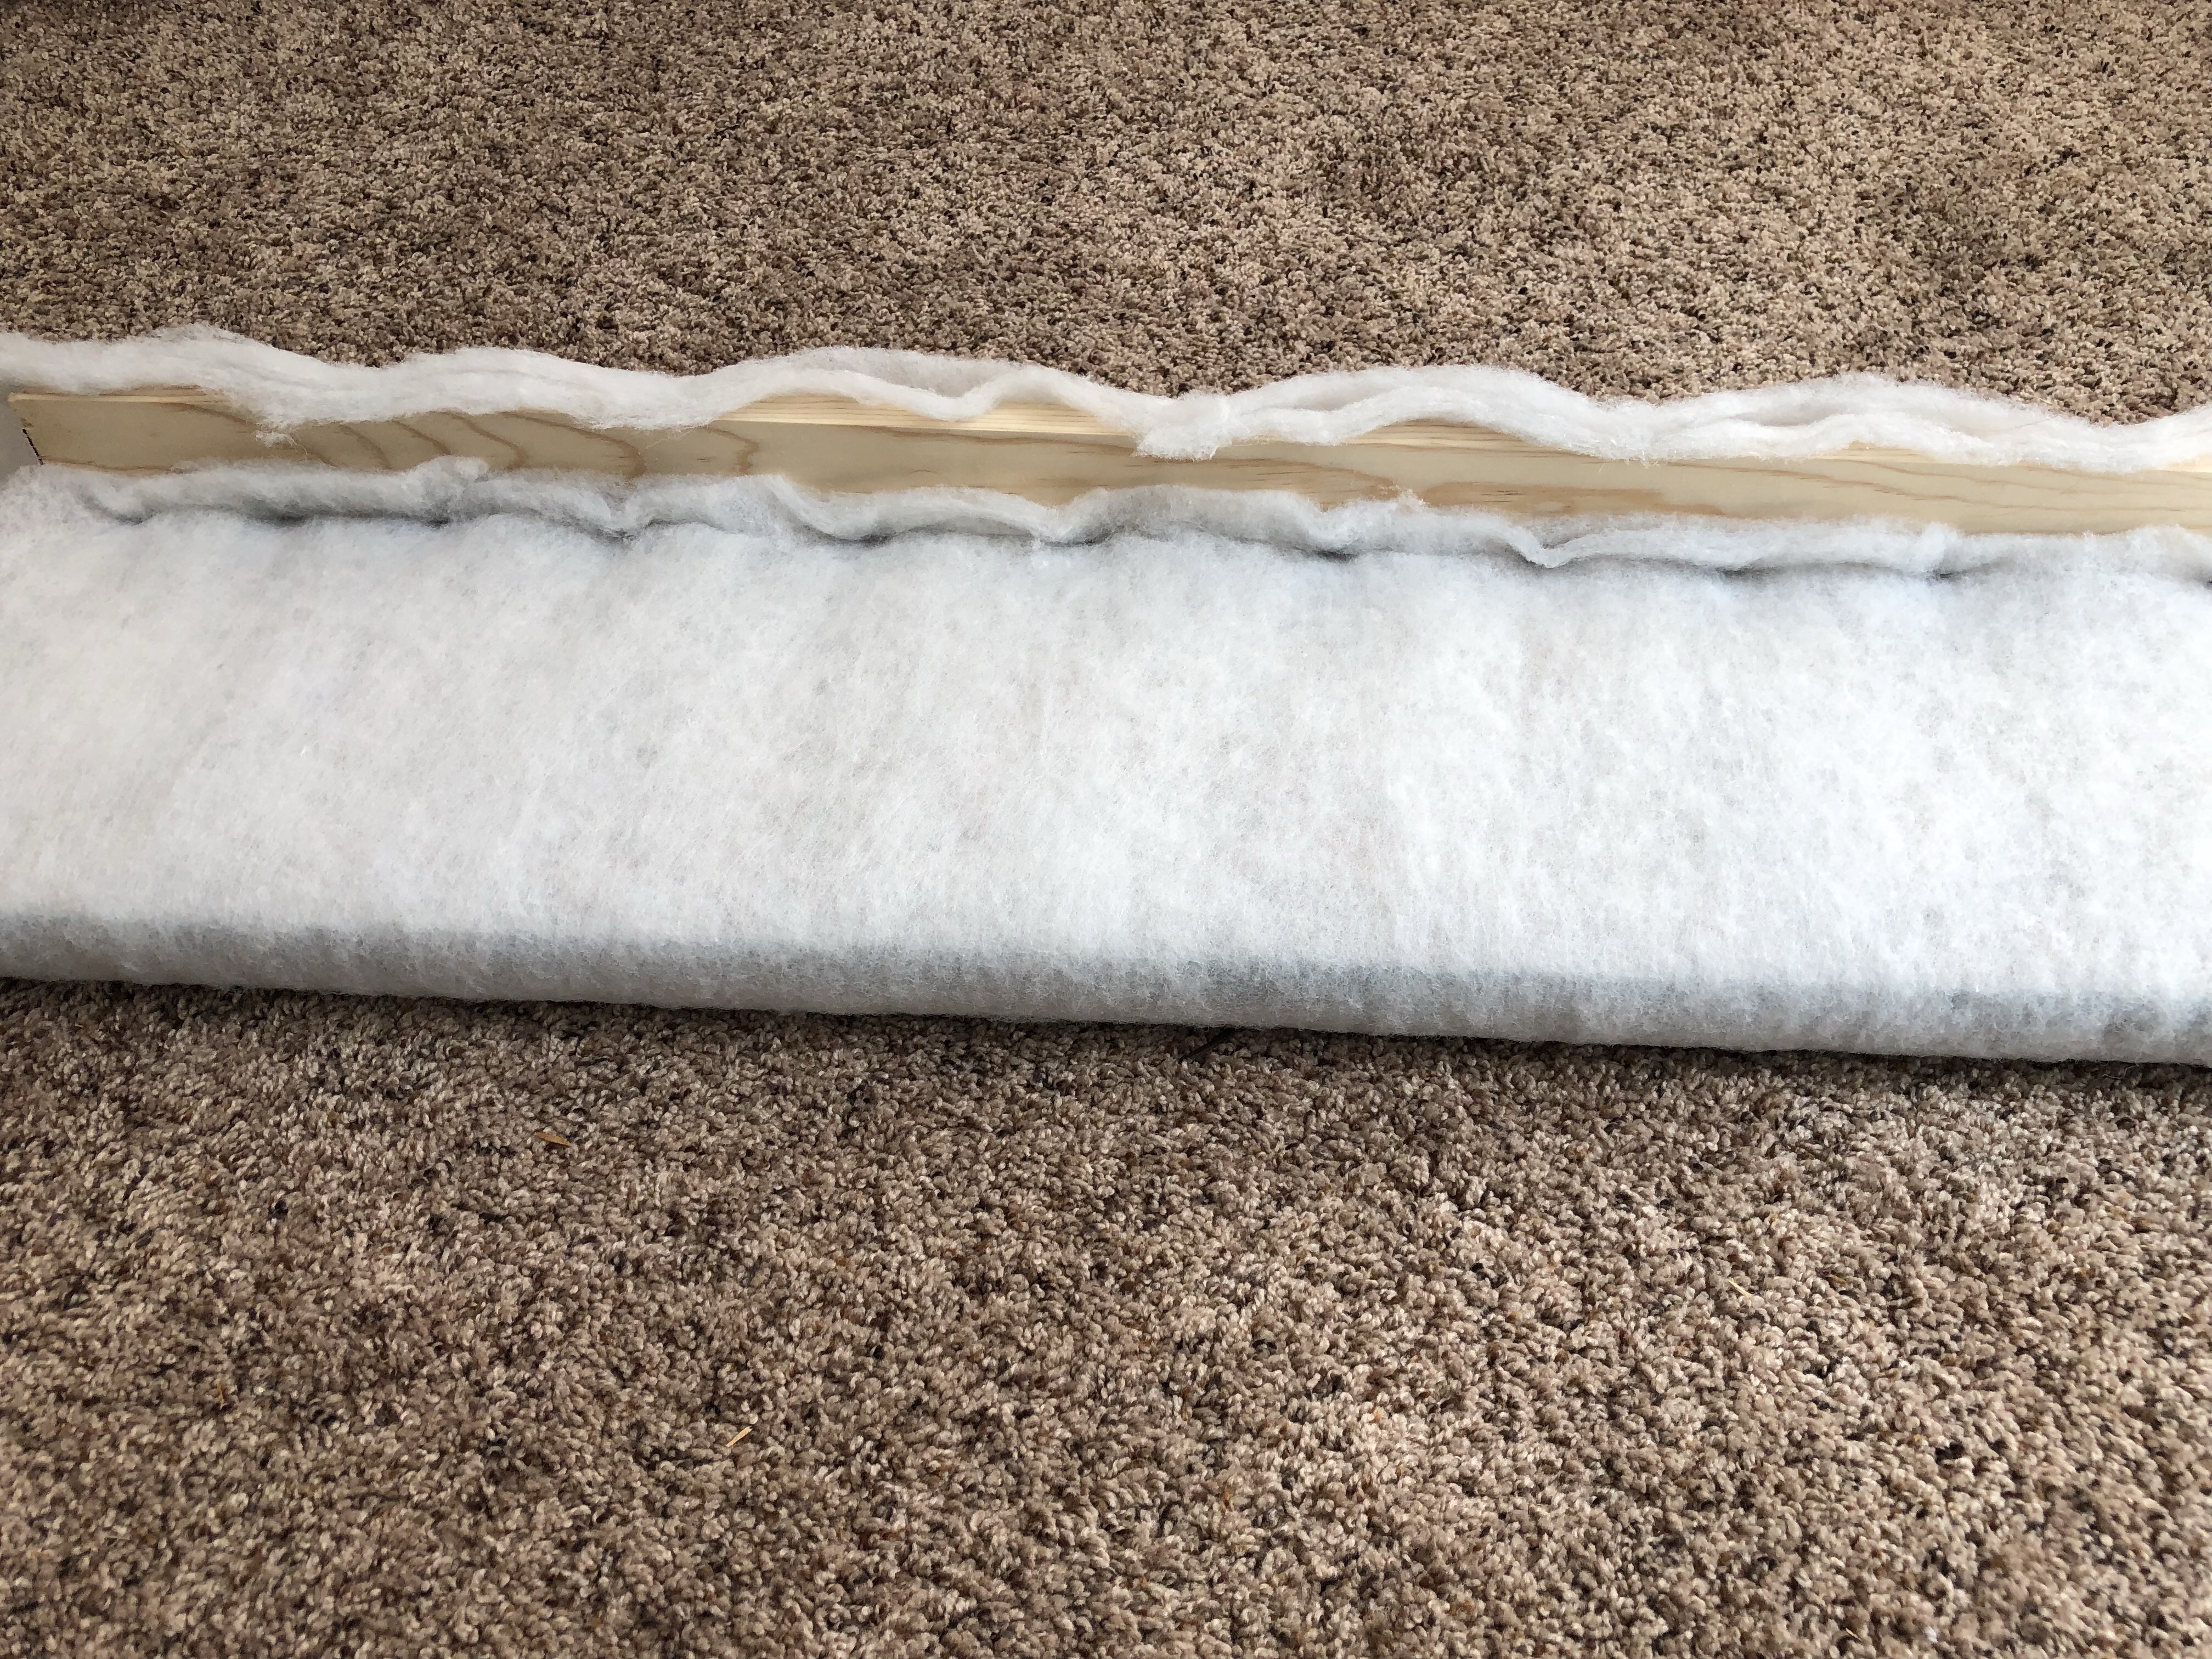
Step 3: Flip headboard back to front…Cut foam to fit headboard, and spray with spray adhesive.
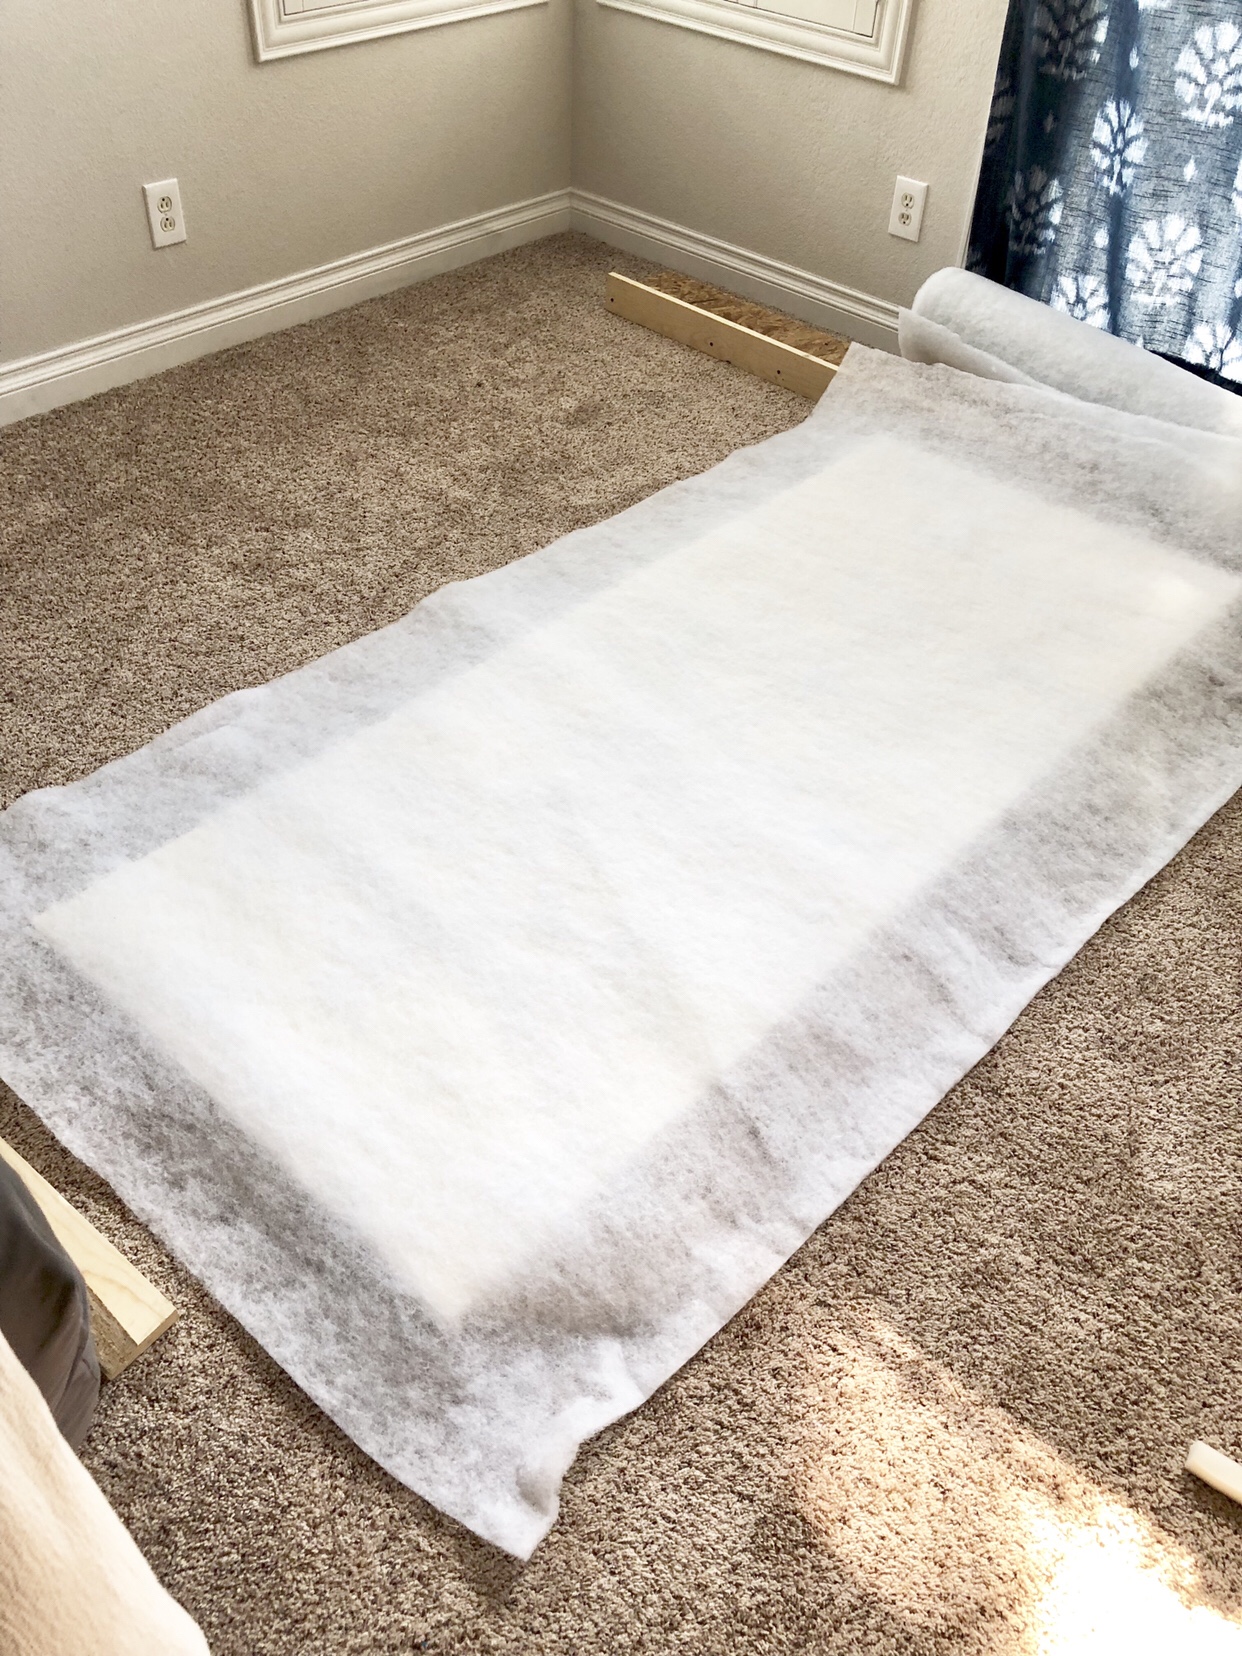
Step 4: Wrap with batting
Lay batting on headboard and make sure it’s smooth with no wrinkles. Flip headboard and batting so batting is on ground. Pull the batting tight around edges and staple to the back. (Staple guns like this are super cheap!)
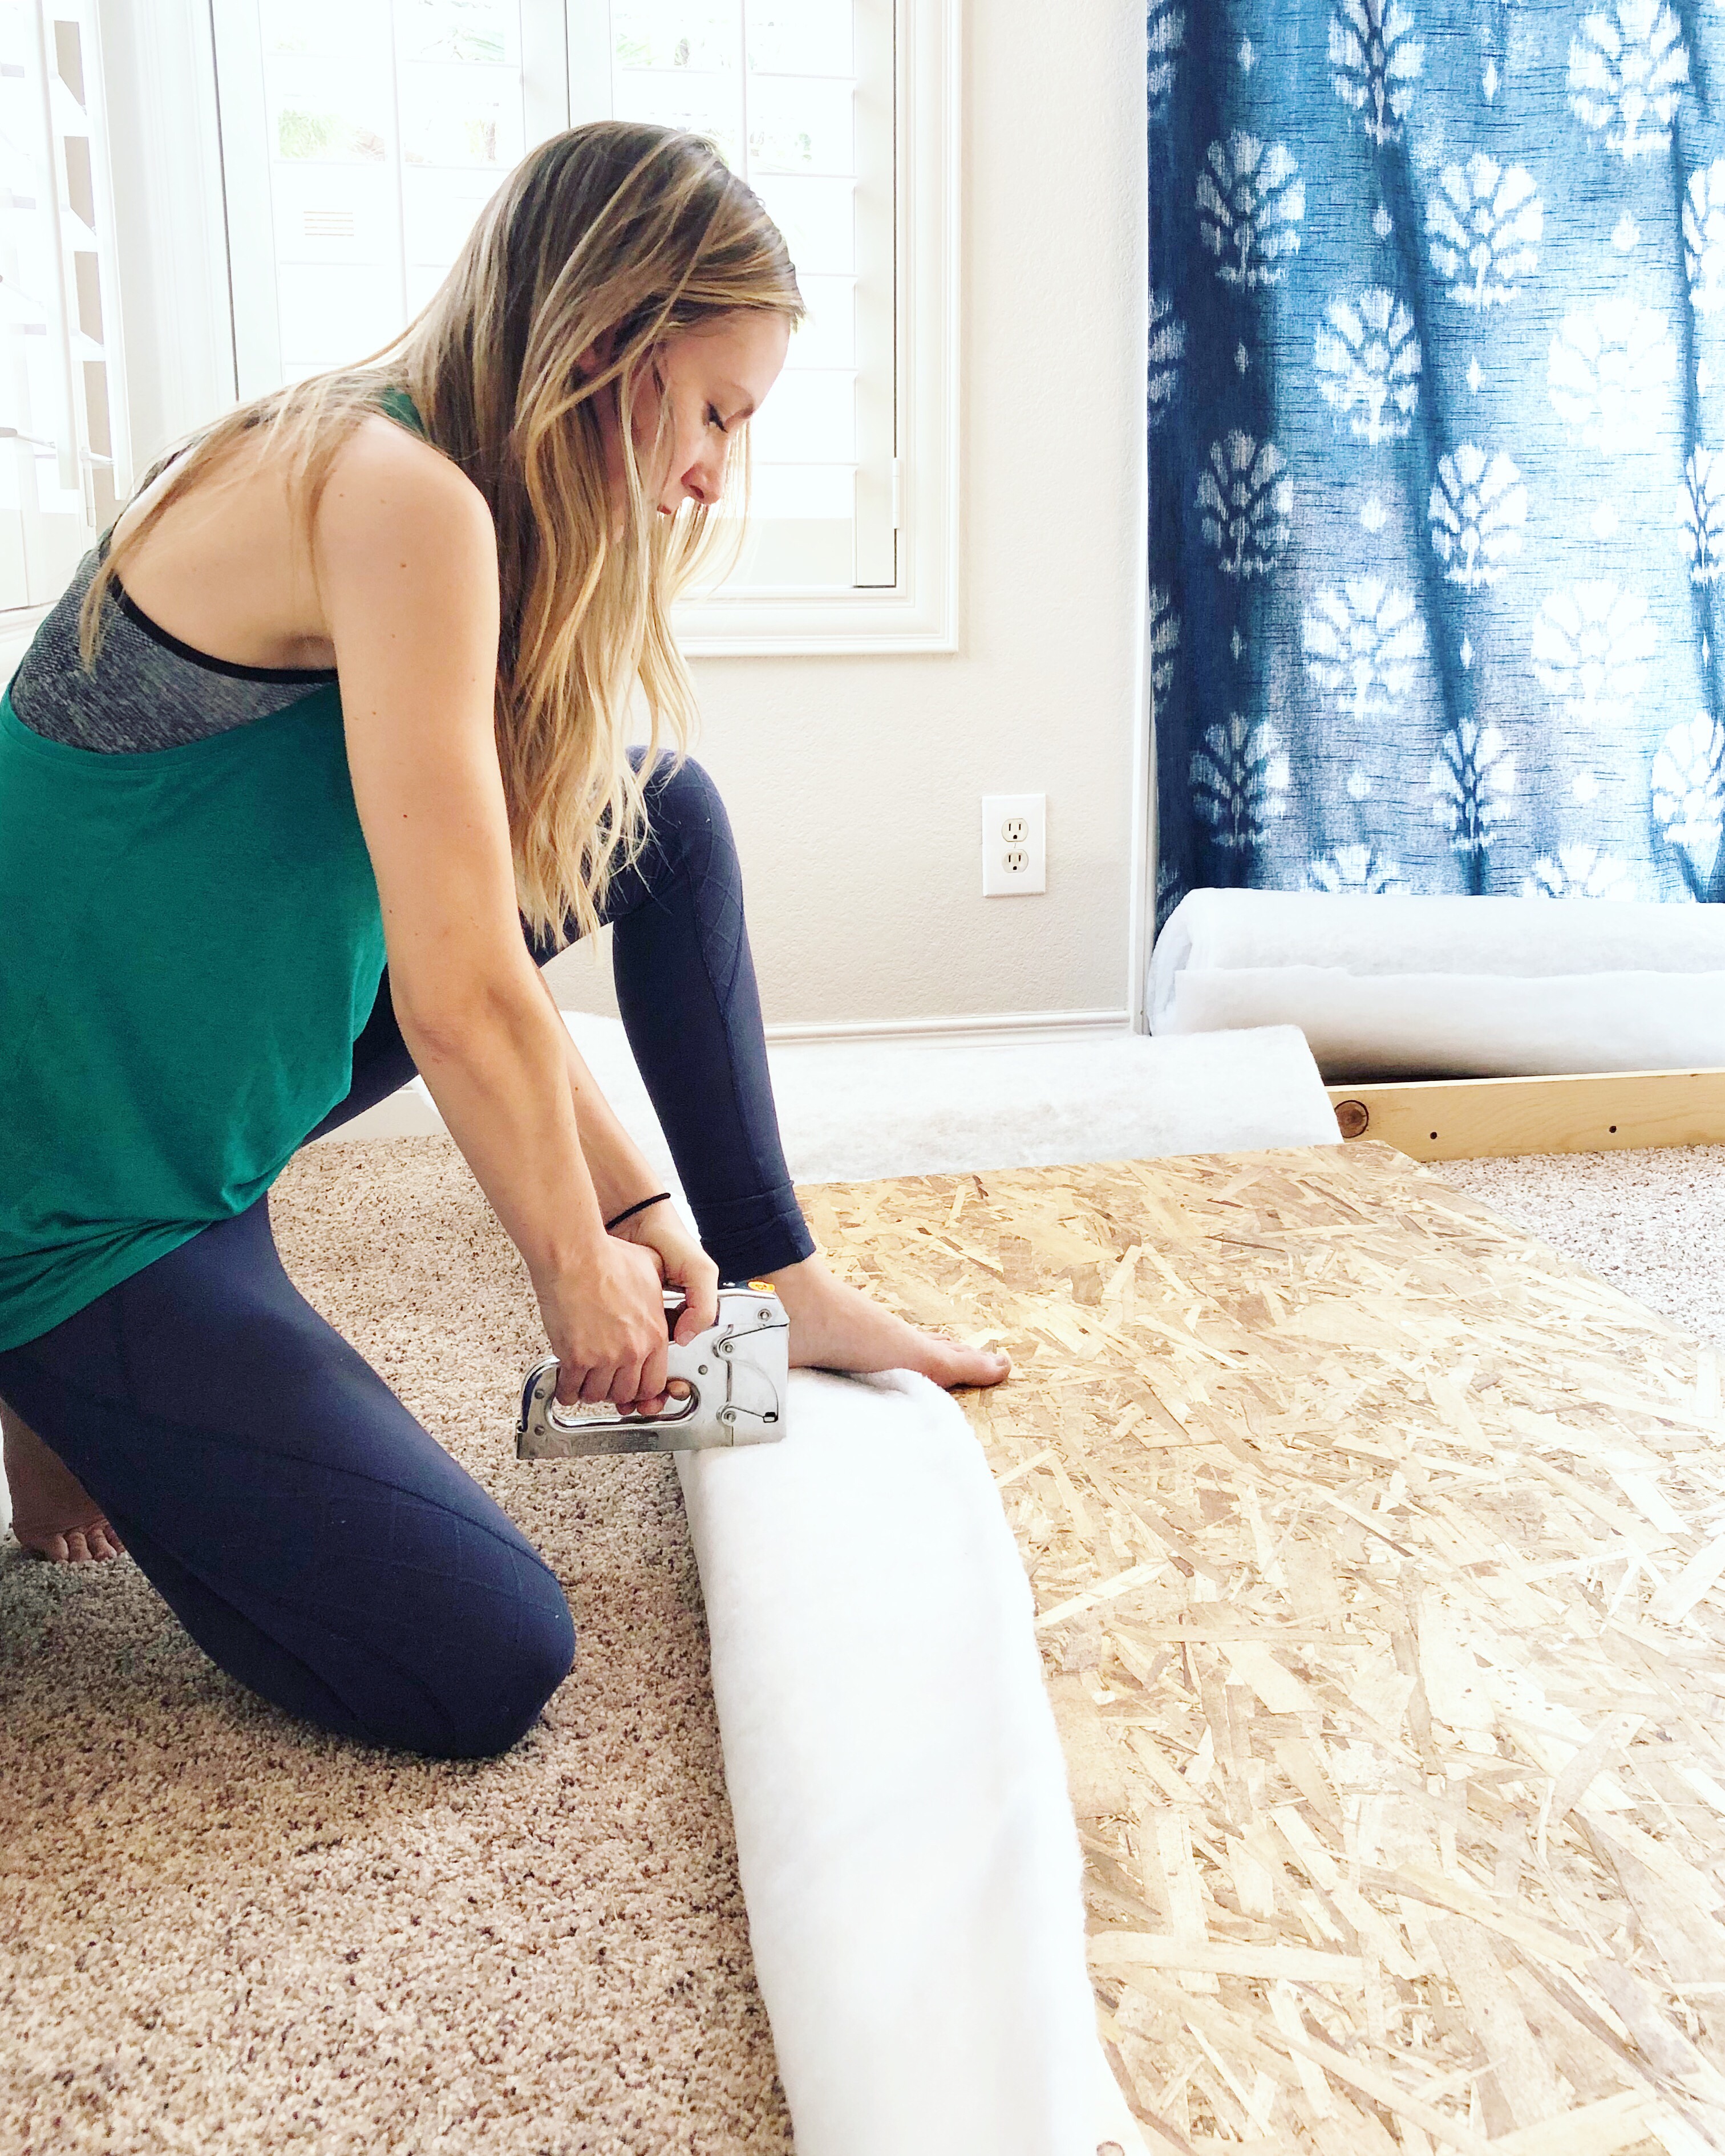
Next we are going to wrap the wings. Start with the top of the wing that’ll be facing the ceiling. Cut a rectangle and pull it around the top. Staple it in a few places around the side to secure it. Next you’ll wrap the main part of the wing. I wrapped mine with 2 layers, but one would be fine too. First staple the batting on the inside of the wing, then flip it over wrapping it around the wing, and staple it to the 1×4. (Helpful tip from my mistake: Don’t cover the whole 1×4 with batting because your screws at the end will have a hard time going through. Instead, staple batting to 1×4 leaving a couple inches of just the board.) Trim batting excess off in preparation for the fabric.
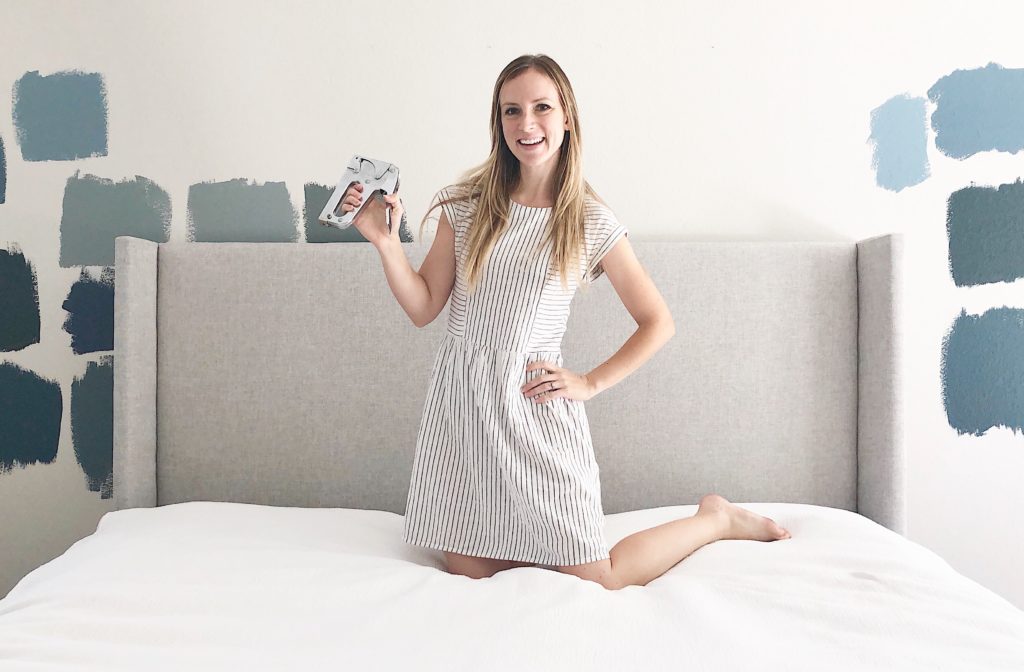
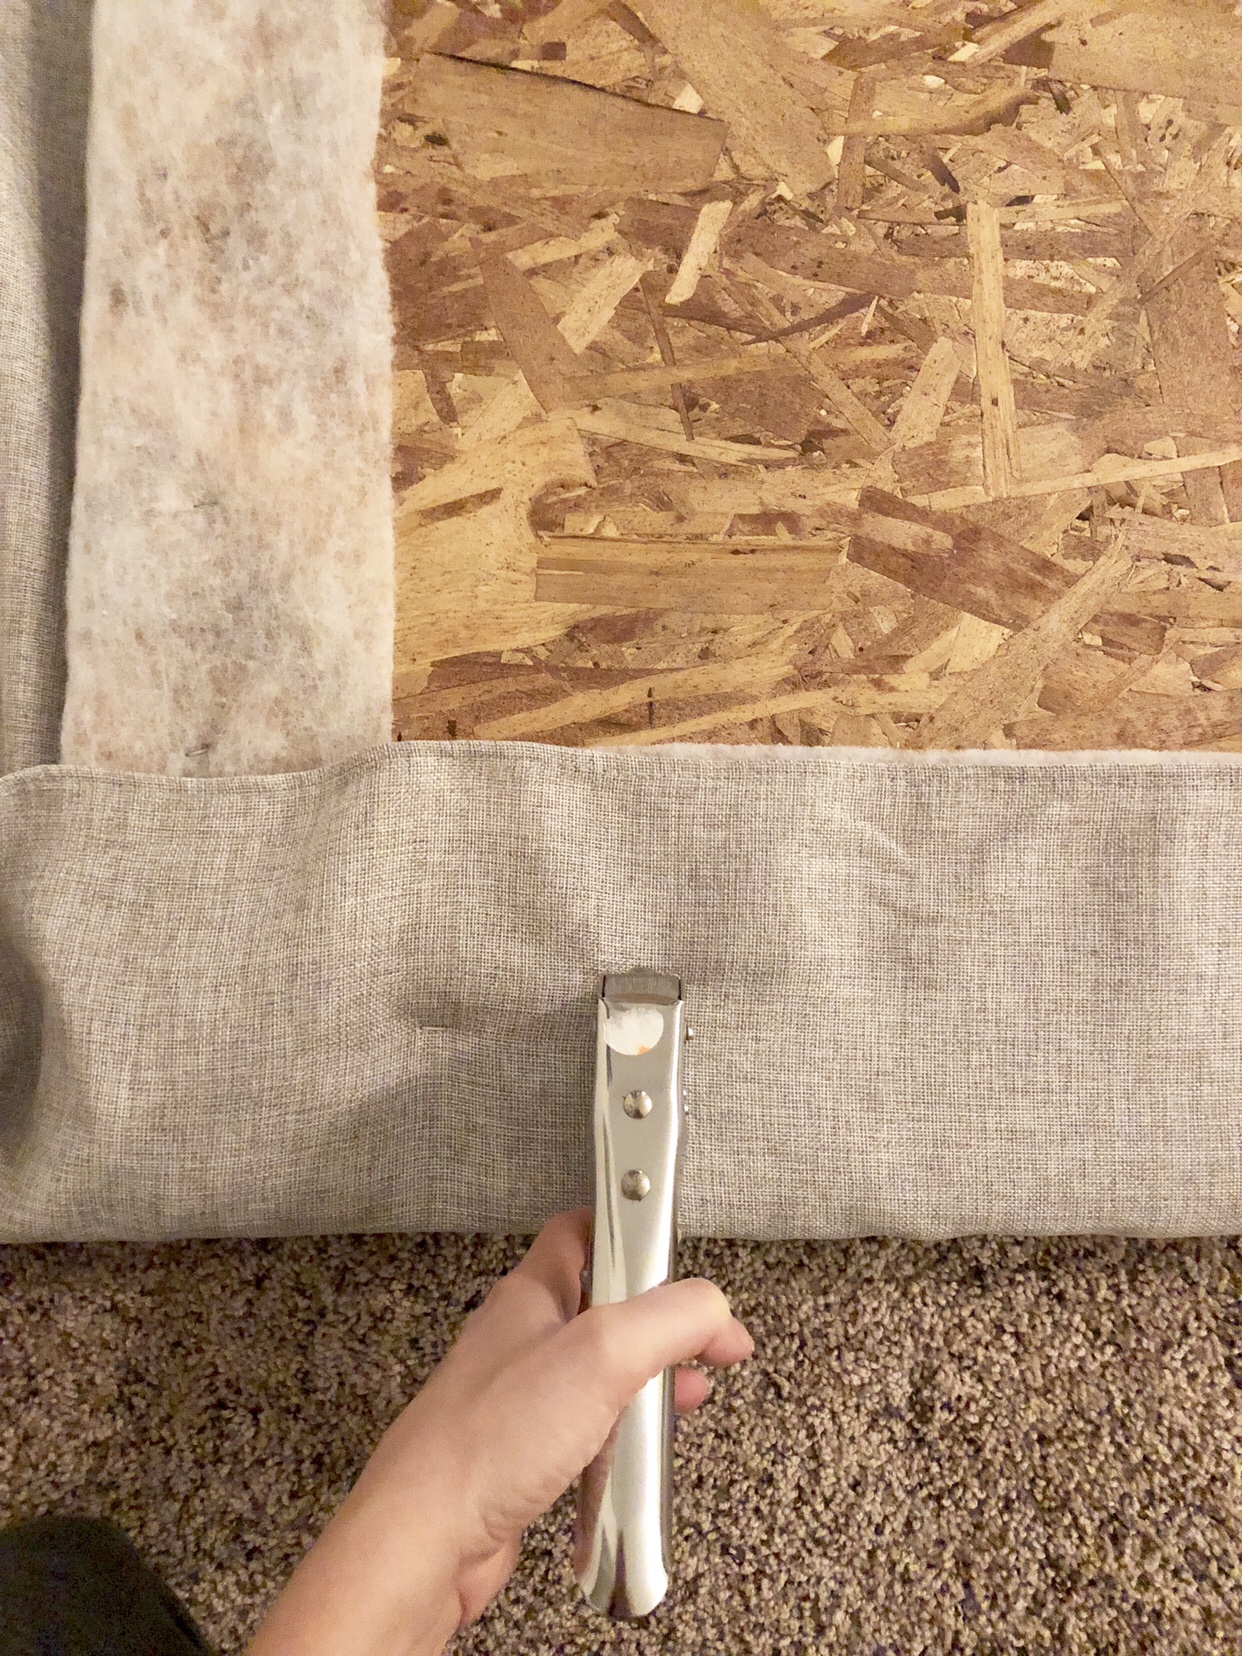
Step 5: Wrap with fabric
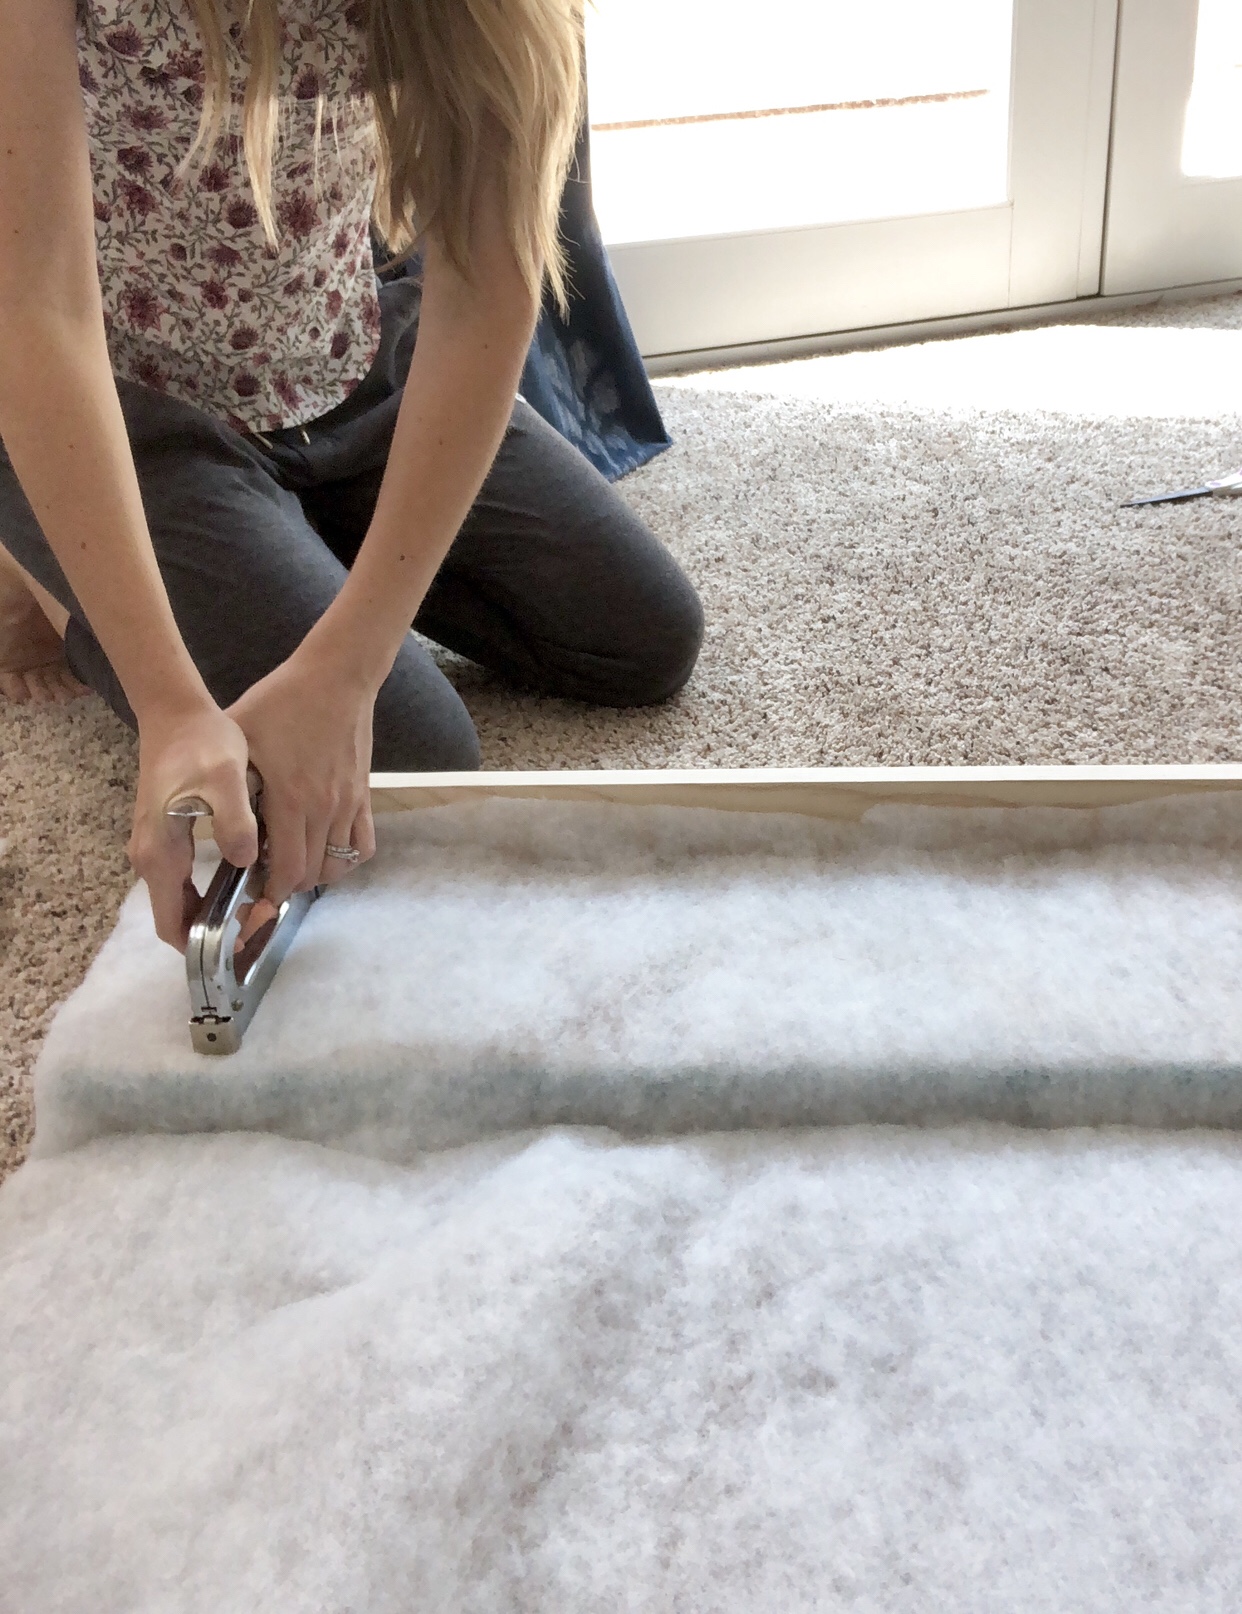
Wrap the headboard in fabric and staple, but LEAVE the top of the headboard UNstapled for now. Make sure you pull fabric tight!
Wrap the wings in fabric. Like with the batting, start with the top first. Cut a small rectangle and wrap the top of the wing. I stapled it around the edges in a few spots but you could try the spray adhesive instead. (since I stapled, I had to then fill in those little staple places with a little batting so it’d look even with the fabric on).
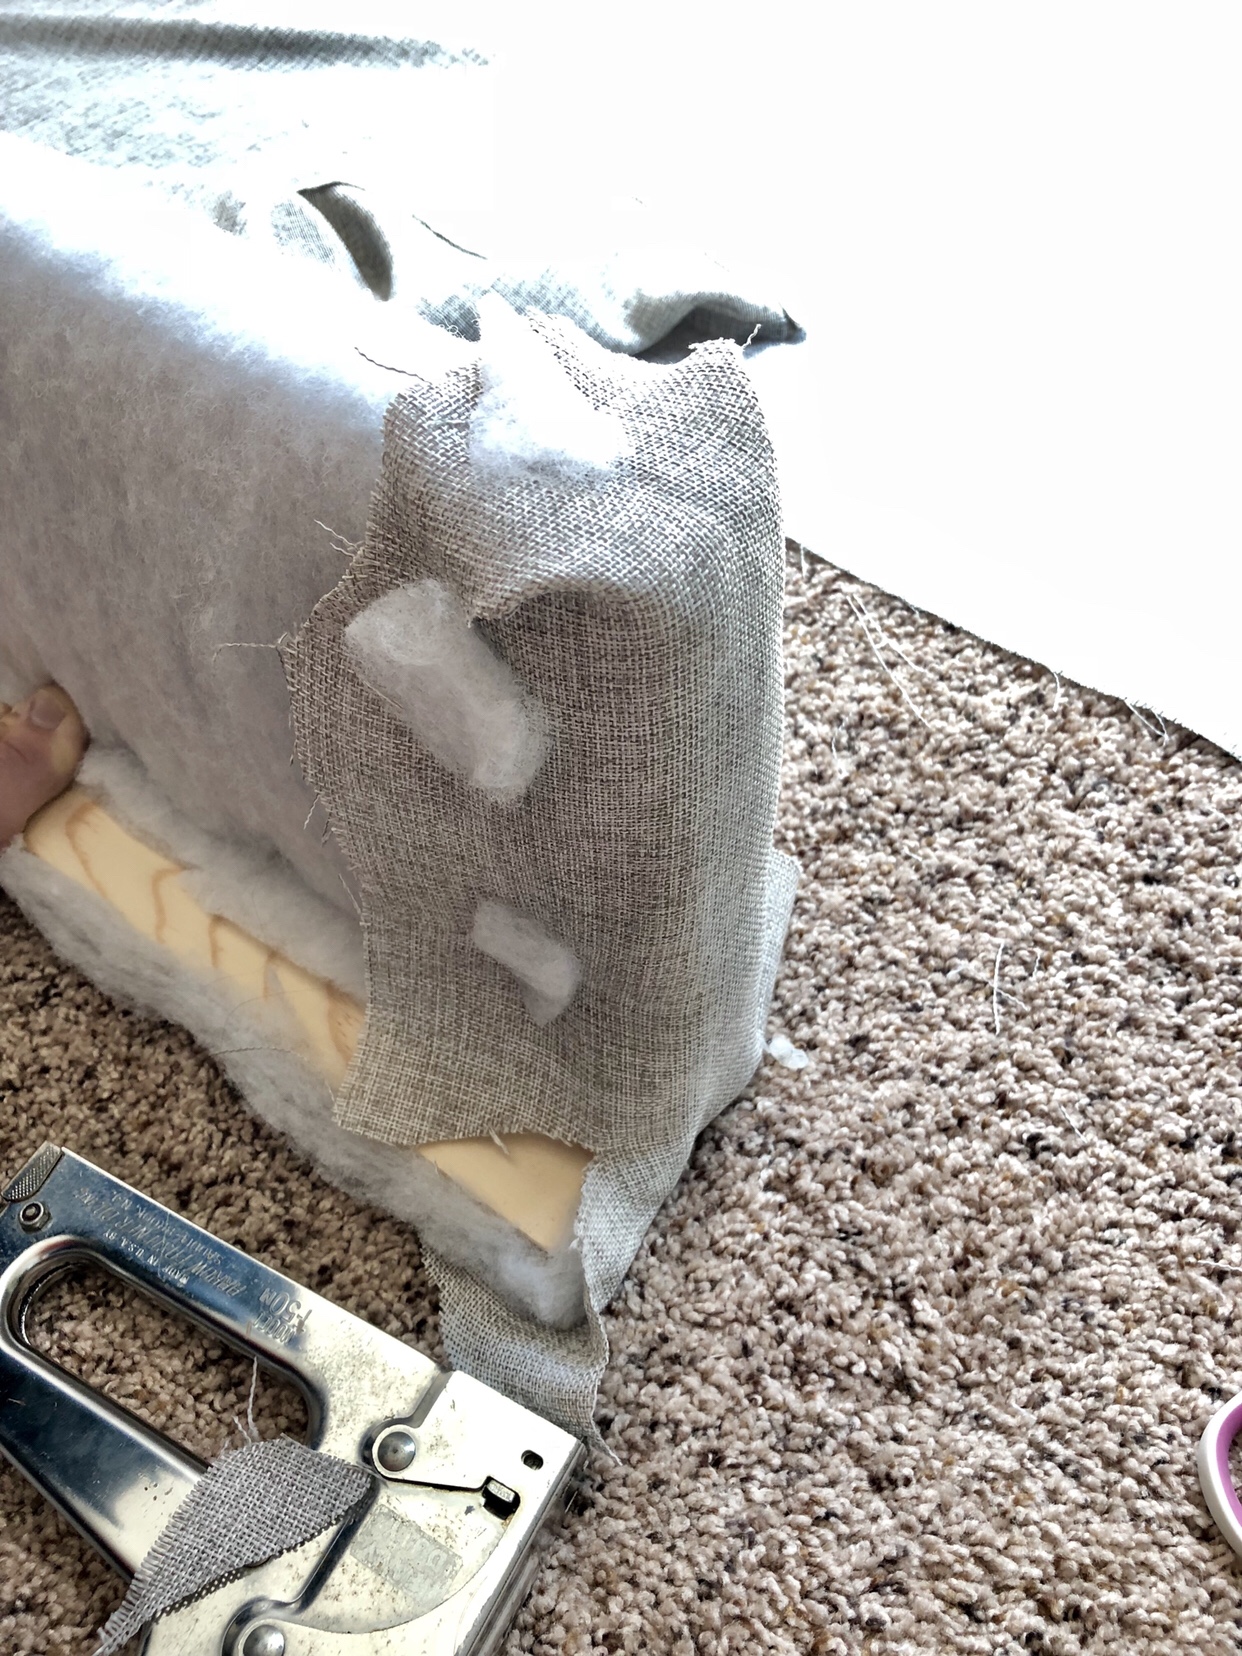
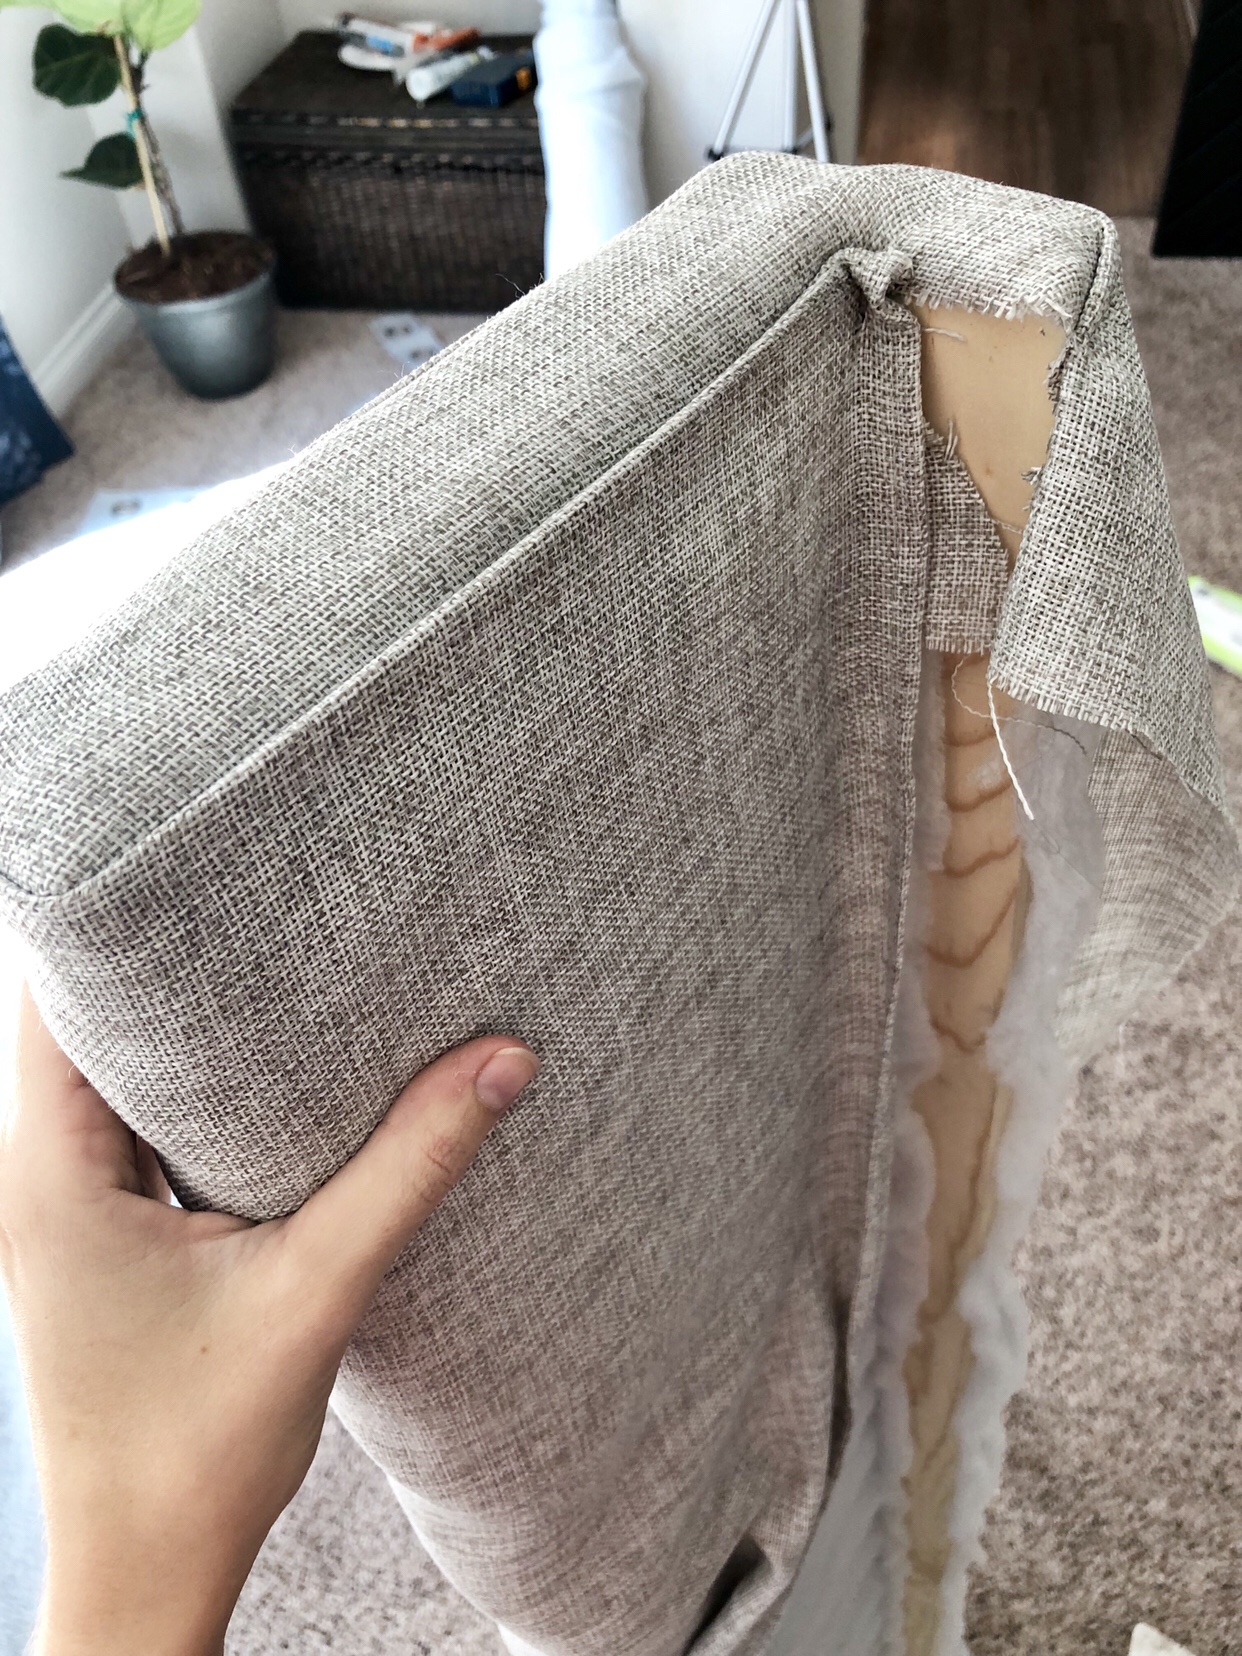
To wrap the board, take an edge of the curtain that’s already turned over, or take an edge and fold it under to make a nice edge. You can iron the edge under, or just pull tight. Staple the turned under edge to the top inside corner of your wing, wrap it around (with that edge still turned under) and staple it to the back. Make sure to leave a couple inches on the back of the 1×4 without fabric. Trim excess fabric and wrap the bottom of wing like a present and staple.
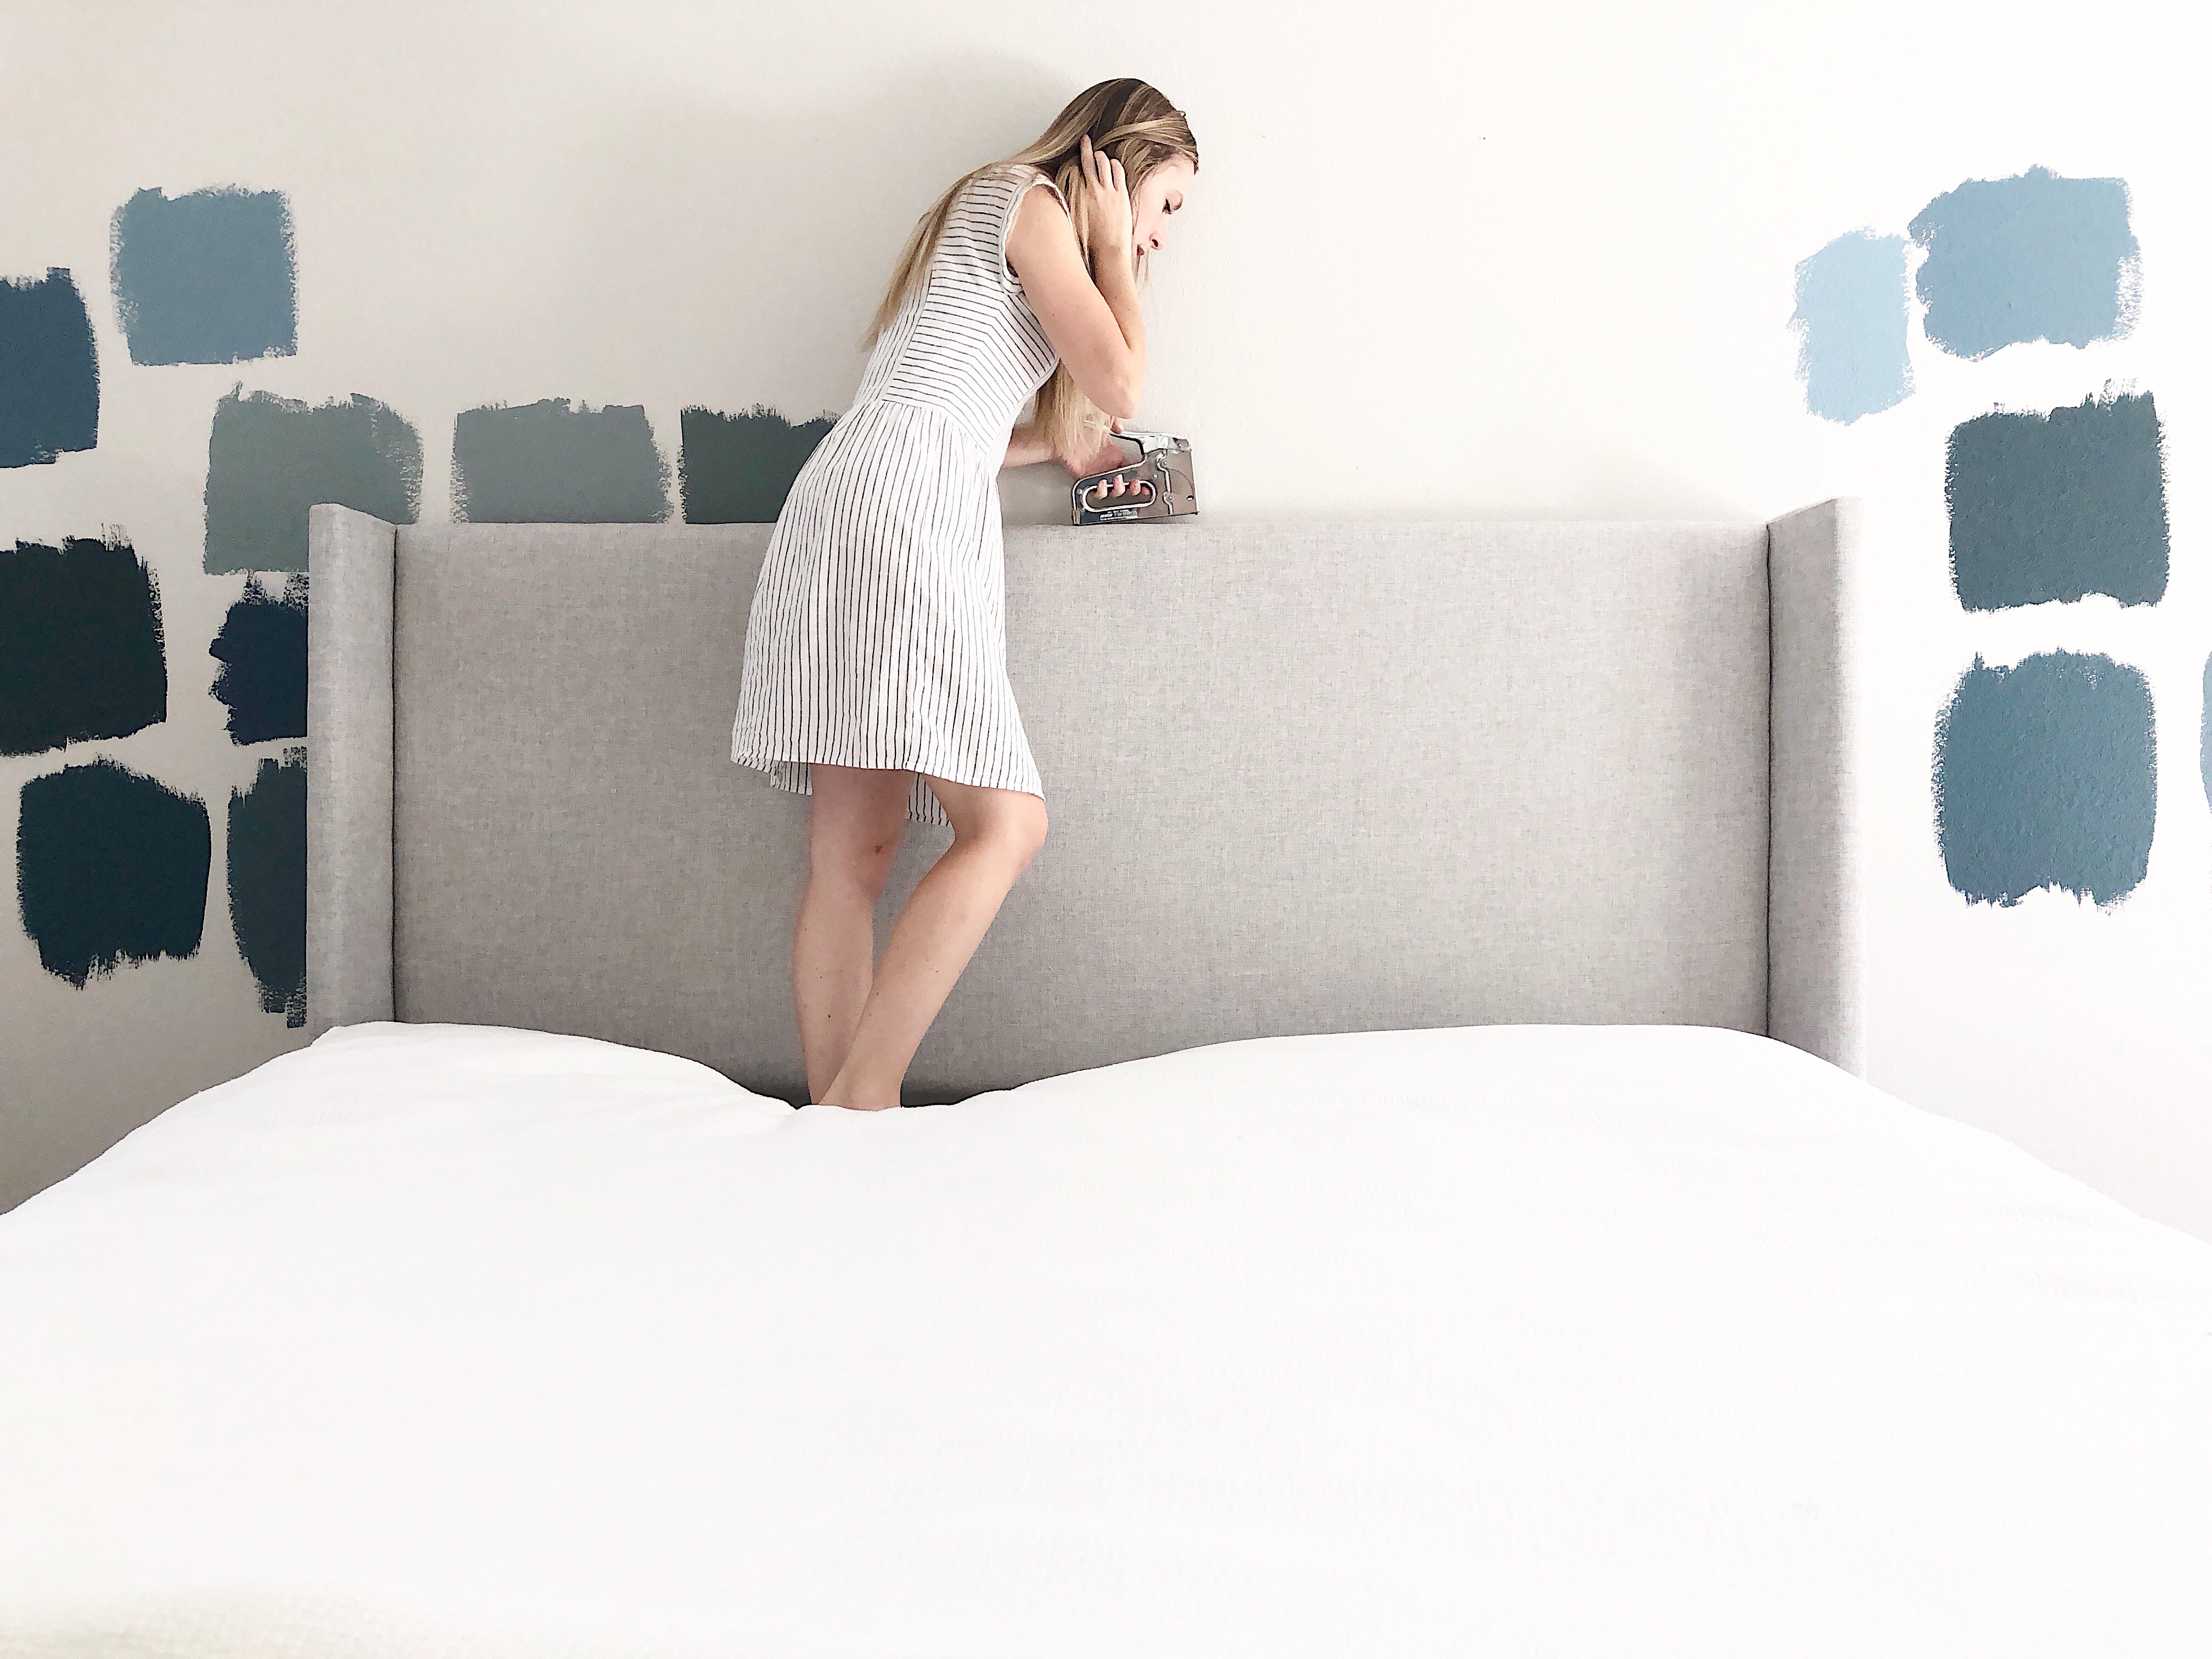
Step 6: Attach the wings to the headboard
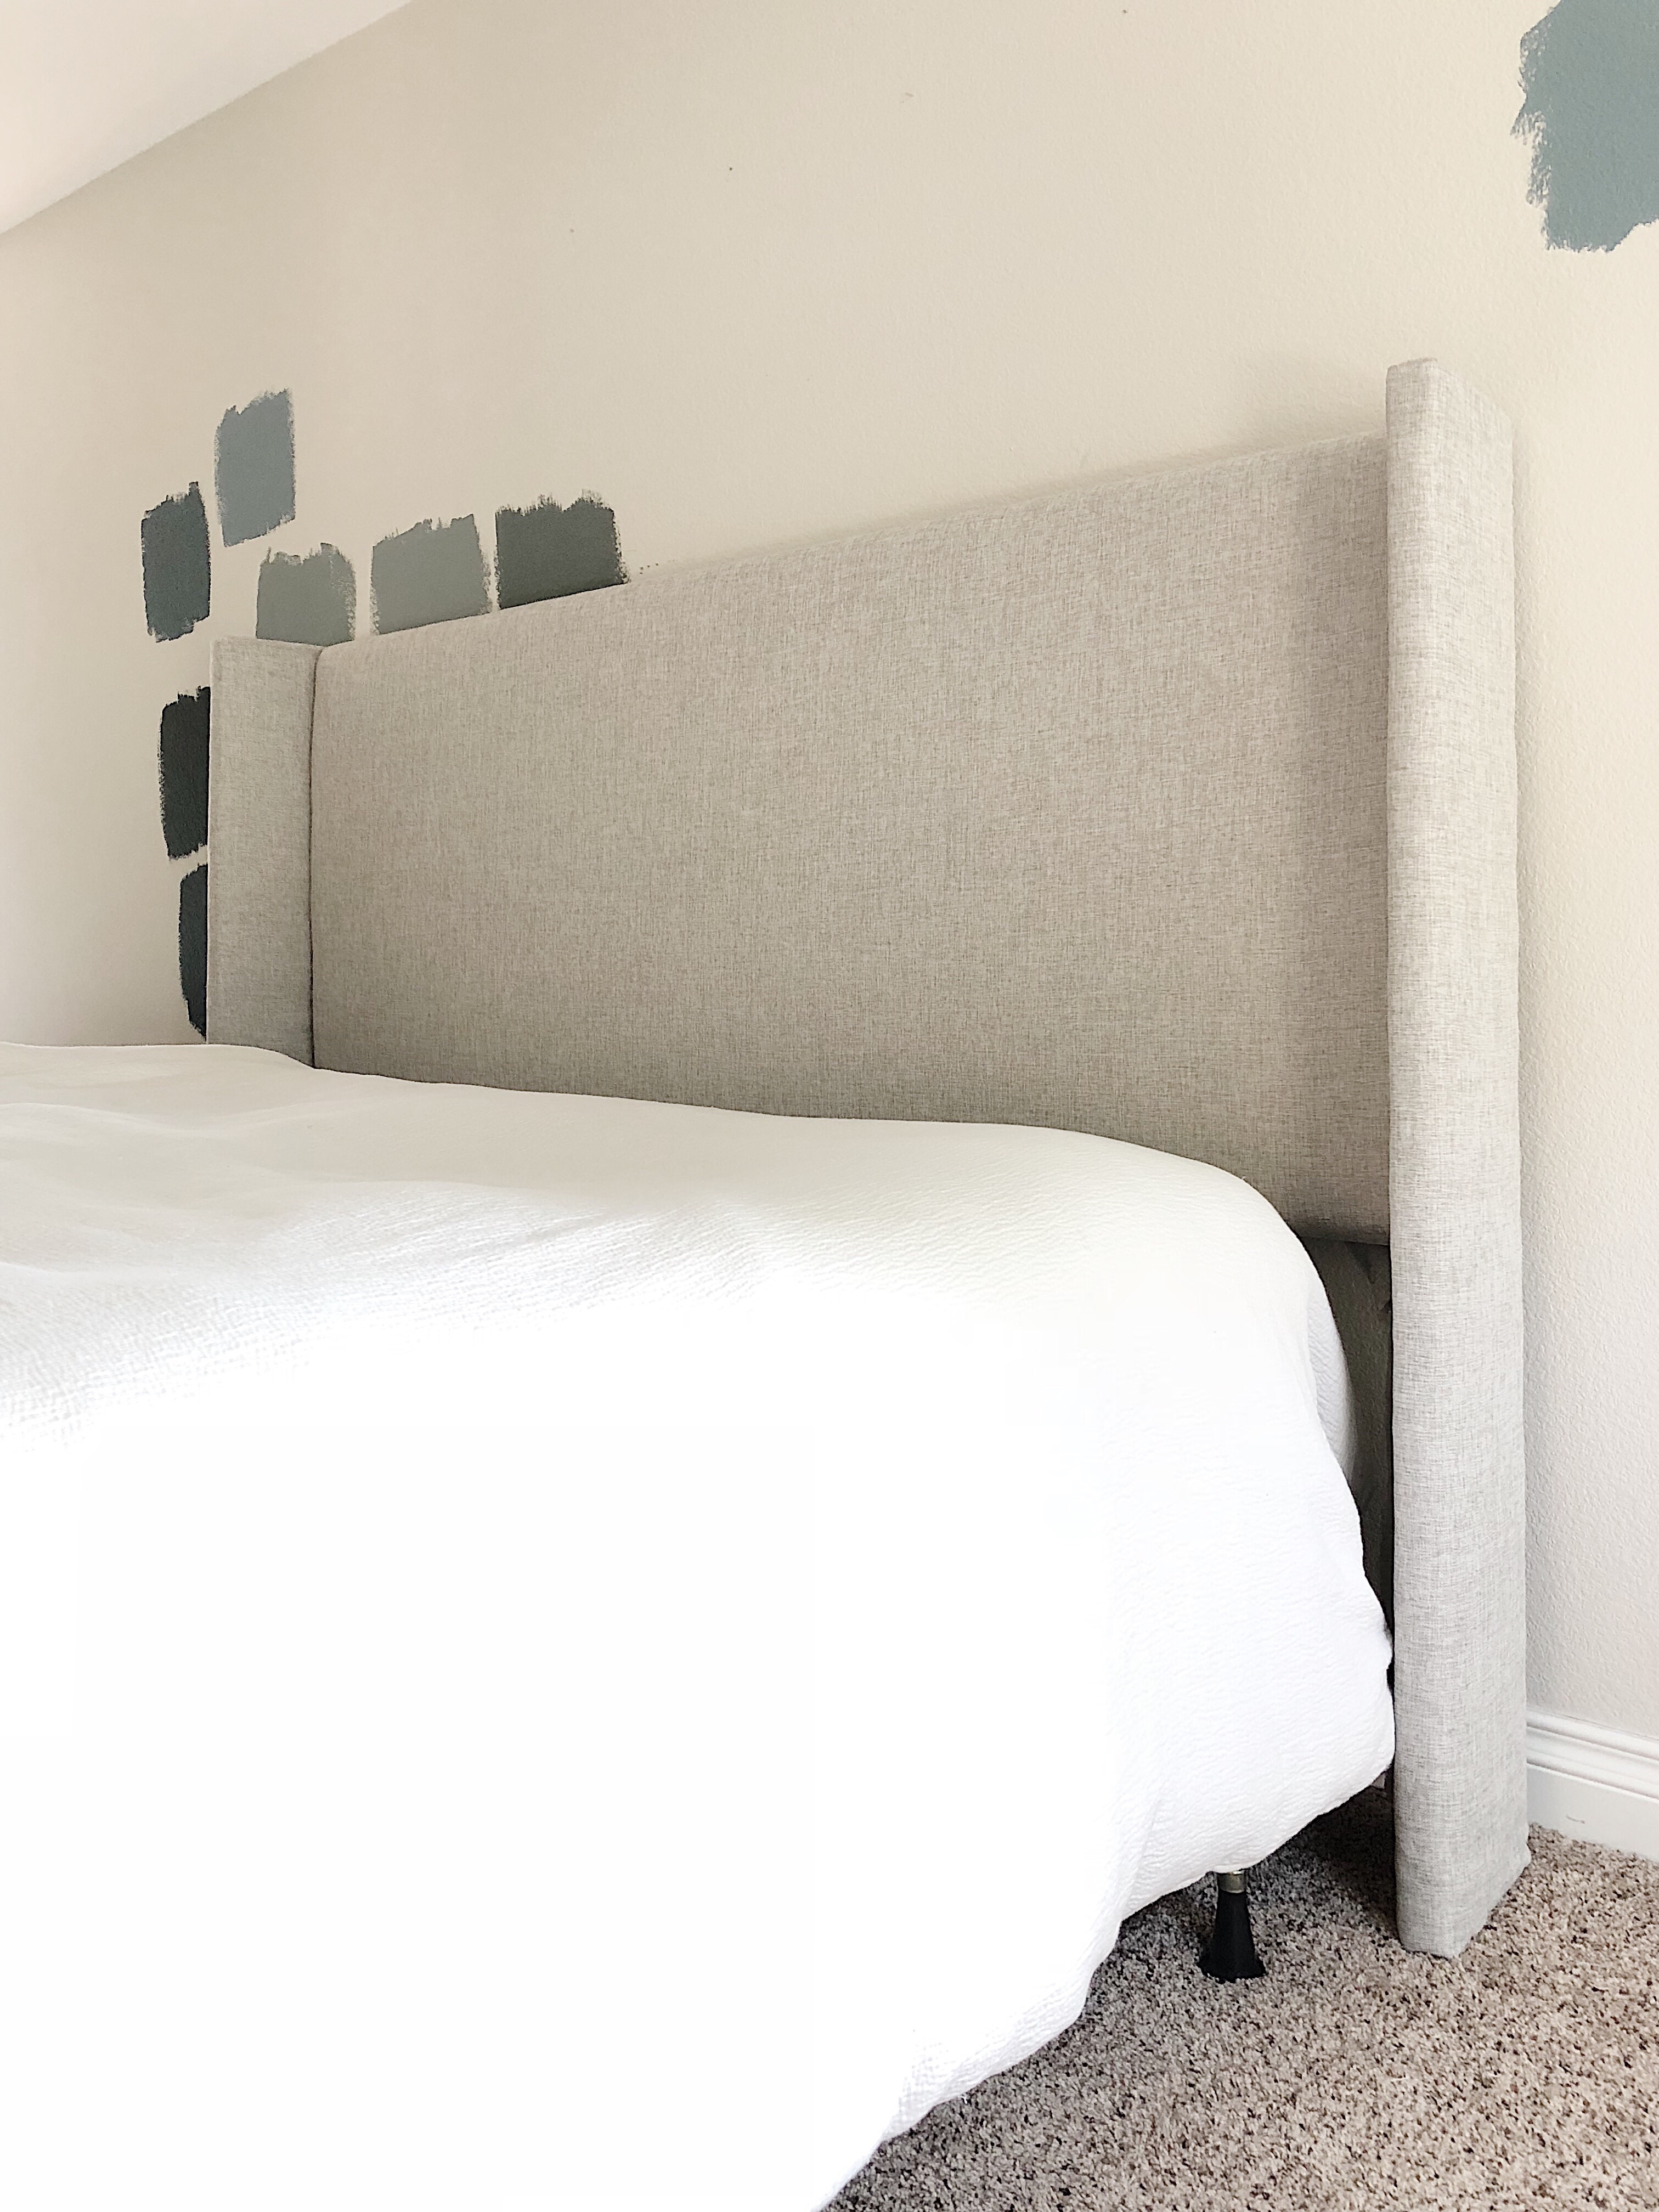
Theoretically you would only need 1 1/4 in screws, but since the batting pushed things out a bit, I ended up using 2 in screws…judge how long you think you’ll need. Support the headboard on a table or a couple chairs and get it to the right height so you can line up your wings. Once your wings are lined up, take that 1×4 and put it on the backside of the headboard so you can screw it into the headboard. The wings should be like Ls with the wing coming out and the 1×4 wrapping around the back. Screw into your 1×4 and through to your headboard while making sure you keep wings pushed close and lined up.
Once wings are screwed, you can take the top headboard fabric and staple it to the back. Doing this at the very end makes it so that you can cover all the back pieces neatly. I just used my mattress to push it against the wall, but you could attach to frame or wall if you like :).
I am excited to see your headboards! If you have any questions, message me on instagram! Now it’s time for me to work on the rest of my room. Up next, board and batten wall!