I think artwork, especially large-scale artwork, is the perfect way to bring a space together. But for your artwork to shine, you need to find the perfect frames. Which can actually be a lot harder than it sounds. This is why I am sharing my top 4 DIY frames that anyone can make.
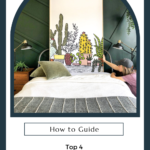
#1- Floating Frame
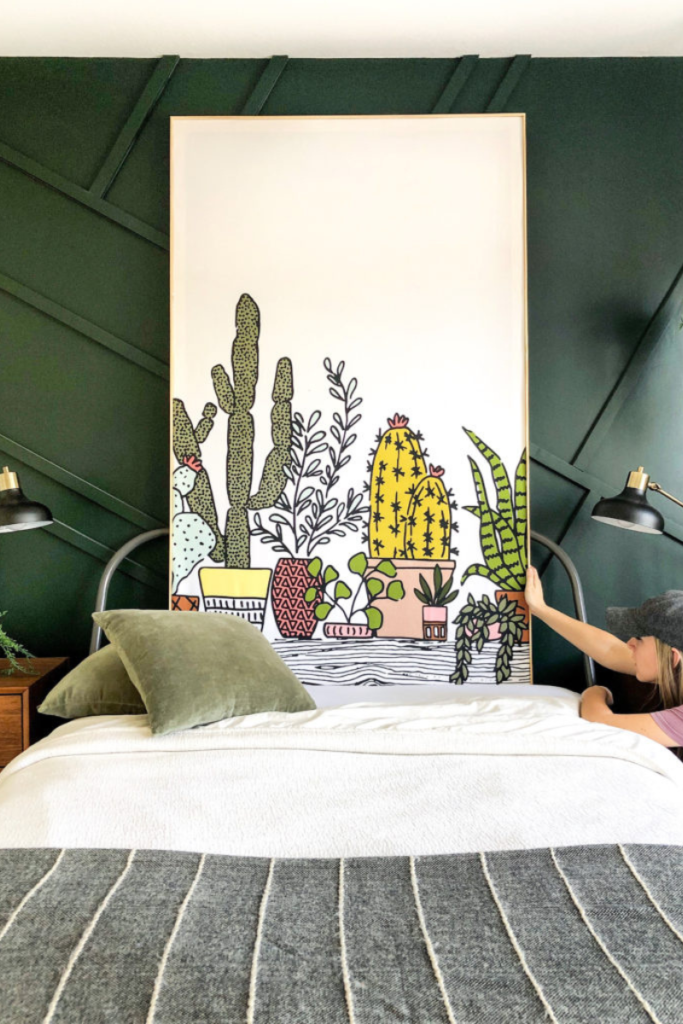
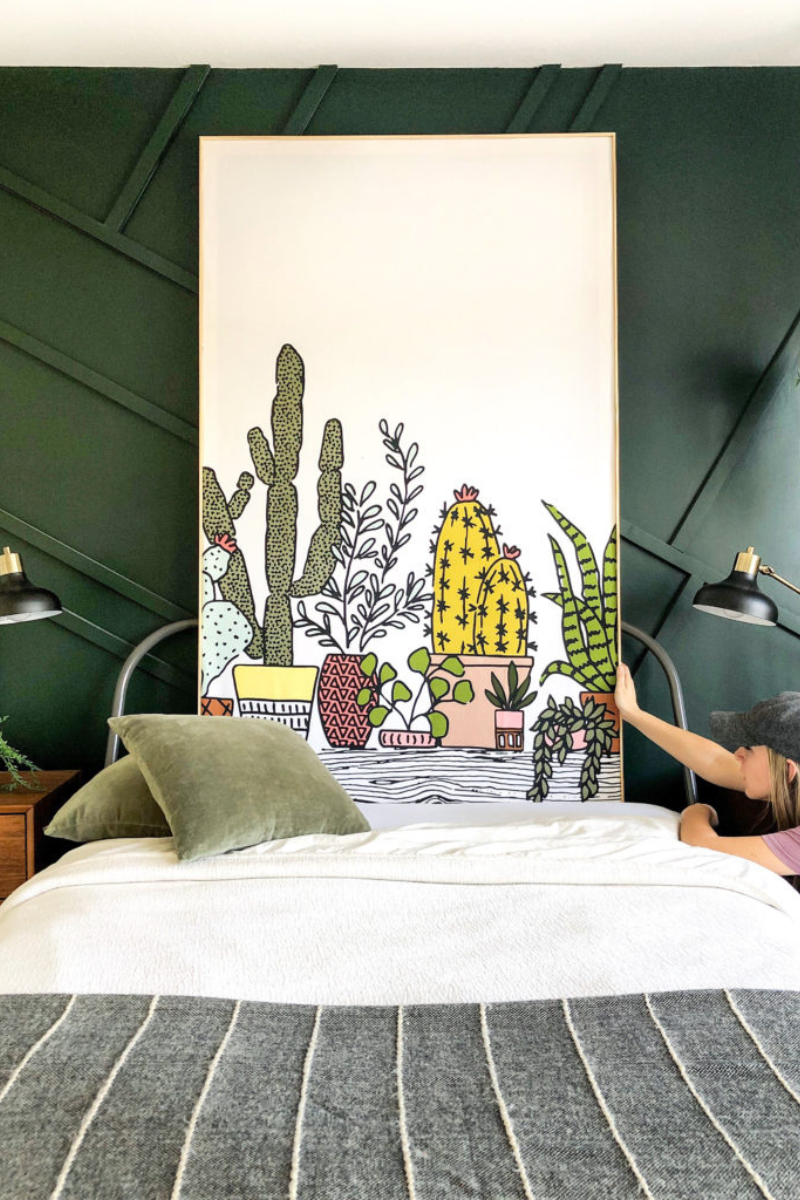
I love large wall art, but it comes with a price tag that I don’t love. When I came up with this floating frame, I was able to do the whole project for $40 in just a couple of hours and ended up with the large artwork of my dreams. I want you to be able to recreate this in your own home because it is easy enough for anyone to do. Let’s walk through it!
For my floating frame project, I started by ordering a wall tapestry. I ordered mine from society6 because they have so many options in different sizes. Once the tapestry is ready, you will need to mount it. Head over to How Does She to catch my tutorial for this step.
Time for the Outer Floating Frame
For my outer floating frame, I used 1×3 pine boards. If you want a thicker (or thinner) frame try testing out different-sized boards. For a 51×60 tapestry, I thought 1×3 boards were just right.
Before assembling the frame, sand and finish your boards as desired. I measured each piece one by one and then mitered the corners (cut the boards at 45 degrees) for a tight fit. Helpful tip: when measuring your boards, mark the inside corners by drawing which direction your miter should go. Check out my tutorials on @angelarosehome).
Once the boards are ready, use wood glue to attach your outer frame. Then nail a couple of nails in each corner. Use clamps to secure the outside frame to the rectangle mount while drying. That’s it! You did it!!! For a full step-by-step guide with pictures check out this post.
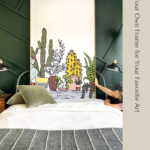
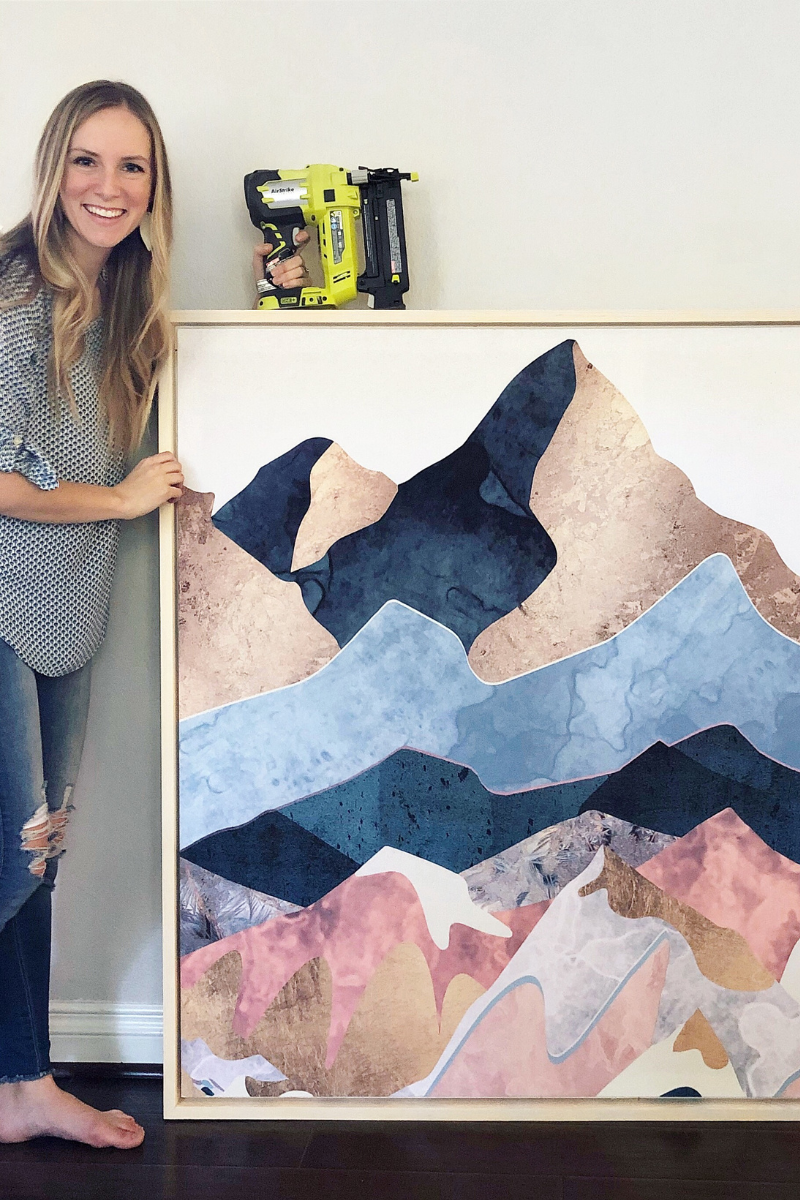
#2- DIY Stretched Frame
Did you know that you can create a really cool piece of art with a shower curtain? I know we are talking about frames in this post, but for this stretched frame DIY, the art and frame go hand in hand.
To start, we need to build an inner frame for us to stretch our art around. For my stretched frame I used 1×2 finger joint pine boards cut to size. You can use any type of wood you want, just cut it to the size you want your art to be. Once the pieces are cut, all you need to do is screw the boards together. If you feel like leveling up your DIY, try using a Kreg jig to create pocket holes for your screws to fit into. The holes will keep everything smooth and flush.
PRO-TIP: If you cut the top and bottom boards to the correct width first, you can subtract 3 inches from your desired height to figure out the cuts for your sideboards. The math works out because the width of the top and bottom boards are 1.5 inches wide each.
Add the Art to the Frame
Now it’s time to attach your fabric. Before I attached my shower curtain, I attached a liner (an old sheet) just to make it so the fabric wasn’t seethrough. When you lay everything out, make sure your print is face down, with the frame on top so you don’t accidentally staple it backward! Pull tight and staple the fabric around the frame. I like starting in the middle of the top board first to hold everything in place. Then continue stapling along the top board to finish. Once your top board is secure, you can move on to stapling the middle bottom and eventually finish with the sides. You can stop here, or…
You can add a thin frame on the outside of the art. This is what I decided to do, but it is totally optional. To create my outer frame, I used a thin lattice board around 1/4 inch by 1 inch from Home Depot. Cut boards beginning with the top and bottom. Then attach the boards with a brad nailer and 1-inch nails. Just be sure to measure a tester board first to make sure you cut it to the right length. Once the outer frame is on, the artwork really pops.
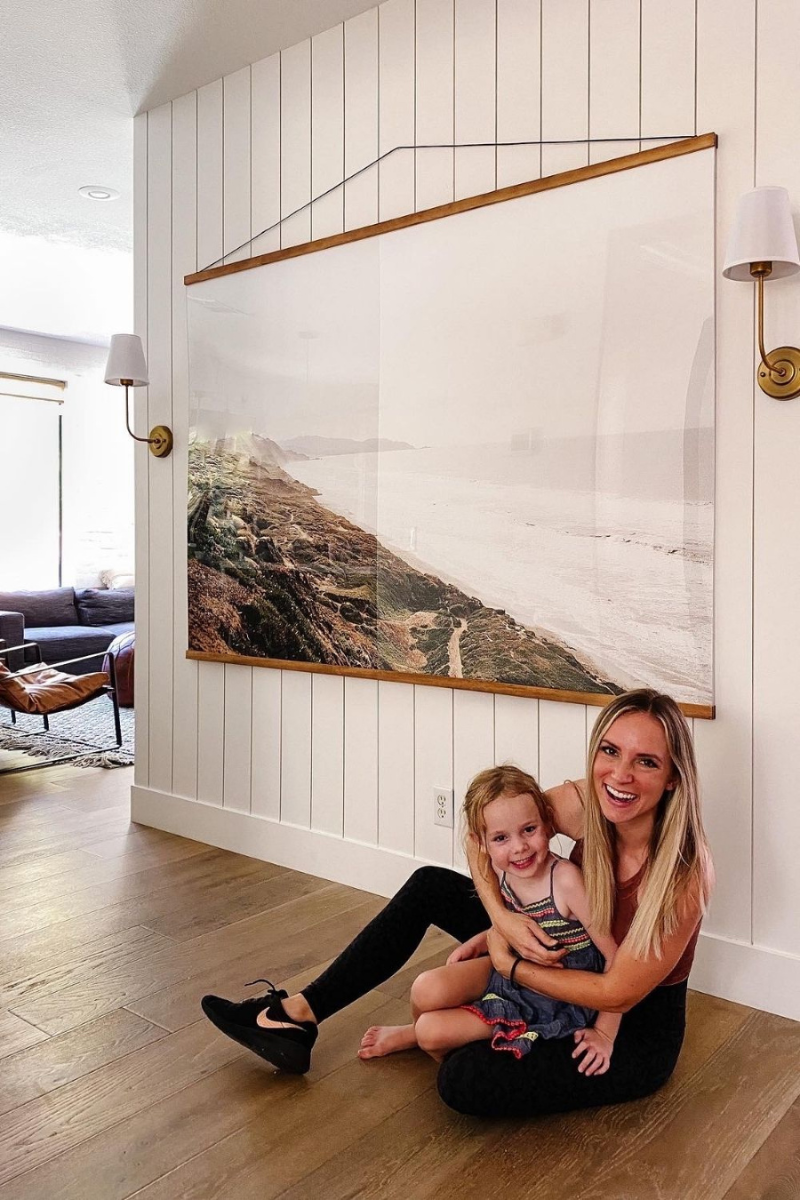
#3-Plexiglass Mounted Frame
If you are looking for an easy way to give your space an updated modern vibe with a large print, you should DIY a plexiglass mount. When I was updating my downstairs hallway, I really wanted to hang a gorgeous print I got from @juniperprintshop, but the print was 55” x 79” which made finding a frame impossible. Instead of paying a fortune for custom framing, I came up with this plexiglass solution that you can use in your home too!
First, grab some ½” x 1 ¼” trim pine boards from Home Depot. Measure out the length of your print, sand your boards, and then stain them. For my project, I used the stain color ‘special walnut’. Then I very carefully use a straight edge and an Exacto knife to trim the edges of your print so that everything lines up perfectly.
You are going to sandwich the print in between two pieces of clear plexiglass to protect it from little hands or whatever life might throw at it. But before we can do that we need to use a countersink drill bit to make a few holes on the top and bottom edges of the plexiglass. Each hole should be a foot or so apart from the next. Once the holes are drilled you can peel off the film. When I was removing the film it was really sticky so I used a pole to roll it off.
DIY INSIDER INFO-The nice thing about a countersink drill bit is it leaves a little extra space at the top so when you add the screw, it lays flush.
Assembly Time
With the film off, it is time to very carefully place the print between the two pieces of plexiglass. This part takes a lot of patience and breathing. When I was at this step, I had a few extra hands help me, but even then it was still frustrating trying to keep all the wrinkles out. Once everything is smoothed out, all that is left is to hang your art.
I started by nailing the top piece of the print’s trim to the wall. Then, we slowly carried in the plexiglassed art and I drilled the screws into the holes I previously made. You will want to repeat these same steps, for both the top and bottom parts of the frame and trim. You will also have two more pieces of trim to put on top. These can’t be nailed to the plexiglass, so instead, I just used some double-sided tape to stick each piece on. By attaching the art directly to the wall, I don’t have to worry about it getting knocked off the wall or having it be crooked when people walk by.
For that final touch, grab some leather string. Put a nail above each side of the frame and one a little higher in the center. Then attach the leather string to the nails to make the print look like it was hanging. I love the plexiglass-mounted frame in my hallway because it finished everything off. I know you will love yours too!
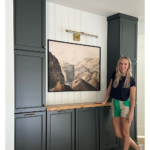
#4- Large DIY Glass-free Frame
When I was building my hallway cabinet storage I couldn’t find an affordable frame that I liked to show off the print I got from Jenny Komeda at @juniperprintshop. I wanted a large frame without a glare which is when my large glass-free DIY frame was born.
There are easy 3 steps when creating a glass-free frame.
1-Create a backing for your print
2-Mount your print
3-Trim out the print (AKA the frame)
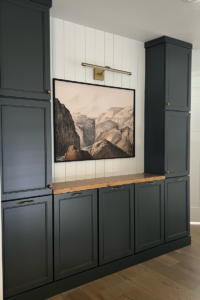
Create a backing for your print: When you have a print on the wall, you don’t want any texture to show through. So the first thing you need to do is create a backing for the print. To do this, cut a piece of smooth plywood to the same size as your print. I love using Eucaboard for projects like this because it has such a smooth texture. Once your board is cut to the right size, install it right onto your wall.
Mount your print: This list of frames is all about DIY projects that anyone can do and it doesn’t get much easier than double-sided tape. To mount your artwork, apply your sticky double-sided tape to the back of your print. Then, attach your print to the backing that you nailed to the wall. Once the print is up, smooth it out starting in the middle and out to the sides working from top to bottom. This will get rid of any bubbles and make sure your print keeps looking gorgeous. Check out a close-up of this technique here.
Trim out your frame: The last step in creating a glass-free frame is to frame out the print. I wanted the look of a thinner frame so I decided to use ½-inch trim pieces, but you can use whatever thickness you like the best. To cut your trim boards, use your miter saw to cut the trim to the length of your print. You will want to keep the top and bottom trim pieces longer so that the side pieces fit perfectly in between them. The best part about this frame is that there are no fancy cuts. It is simple and straightforward. The boards will meet up with each other and can be nailed into place once they have been painted or stained.
For a more detailed how-to check out this blog post. I haven’t been able to get over how great this glass-free frame turned out! It is the perfect solution if you are wanting to see the velvety finish of a print while also having a polished frame look.
BONUS-
I also wanted to mention my favorite Ikea frames as a bonus to my list of top DIY frames that anyone can do. Technically didn’t build the frames myself, but I did DIY the artwork in them for my loft makeover so I think it counts. Check out how I did it here. Plus, DIY can be as simple as finding something in the store, purchasing it, and adding it into your space.
Top 4 DIY Frames That Anyone Can Make
Which frame from my top 4 DIY frames that anyone can make are you going to try first? They are all so good I don’t even know where you are going to start. But when you do get it started, remember to tag me @angelarosehome on Instagram so I can see it! DIY is so much better when we stop pinning, start doing, and cheer each other on along the way. Remember to follow me on Instagram and TikTok for my latest DIY projects. I always have something going on.
Disclosure: I only recommend products I would use myself and all opinions expressed here are our own. This post may contain affiliate links that at no additional cost to you, I may earn a small commission. Read the full privacy policy here.